


Small clay decorative objects are a beautiful way to decorate your home without spending too much money. From tiny vases and cute mushroom decorations to modern clay arches, these handmade pieces can make ordinary shelves, desks, and nightstands feel more personal and inviting.
You don’t even need a wheel or kiln to get started! Using air dry clay, a few basic tools and some imagination you can create beautiful pieces of décor.
Here are 10 mini clay décor ideas to try out. Whether you love a minimalist look, cosy cottage feel or just enjoy lots of hand made pieces.
If you love making tiny handmade decorations, explore these 10 Miniature Clay Birds That Are Tiny and Adorable for more cute and creative clay craft ideas.
What You Need to Make Small Clay Decorations
Before choosing your first project, gather a few simple supplies. Most small clay decorations require only basic materials, making them a convenient choice for beginners.
- Air-dry clay: White or terracotta-colored clay works well for decorative projects.
- Rolling pin: Helps flatten clay into smooth, even slabs.
- Clay shaping tools: Useful for cutting, carving, and adding details.
- Water and a soft sponge: Help smooth small imperfections while shaping.
- Acrylic paints: Allow you to customize your decorations with different colors.
- Small paintbrushes: Ideal for delicate patterns and finishing touches.
- Fine-grit sandpaper: Can smooth rough edges after the clay has dried, if the manufacturer permits sanding.
- Clear varnish: Optional for protecting painted surfaces and creating a matte or satin finish.
Air-dry clay is especially convenient because it hardens without kiln firing. However, drying times vary depending on the clay brand, thickness, and room conditions.
For a natural look, leave your decorations in their original clay color. Alternatively, use soft neutrals, earthy shades, or cheerful pastels to complement your home.
If you enjoy making tiny clay creations, explore 10 Miniature Clay Dollhouse Accessories to Make Yourself for more fun DIY ideas to decorate your miniature home.
10 Small Clay Decorative Objects to Try
1. Mini Clay Bud Vases: Beautiful Small Clay Decorative Objects
These mini clay flower buds are a lovely addition to any dried flower or thin branch decoration. They are a great size for adding to shelves, side tables and slim windowsills.
Whether you make one simple bud vase or a set of matching vases of varying heights, the soft cream, warm beige and dull terracotta shades all work really well in modern and rustic homes.
How to make it: Shape a small clay cylinder, create a shallow opening for dried stems, and gently smooth the surface with damp fingers. Keep the base wide enough to prevent tipping. Allow it to dry completely before painting.
For fresh flowers, use a separate watertight insert inside a sufficiently large decorative vessel rather than pouring water directly into air-dry clay.
Styling tip: Display three mini vases at slightly different heights on a wooden tray for a simple, balanced arrangement.
If you enjoy making mini crafts, explore these 15 Tiny Clay Keychains That Are Cute and Easy to Make for more adorable DIY inspiration.

2. Abstract Clay Arch Sculptures: Modern Small Clay Decorative Objects
Abstract clay arch sculptures are ideal for anyone who loves clean lines, organic curves, and contemporary home decor.
These little pieces look like miniature gallery sculptures, yet their shapes are surprisingly easy to create. You can make a simple arch, a curved loop, or an asymmetrical form that feels more artistic.
How to make it: Roll clay into a thick, even coil and bend it into a gentle arch. Flatten the ends to create stable contact points, then support the shape while it dries.
For a beginner project, try keeping the arch around 3–4 inches tall and avoid making the curved sections too thin.
Styling tip: Place a matte ivory arch beside stacked books or a small wooden box. The combination of curved clay and straight edges creates visual interest.
If you’re looking for cute and easy animal crafts, explore these 15 Tiny Clay Animal Ideas for Beginners to create adorable miniature animals for keychains, gifts, and decorations.

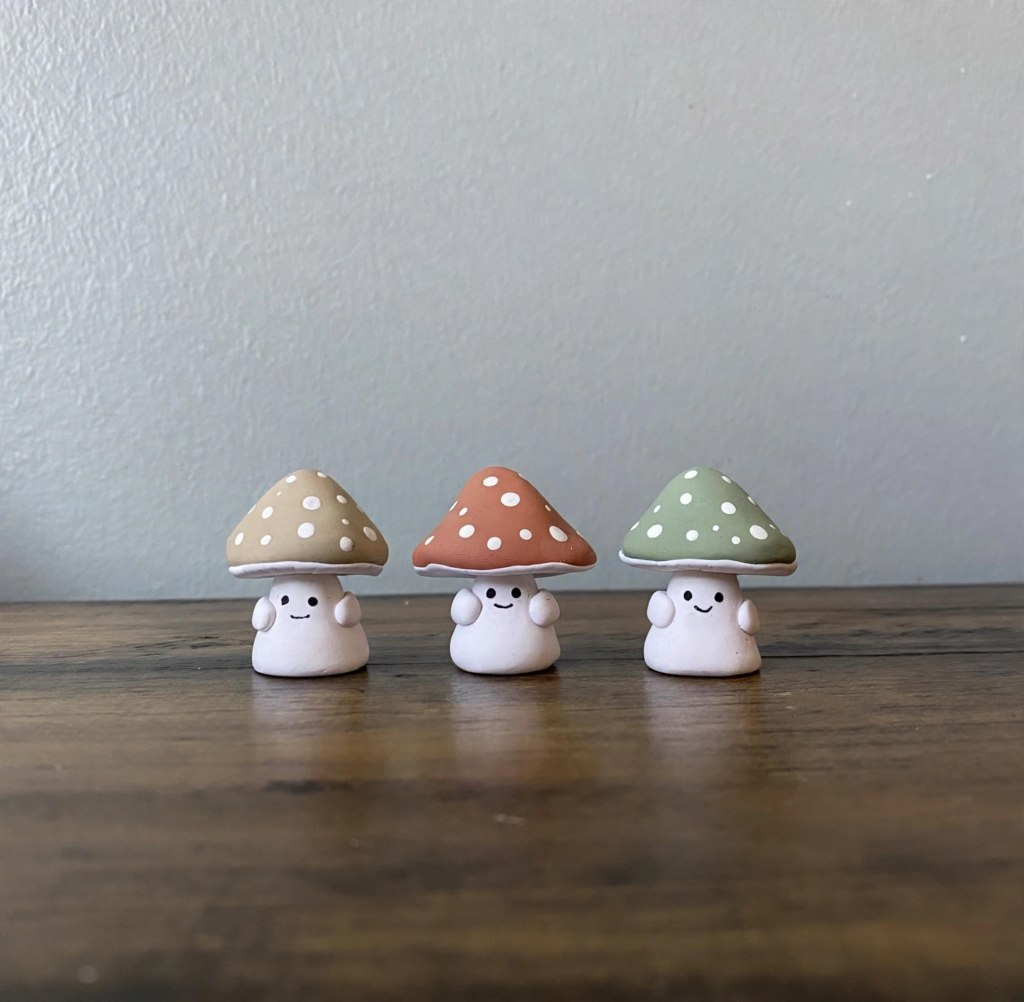
3. Tiny Clay Mushroom Decorations: Cute Small Clay Decorative Objects
These cute little mushroom planters are great for giving those little corners of your home a touch of nature! They’re perfect for cottage core bedrooms, reading nooks and natural display shelves.
Make round caps, slightly irregular stems and some squishy painted parts. Three is more fun than one of the same!
How to make it: Roll a short cylinder for the stem and flatten its bottom. Shape a separate rounded cap, then attach it securely using the joining method recommended for your clay.
Once dry, paint the caps in warm red, soft brown, or creamy white. Add tiny dots if you want a whimsical finish.
Styling tip: Arrange the mushrooms beside a miniature faux plant or a small stack of vintage-style books.
4. Mini Clay Trinket Bowls: Elegant Small Clay Decorative Objects
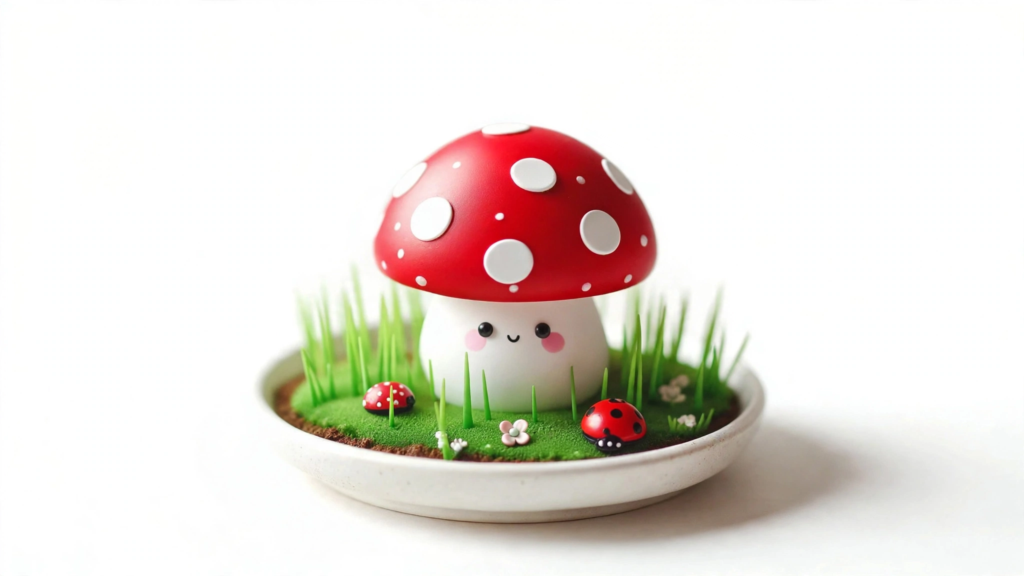
Mini clay trinket bowls combine decorative appeal with everyday usefulness. They’re perfect for holding rings, earrings, hair clips, or other lightweight items.
Unlike larger bowls, these tiny versions take up very little room, making them especially useful on crowded dressers and bedside tables.
How to make it: Roll a small ball of clay and press your thumb into the center. Slowly pinch the sides outward while rotating the piece to create a shallow bowl.
Keep the bottom relatively flat so the finished bowl sits securely. For extra personality, shape the rim into gentle waves or scallops.
Styling tip: Choose a soft blush or cream finish and display the bowl beside a perfume bottle or a small framed photo.
Use these bowls for dry, non-food items rather than snacks or liquids.
If your kids enjoy hands-on crafting, explore [15 Fun Air-Dry Clay Toys for Kids to Make at Home] for more creative and beginner-friendly projects to try together.

5.Stacked Clay Pebble Sculptures: Minimalist Small Clay Decorative Objects
Stacked clay pebble sculptures are a wonderful option for minimalist or nature-inspired homes.
Their smooth, rounded shapes resemble river stones and create a calm, sculptural accent without adding visual clutter.
You can make them in warm gray, sandy beige, charcoal, or soft white. Slight variations in shape make the arrangement look more natural.
How to make it: Shape small pieces of clay into flattened ovals. Create stable, flat contact areas and let each piece dry fully.
For a permanent sculpture, bond the dried pieces with an adhesive suitable for your clay, following the adhesive’s instructions. Keep the stack low and stable.
Styling tip: Display the sculpture on a side table beside a small book or a textured ceramic-style vase.

6. Small Clay Decorative Houses
Small clay decorative houses add a cozy, storybook feeling to your home. They look particularly charming in entryways, bedrooms, and seasonal shelf arrangements.
You can keep the houses simple with clean geometric shapes or add tiny doors, windows, and textured roofs.
For a Scandinavian-inspired look, use white, beige, and warm gray. Alternatively, try terracotta and dusty pink for a softer, more playful display.
How to make it: Shape a compact rectangular body and add a triangular roof. Gently mark the windows and doors using a blunt shaping tool.
Avoid deep cuts that weaken the walls. Let the house dry thoroughly before painting small architectural details.
Styling tip: Create a miniature village with three houses in different sizes and place them along a narrow shelf.

7.Clay Leaf Impression Ornaments: Nature-Inspired Small Clay Decorative Objects
Clay leaf impression ornaments are an easy way to bring nature-inspired texture into your decor.
Instead of sculpting complicated shapes, you can use real leaves to create beautiful patterns directly on the clay.
The delicate veins and organic outlines make each ornament feel unique, especially when finished in muted earthy colors.
How to make it: Roll clay into a small, even slab. Place a clean leaf on the surface and gently press it down with a rolling pin.
Carefully lift the leaf to reveal the impression, then trim the clay into an oval, circle, or organic shape.
If you want to hang the ornament, create a hole before drying.
Styling tip: Display several leaf ornaments in a shallow wooden tray or hang one from a small decorative branch.
If you enjoy crafting with clay, explore these 12 Handmade Clay Jewelry Ideas to Try for creative inspiration, from colorful earrings to beautiful handmade pendants.

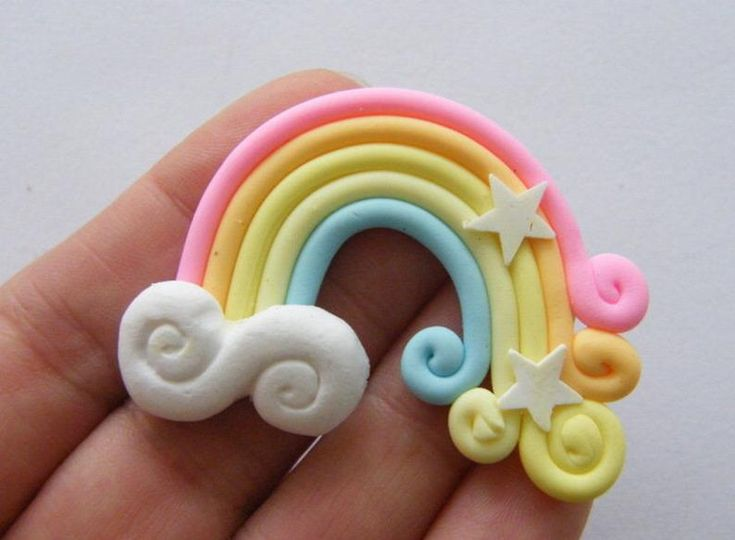
8. Mini Clay Rainbow Decorations
Mini clay rainbows are a cheerful addition to bedrooms, creative spaces, and playful home decor arrangements.
Although colorful rainbows are popular, you can also create a sophisticated version using muted terracotta, beige, dusty rose, and cream.
The curved shape looks especially attractive beside straight-edged books and framed artwork.
How to make it: Roll several thin clay coils and arrange them into nested rainbow curves.
Gently press the coils together, following the clay manufacturer’s joining guidance. Flatten the bottom edges so the rainbow can stand securely.
Allow the piece to dry while properly supported.
Styling tip: Place a neutral-colored rainbow on a floating shelf beside a small basket or decorative wooden accent.
9. Tiny Clay Star and Moon Ornaments
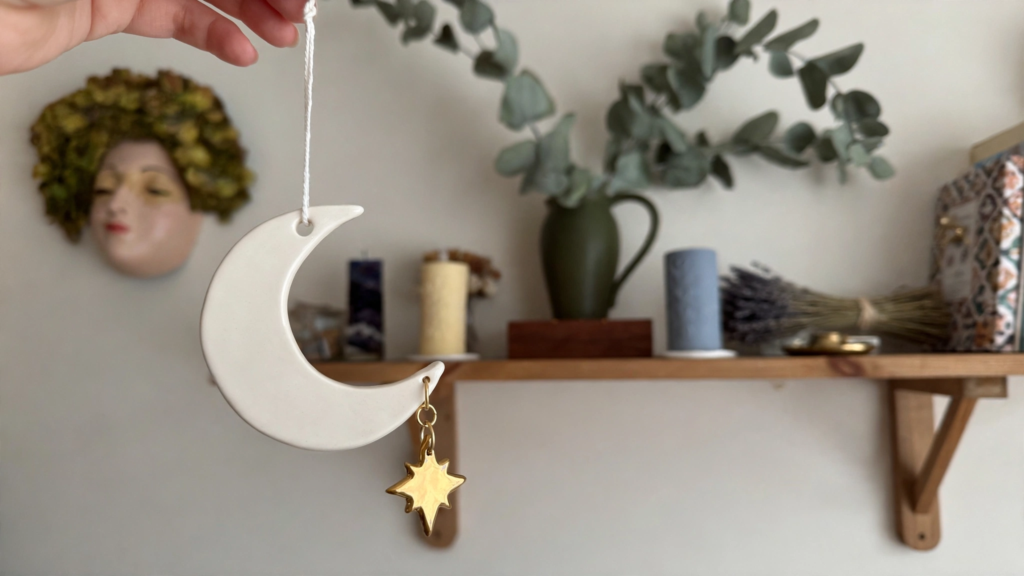
Tiny clay stars and moons are perfect for creating soft, dreamy decorative accents.
These celestial shapes work beautifully in bedrooms, reading nooks, and seasonal displays. You can make them minimal with plain white clay or add a little metallic paint for a subtle shimmer.
How to make it: Roll a thin, even clay slab and cut out small stars and crescent moons using templates or cookie cutters reserved for crafting.
Smooth the edges and make a small hanging hole before drying. Once fully hardened, paint the ornaments and attach a thin ribbon or string.
Styling tip: Hang several stars and moons from a decorative branch or arrange them in a small dish on a dresser.
For more helpful tips on working with clay, check out Crayola’s air-dry clay sealing guide before finishing your handmade decorations.
10. Mini Clay Botanical Sculptures
Mini clay botanical sculptures are a beautiful way to add handmade floral details without using real plants.
You can create tiny flowers, simple leaves, or abstract stems that resemble miniature works of art.
For a modern finish, choose a limited color palette such as ivory, sage green, and muted terracotta.
How to make it: Start with a small, stable clay base. Shape short, sturdy stems and simple leaf or flower forms, then attach them carefully.
Keep the design compact so delicate parts are less likely to bend or break. Support projecting elements while the clay dries.
Styling tip: Place a miniature botanical sculpture beside a framed print or a small decorative book stack.

How to Make Your Clay Decorations Look Beautiful
Even simple clay projects can look polished when you pay attention to their shapes, finishes, and placement.
Choose a Coordinated Color Palette
Try limiting each decorative collection to two or three complementary colors.
Warm white, beige, and terracotta create an earthy look, while sage green, cream, and dusty pink feel softer and more romantic.
For modern interiors, matte black and ivory can create a striking contrast.
Mix Different Shapes and Heights
A small arch sculpture looks more interesting beside a rounded bowl or a tall mini vase.
Instead of lining up identical objects, combine pieces with different silhouettes and heights.
Leave a little open space around each arrangement so the details remain visible.
Use Texture Carefully
You don’t need complicated sculpting tools to create interesting surfaces.
Try pressing lace, leaves, textured fabric, or a clean sponge into soft clay. A little texture can make a plain piece feel more intentional.
However, avoid covering every object in heavy patterns. Sometimes a smooth matte finish is the most attractive choice.
Finish Your Pieces Properly
Allow the clay to dry completely according to its packaging instructions before painting.
Smooth any rough edges carefully, then apply acrylic paint in thin layers. If your product allows it, finish with a compatible clear varnish.
Remember that sealing ordinary air-dry clay does not necessarily make it waterproof. Keep decorative pieces away from standing water and excessive moisture.

Common Mistakes to Avoid When Making Small Clay Decor
A few small mistakes can affect how your finished decorations look and last.
Making delicate parts too thin: Very thin arches, stems, and edges are easier to damage. Choose slightly thicker shapes for your first projects.
Using too much water: Excess moisture can make the surface messy and harder to control. Use just enough water to smooth the clay.
Rushing the drying process: Let the pieces dry according to the manufacturer’s instructions rather than using excessive heat.
Painting before the clay is dry: Moisture trapped beneath paint or varnish can affect the finish.
Ignoring stability: Decorative houses, arches, and pebble sculptures should have flat, balanced bases.
Using decorative clay as functional pottery: Ordinary air-dry clay is not a substitute for food-safe, kiln-fired ceramics. Keep these projects for dry decorative use.
Final Thoughts
Making small clay decorative objects is a simple way to personalize your home with something handmade.
Whether you choose a minimalist arch sculpture, a tiny mushroom, or a delicate botanical ornament, each project gives you room to experiment with colors, shapes, and textures.
Start with one easy design, take your time shaping it, and enjoy the process. A small handmade decoration can become a charming detail that makes your space feel more personal.
Frequently Asked Questions
Ten things you can make with clay include miniature vases, decorative bowls, mushroom figurines, abstract sculptures, small houses, leaf ornaments, rainbows, stars, moons, and botanical decorations. These projects can be adapted for home decor using air-dry clay.
Examples of small clay objects include mini flower vases, trinket dishes, tiny sculptures, decorative ornaments, miniature houses, and handmade shelf accents. Many can be created with basic hand-building techniques.
Clay can be used to create pottery, sculptures, decorative tiles, planters, ornaments, jewelry, figurines, architectural bricks, wall art, and household accessories. Different uses require different clay types and finishing methods.
Mini clay art ideas include tiny mushrooms, miniature flowers, abstract arches, little houses, celestial ornaments, textured leaves, and geometric sculptures. You can customize them with paint and surface textures.
Air-dry clay is a convenient choice for beginners making indoor decorations because it doesn’t require a kiln. Polymer clay is another option for small, detailed pieces, but it must be cured according to its manufacturer’s instructions.
Drying time depends on the brand, thickness, temperature, and humidity. Some small pieces may dry within a day or two, while thicker pieces need longer. Follow the product instructions and make sure the piece is completely dry before painting or sealing.
Yes. Many air-dry clay products can be painted with acrylic paints after drying. Test the finish on a small area and follow the clay manufacturer’s recommendations.