


Tiny clay keychains are a great way to put a little personality into a small keychain. You can make tons of different designs using colorful clays. The keychains can be made in fun shapes, happy pastel colors, miniature desserts, or even personalized gifts.
Most projects are easy to make and only require a basic knowledge of sculpting. Whether you work with polymer or air-dry clay, these 15 tiny clay keychain ideas will inspire your next project!
If you’re looking for cute and easy animal crafts, explore these 15 Tiny Clay Animal Ideas for Beginners to create adorable miniature animals for keychains, gifts, and decorations.

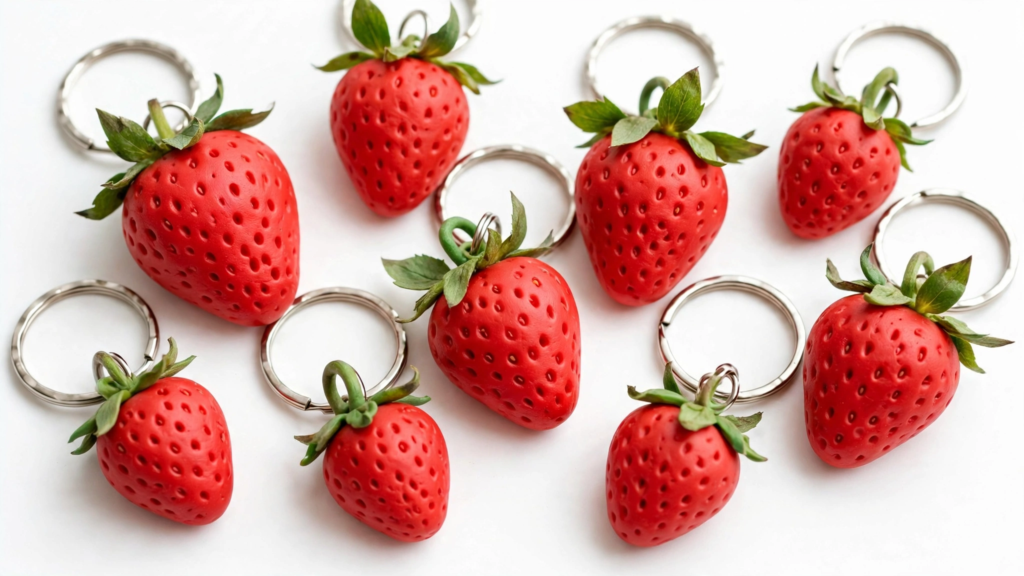
1. Mini Strawberry Clay Keychains
Strawberries are charming little things, made recognizable by a bright red color and a leafy green top. Shape a small berry, taper the end a bit, and add some tiny seed-like bits with a sculpting tool or toothpick. Then, add a couple of green leaves to the top.
Tiny detail tip: Keep the seeds shallow and the leaves short so they don’t catch easily on bags or clothing. Make a few strawberries in slightly different shapes for a handmade look.
If your kids enjoy hands-on crafting, explore [15 Fun Air-Dry Clay Toys for Kids to Make at Home] for more creative and beginner-friendly projects to try together.
2. Tiny Mushroom Clay Keychains
Create a miniature woodland charm by shaping a rounded mushroom cap and a short, sturdy stem. Try a red cap with white spots, or choose earthy shades such as rust, cream, and brown for a more natural style.
Tiny detail tip: Press the spots into the cap or use small pieces of contrasting clay rather than adding tall, delicate decorations. Pair a mushroom with a tiny leaf for a coordinated design.
If you enjoy crafting with clay, explore these 12 Handmade Clay Jewelry Ideas to Try for creative inspiration, from colorful earrings to beautiful handmade pendants.

3. Mini Daisy Clay Keychains
Daisy keychains bring a cheerful floral touch to a small accessory. Shape a round center and surround it with short, rounded petals. White petals with a yellow center give the flower a classic look, while pink or lavender petals create a softer color palette.
Tiny detail tip: Make the petals slightly thick and press them firmly into the center. A compact flower is usually more practical for everyday use than one with long, thin petals.
If you enjoy making tiny creative projects, explore 12 Miniature Clay Food Crafts for Beginners for more fun and easy DIY inspiration.

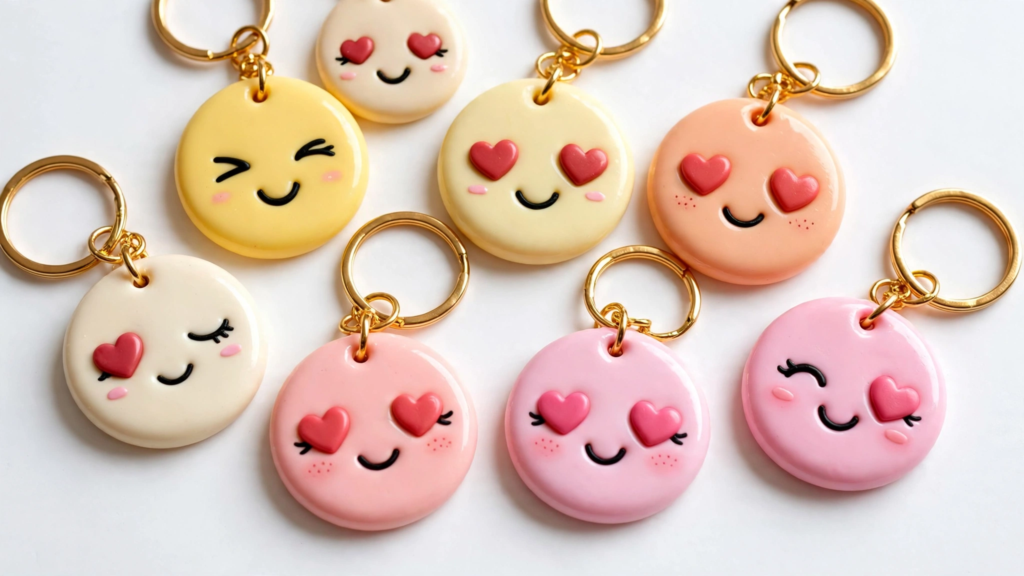
4. Tiny Smiley Face Clay Keychains
Smiley faces are among the simplest clay charms to make. Flatten a small ball into a circle, smooth the edges, and add two eyes and a curved smile. You can also make winking faces, sleepy expressions, or heart-shaped eyes.
Tiny detail tip: Keep the facial features bold and simple so they remain visible on a small surface. Try yellow, peach, cream, or pastel pink bases for different looks.
5. Mini Cat Face Keychains
A charm in the shape of a rounded head with ears at the top. Two small triangles on the sides for ears. Tiny eyes, a tiny nose, and a tiny mouth. Cream, orange, gray, and black are classic colors for a cat, but pastel shades might be nice, too.
Tiny detail tip: Blend the ears firmly into the head instead of leaving narrow connections. If you’re a beginner, use small clay dots for the eyes and nose rather than trying to sculpt detailed whiskers.

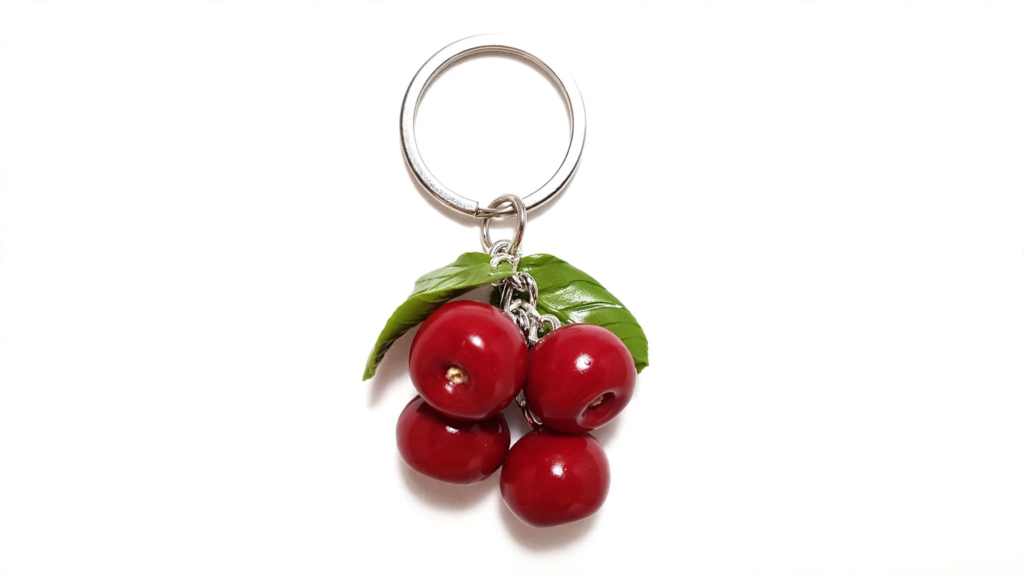
6. Tiny Cherry Keychains
Cherry charms are a wonderful choice for a miniature fruit collection. Form two small rounded cherries, put them close to each other, and add a short green stem. One little leaf can add a nice touch of color.
Tiny detail tip: Keep the stems short and thick enough to handle. For an easier version, make two cherries with shallow stem grooves instead of adding long, separate stems.
7. Mini Heart Keychains
Heart keychains work for birthdays, friendship gifts, Valentine’s Day, or everyday accessories. Shape a small heart by hand or use a cutter, then smooth the edges. Add a few dots, a small flower, or a contrasting heart on the surface.
Tiny detail tip: A rounded, slightly puffy heart is often easier to handle than a very thin cutout. Leave enough solid clay near the top for a secure attachment point.
You can also explore 15 DIY Clay Ring Holder Ideas for a Pretty Jewelry Display for creative ways to organize your rings and add a handmade touch to your vanity or dresser.

8. Tiny Cloud and Star Keychains
Create a dreamy charm by combining a puffy cloud with a small star. You can make a white cloud with a pastel star or choose a moon-and-star combination in cream and pale yellow.
Tiny detail tip: Press attached shapes together firmly and avoid narrow points. If you prefer a simpler project, make a single star or cloud instead of a dangling set.

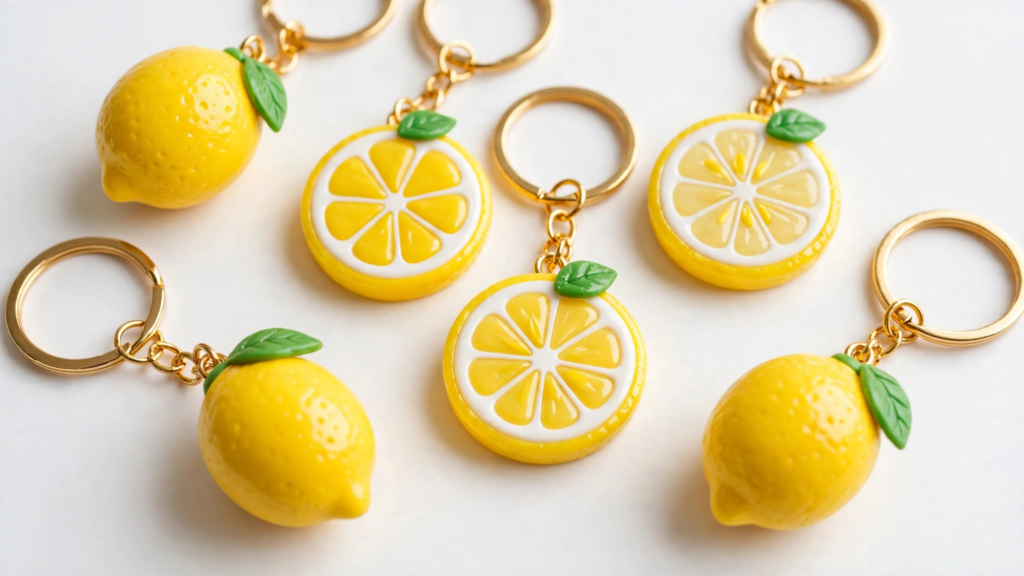
9. Mini Lemon Keychains
Tiny tip detail: keep the outline thick enough that it won’t bend or chip. It’s probably easiest if you start with an entire lemon (if you’re new to miniatures sculpting) and you can always add slices for the finer details later.
10. Tiny Bear Keychains
Bear charms make great gifts. They are easy to personalize. Simply shape a round head and attach two small ears. Add a simple muzzle and eyes. Make the charm using tan or brown clay or try using cream, pink, or lavender.
Tiny detail tip: Attach the ears securely and keep the facial details close to the surface. A simple bear face can be just as effective as a full miniature figure and is usually easier to make.
You can also explore 12 Air-Dry Clay Christmas Ornaments for a Handmade Holiday for more creative ideas to decorate your home with handmade holiday crafts.

11. Mini Bow Keychains
Tiny bows make a great accessory to a key ring, backpack, or purse. Two rounded loops are formed and connected with a small center knot. Bows can be made in red for a bright look, or in black or cream for a more classic appearance, or in pastel shades for a gentle effect.
Tiny detail tip: Make the loops broad rather than paper-thin. You can also add a small bow to a heart or initial charm to create a matching set.

12. Tiny Avocado Keychains
An avocado charm has a recognizable shape and plenty of room for a cute face. Form an oval body, add a lighter green center, and place a small brown circle in the middle to represent the pit. Add eyes and a smile if you want a character-style design.
Tiny detail tip: Press the layers together securely and keep the pit low-profile. The layered colors make this charm look detailed without requiring complicated sculpting.

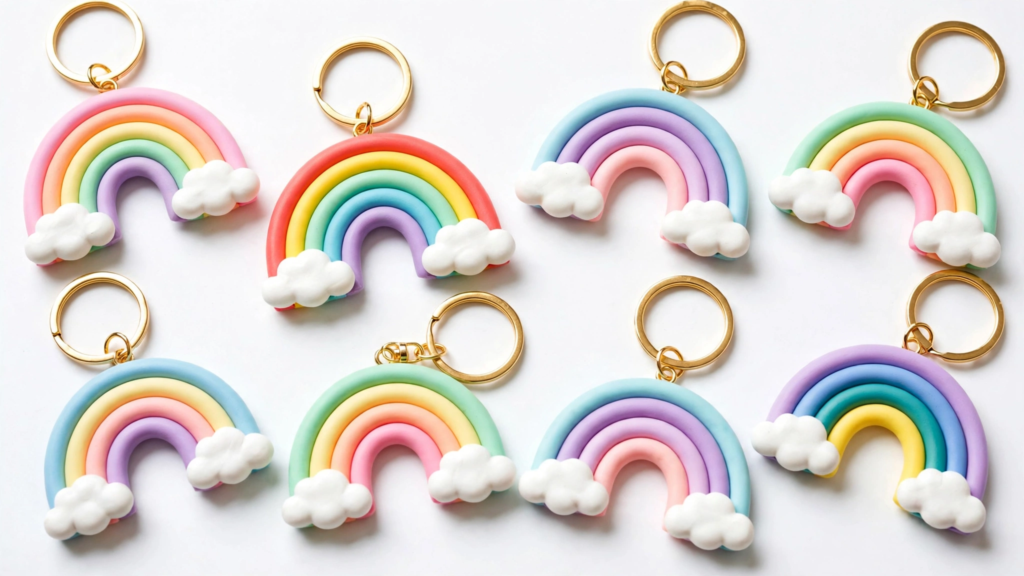
13. Mini Rainbow Keychains
Rainbow keychains are colorful and easy to customize. Roll short strips of clay in different colors, bend them into arches, and press the layers together. You can add small clouds at the ends or keep the rainbow simple.
Tiny detail tip: Use thick, even strips and avoid making the arches too tall or narrow. A compact rainbow is easier to handle and less likely to have fragile edges.
14. Tiny Flower Pot Keychains
Make a miniature plant charm with a small pot and a few leaves or flowers. Shape a simple tapered pot, then add short green leaves and a tiny flower at the top. Try a terracotta-colored pot with white daisies or a pastel pot with pink blossoms.
Tiny detail tip: Keep the stems short and press each leaf securely into the base. You can simplify the design further by making a single potted succulent with a few rounded leaves.

15. Personalized Initial Keychains
Initial keychains are simple to customize and make thoughtful gifts. Shape a small circle, oval, or heart, then stamp or add a single letter. Choose a contrasting color for the letter so it stands out clearly.
Tiny detail tip: Keep the letter large enough to read at a glance. If you add a hole before curing or drying, leave sufficient space around it so the charm doesn’t split near the edge.
“Before making your charms, check out this helpful polymer clay keychain tutorial for tips on shaping, baking, and attaching keychain hardware.”

What Clay Works Best for Tiny Keychains?
Both polymer clay and air-dry clay can be used for miniature keychains, but they require different handling.
- Polymer clay: This clay is cured in an oven according to the specific product’s instructions. It is useful for small sculpted details and colorful charms.
- Air-dry clay: This clay hardens as it dries, without oven curing. Drying time depends on the product and the thickness of the piece. Follow the manufacturer’s instructions before painting, sealing, or attaching hardware.
Choose your clay based on the design, the tools you have, and the finish you want. Do not use polymer-clay baking temperatures or times for air-dry clay, and never assume all polymer clay brands use identical curing instructions.
How to Attach Keychain Hardware
A cute charm also needs a secure connection. The best attachment method depends on the clay type and the shape of the design.
- Plan the attachment point: Leave a solid area at the top of the charm rather than placing a hole too close to an edge.
- For polymer clay: Follow your clay manufacturer’s instructions for embedding a suitable eye pin or making a hole before curing. Let the piece cool completely before assembling it.
- For air-dry clay: Make a hole or attachment opening using a method suitable for the clay while shaping it, then let the piece dry fully. Follow the product’s instructions for attaching hardware.
- Assemble the keychain: Use compatible jump rings, a split ring, or a lobster clasp. Jewelry pliers can help you open and close jump rings properly.
- Check the connection: Before using the keychain, gently check that the charm and hardware are secure.
For a design that will be handled frequently, avoid relying on a thin, fragile section of clay to support the entire key ring. If a charm is especially delicate or valuable, consider testing the attachment method before making several.
Tips for Making Tiny Clay Keychains Last
- Keep thin petals, stems, ears, and points short and sturdy.
- Smooth rough edges before the clay cures or dries, when appropriate for the material.
- Follow the exact curing or drying instructions for your chosen clay.
- Use paint and sealers that are compatible with the clay and follow their product labels.
- Avoid assuming that a glossy finish automatically makes a charm waterproof or impact-resistant.
- Keep finished keychains away from unnecessary bending, sharp impacts, and excessive weight.
- Test a new design and its hardware before making a larger batch.
Final Thoughts
Tiny clay keychains can be as simple as a smiley face or as detailed as a miniature flower pot. Start with an easy shape, practice adding small details, and experiment with colors until you find a style you enjoy.
Strawberries, mushrooms, daisies, hearts, and initial charms are good starting points because their shapes are recognizable without requiring complicated sculpting. Once you’re comfortable with the basics, combine designs into coordinated sets or personalize them for handmade gifts.
The key is to keep the details neat, the charm compact, and the attachment point sturdy enough for everyday use.
FAQ section
Shape your chosen design, create a secure attachment point, and cure or dry the clay according to the manufacturer’s instructions. Once the charm is fully set and cool or dry, attach the keychain ring with suitable hardware.
Popular miniature clay items include strawberries, mushrooms, flowers, tiny animals, food charms, clouds, stars, hearts, miniature plants, and personalized initials. Many can be adapted into keychains, bag charms, or zipper pulls.
Try tiny fruit, smiley faces, cat heads, mushrooms, bows, hearts, rainbows, or initial tags. Choose a simple silhouette if you’re a beginner and add small details as you gain experience.
Polymer clay is useful for detailed miniature designs and must be oven-cured according to its product instructions. Air-dry clay hardens without oven curing, but it needs sufficient drying time. The best choice depends on the design and how you plan to attach the hardware.
There is no universal size requirement. A compact design around 1–2 inches can be a practical starting point, but the ideal size depends on the shape, weight, and attachment method. Avoid making delicate details so small that they become fragile.
Avoid thin stems, narrow connections, and holes too close to the edge. Cure or dry the clay fully, choose suitable hardware, and test the attachment point before using the charm. A sealer cannot compensate for a weak design.
Not every clay product requires the same finish. Follow the clay and finishing-product instructions. If you paint or seal a charm, choose a compatible product and allow it to dry or cure as directed.
Yes. Smiley faces, hearts, mushrooms, and simple fruit shapes are approachable first projects. Start with one main shape and a few details rather than trying to sculpt a complicated miniature figure.