


Tiny clay animals are a fun way to start sculpting without complicated shapes or expensive tools. With a little clay, a toothpick, and a few favorite colors, you can make adorable miniature creatures such as frogs, cats, turtles, chicks, and snails.
The best tiny clay animal ideas for beginners use simple shapes, sturdy little bodies, and minimal details. Fortunately, you don’t need to sculpt realistic fur, feathers, or paws to make an animal recognizable. Instead, a round body, two tiny eyes, and one distinctive feature can be enough to create a cute and recognizable animal.
Whether you want cute desk decorations, handmade gifts, or a miniature animal collection, these 15 ideas offer an easy place to start.
If your kids enjoy hands-on crafting, explore [15 Fun Air-Dry Clay Toys for Kids to Make at Home] for more creative and beginner-friendly projects to try together.

Supplies You Need to Make Tiny Clay Animals
You can create most of these miniatures with a small selection of basic supplies.
- Clay: Choose air-dry clay for projects that harden at room temperature or polymer clay that cures in an oven according to its package directions.
- Toothpick: Use it to make eyes, smiles, shell patterns, and tiny texture marks.
- Acrylic paint: White clay can be painted after it has dried completely.
- Small paintbrush: A fine brush helps with eyes, noses, spots, and other details.
- Water and a sponge: These can help smooth compatible air-dry clay, depending on the manufacturer’s instructions.
- Clean work surface: A smooth, protected surface helps keep dust and fibers off your creations.
Colored clay is especially convenient for tiny projects because you can create the main body and small features without painting every part.
If you enjoy crafting with clay, explore these 12 Handmade Clay Jewelry Ideas to Try for creative inspiration, from colorful earrings to beautiful handmade pendants.
15 Tiny Clay Animal Ideas for Beginners
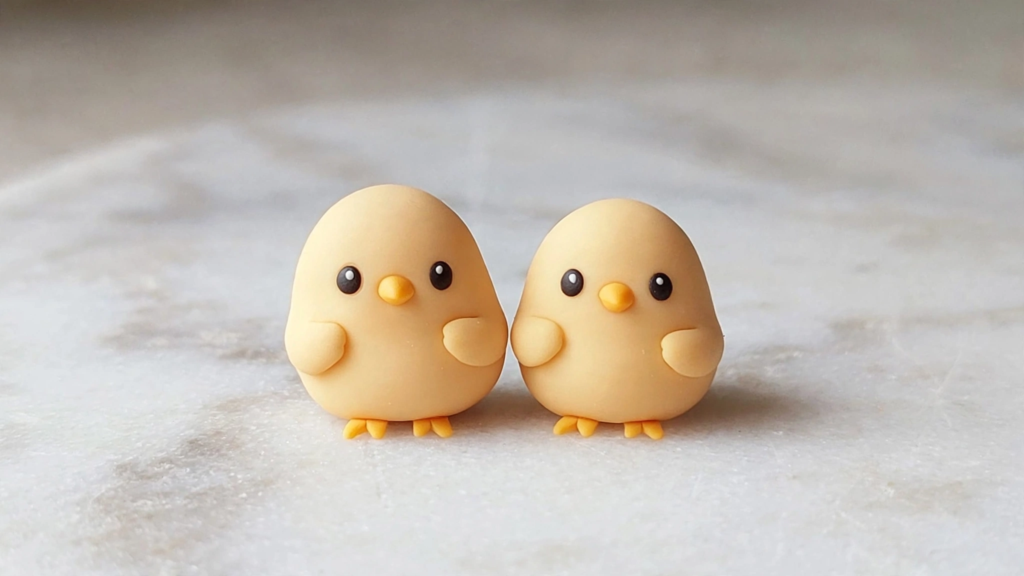
1. Tiny Clay Chick: An Easy Clay Animal Idea for Beginners
Difficulty: Very easy
A tiny chick is one of the simplest clay animals to make because its body is almost entirely round. Its bright color and little orange beak make it recognizable even without wings or complicated details.
What you’ll need: Yellow clay, a tiny amount of orange clay, and black clay or suitable paint for the eyes.
How to make it:
- Roll a small piece of yellow clay into a smooth ball.
- Gently flatten the bottom so the chick can stand without rolling.
- Shape a tiny orange triangle for the beak and press it onto the front.
- Add two small eyes above the beak.
- Pinch two tiny yellow wing shapes and attach them to the sides if desired.
Beginner tip: Keep the wings close to the body. Small, compact details are easier to attach and less likely to break.
If you enjoy making tiny creative projects, explore 12 Miniature Clay Food Crafts for Beginners for more fun and easy DIY inspiration.
2. Mini Clay Frog: One of the Cutest Tiny Clay Animals
Difficulty: Very easy
A miniature frog looks cute with a round green body, raised eyes, and short legs. Additionally, you can give it a cheerful expression without sculpting a separate mouth or complicated feet. This makes it a simple and fun project for beginners who want to create adorable tiny clay animals.
What you’ll need: Green clay, a little white or black clay for the eyes, and a toothpick.
How to make it:
- Roll green clay into a ball and flatten the bottom slightly.
- Make two smaller green balls for the raised eye bumps.
- Press the eye bumps onto the top front of the body.
- Add tiny black pupils to the eyes.
- Shape four short, flattened pieces of green clay for the feet.
- Use a toothpick to mark a small smile.
Beginner tip: Position the eyes close together near the front of the head. This creates a recognizable frog face with very few details.
You can also explore 15 DIY Clay Ring Holder Ideas for a Pretty Jewelry Display for creative ways to organize your rings and add a handmade touch to your vanity or dresser.

3.Chubby Clay Cat: A Cute Tiny Clay Animals Idea for Beginners
Difficulty: Easy
A chubby cat is ideal for beginners who want a recognizable animal without making separate legs. Its rounded body, pointed ears, and tiny face create the entire design.
What you’ll need: Gray, white, cream, or pastel clay, plus a little black and pink clay for facial details.
How to make it:
- Roll the main clay into a plump oval.
- Flatten the bottom so the cat sits securely.
- Shape two tiny triangles for the ears and attach them to the top.
- Add two dot eyes and a small nose.
- Press a few delicate whisker marks into the cheeks with a toothpick.
- Add a thin curved tail to one side if you want extra detail.
Beginner tip: Make the ears thick enough to handle comfortably. Extremely thin triangles can snap or lose their shape.
You can also explore 12 Air-Dry Clay Christmas Ornaments for a Handmade Holiday for more creative ideas to decorate your home with handmade holiday crafts.

4. Mini Clay Turtle: A Simple Tiny Clay Animals for Beginners
Difficulty: Easy
A tiny turtle is a great way to practice making one shape sit on top of another. Its domed shell provides a clear focal point, while the head and feet remain simple.
What you’ll need: Green and tan or brown clay, plus a toothpick for the shell pattern.
How to make it:
- Roll green clay into a short, rounded body.
- Add a small oval head at the front.
- Shape four short feet and attach them underneath.
- Roll tan or brown clay into a ball and flatten it into a rounded dome.
- Place the shell over the body, leaving the head and feet visible.
- Draw a few shallow lines on the shell to suggest separate sections.
Beginner tip: Keep the shell relatively low and the feet evenly spaced. This helps the miniature turtle sit flat rather than wobble.

5. Tiny Clay Snail: An Easy Tiny Clay Animals Idea for Beginners
Difficulty: Easy
A snail is one of the most forgiving miniature designs because its shell can hide an uneven body shape. A simple coil also gives it a distinctive appearance.
What you’ll need: Two contrasting clay colors and a toothpick.
How to make it:
- Roll one piece of clay into a short, thick body with a raised head.
- Roll another piece into a thin rope.
- Coil the rope into a small spiral to create the shell.
- Press the shell gently onto the back of the body.
- Add two short eye stalks if desired.
- Finish with tiny eyes and a curved smile.
Beginner tip: Make the shell compact rather than oversized. A very heavy shell can cause a soft body to lean or tip.

6. Tiny Clay Bunny: A Cute Tiny Clay Animals for Beginners
Difficulty: Easy
A miniature bunny can be made from a rounded body, a small head, and two recognizable ears. For a soft, charming look, use white, cream, or pale pink clay. You can also add tiny eyes and a small nose to make your bunny even more adorable without adding complicated details.
What you’ll need: White or cream clay, a little pink clay, and black clay or paint for the eyes.
How to make it:
- Shape the body into a small egg.
- Add a round head at the top front.
- Form two short, thick ears and attach them to the head.
- Add tiny pink inner-ear details if desired.
- Place two small eyes and a little nose on the face.
- Attach a small round tail to the back.
Beginner tip: If tall ears keep bending, make them shorter and thicker. You can also make a sitting bunny with ears resting against its head.

7. Pocket-Sized Clay Penguin
Difficulty: Easy
A penguin is recognizable by its egg-shaped body and contrasting belly. The simple color combination makes this project especially suitable for beginners.
What you’ll need: Black and white clay, plus small amounts of orange clay.
How to make it:
- Shape black clay into a rounded teardrop.
- Flatten the bottom slightly so the penguin can stand.
- Press a white oval onto the front as the belly.
- Add two small black flippers to the sides.
- Make a tiny orange triangle for the beak.
- Add two orange feet at the bottom and two small eyes above the beak.
Beginner tip: Keep the belly patch thin and smooth. A thick patch can make the front bulky and harder to balance.

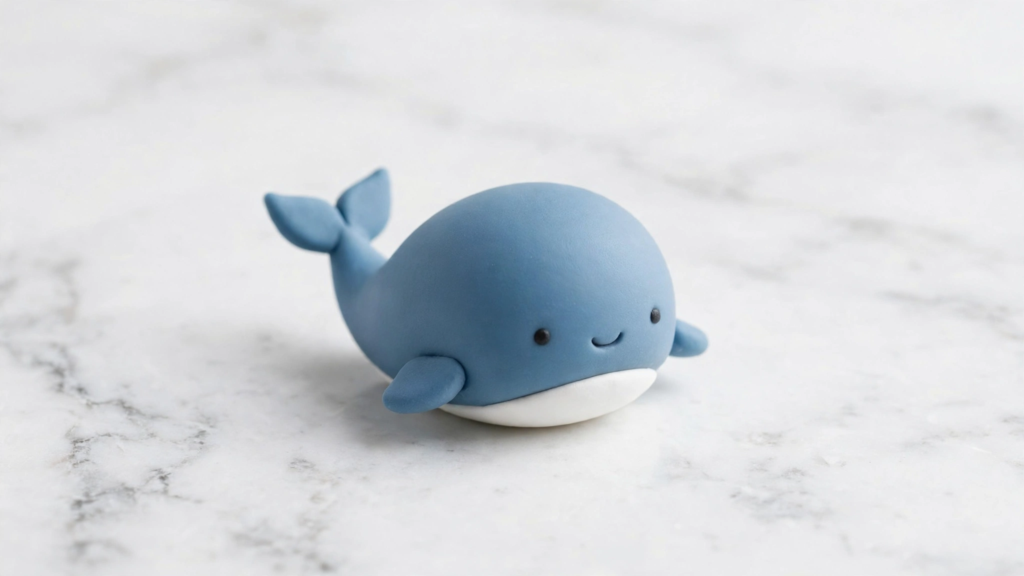
8. Tiny Clay Whale
Difficulty: Easy
A little whale uses a simple oval body with a tapered tail. Its smooth silhouette makes it a good choice for anyone who prefers clean shapes over lots of small parts.
What you’ll need: Blue or gray clay, white clay for the belly, and black clay or paint for the eyes.
How to make it:
- Roll blue clay into a plump oval.
- Gently narrow one end to form the tail area.
- Shape two small triangular tail flukes and attach them at the back.
- Add two tiny side fins.
- Press a small white oval onto the underside.
- Add dot eyes and a tiny smile.
Beginner tip: Keep the tail flukes short and sturdy. A delicate, narrow tail is more difficult to handle on a miniature figure.
9. Mini Clay Bear Cub
Difficulty: Easy
A tiny bear cub is a sweet choice for a miniature animal collection. Its rounded ears and small muzzle help distinguish it from a plain clay ball.
What you’ll need: Brown, tan, or cream clay and a small amount of black or dark brown clay.
How to make it:
- Form a rounded pear-shaped body.
- Add a smaller ball for the head.
- Press two tiny round ears onto the top of the head.
- Add a small oval muzzle to the front.
- Place two dot eyes and a tiny dark nose.
- Add short arms and legs if you want a seated bear.
Beginner tip: Keep the muzzle small and close to the center of the face. Too many raised details can make a tiny bear look crowded.

10. Tiny Clay Fox
Difficulty: Easy to moderate
A miniature fox is a good next step after making a cat or bear. Its pointed ears, orange body, and pale chest make it distinctive without requiring detailed sculpting.
What you’ll need: Orange, white, and black clay.
How to make it:
- Shape orange clay into a rounded body with a slightly pointed top.
- Add two small triangular ears.
- Press a small white patch onto the front of the body.
- Add two tiny eyes and a dark nose.
- Roll a short orange tail and attach it to the back.
- Finish the tail with a small white tip.
Beginner tip: If the fox keeps tipping backward, shorten the tail or curve it around the side so the animal has a more balanced shape.

11. Mini Clay Hedgehog
Difficulty: Easy
A tiny hedgehog lets you experiment with texture without sculpting individual strands of fur. Its rounded body and short, repeated marks create the impression of little spines.
What you’ll need: Tan or brown clay, a little dark brown clay, and a toothpick.
How to make it:
- Shape the body into a small teardrop.
- Round the front into a smooth face.
- Use a toothpick to make short, shallow marks across the back.
- Add tiny dark eyes and a nose.
- Roll a small ball of clay for the nose if you prefer a raised detail.
Beginner tip: Keep the face smooth and concentrate the texture on the back. The contrast makes the hedgehog recognizable without complicated details.
For more inspiration, explore this helpful guide to air-dry clay techniques and creative projects to learn how to shape and decorate your own miniature clay animals.

12. Tiny Clay Owl
Difficulty: Easy
An owl can be made with a single rounded body and two large eyes. Small wings and a triangular beak add enough detail to create a charming woodland miniature.
What you’ll need: Cream, gray, brown, or pastel clay, plus black and white clay for the eyes.
How to make it:
- Roll the clay into an oval and flatten the bottom.
- Make two small round eye discs and place them side by side.
- Add dark pupils, leaving a little space between the eyes.
- Shape a tiny triangle for the beak.
- Press two small wing shapes onto the sides.
- Use a toothpick to mark a few shallow feather lines on the body.
Beginner tip: Make the eyes slightly larger than realistic. Oversized eyes give a miniature owl a cute, cartoon-like appearance.

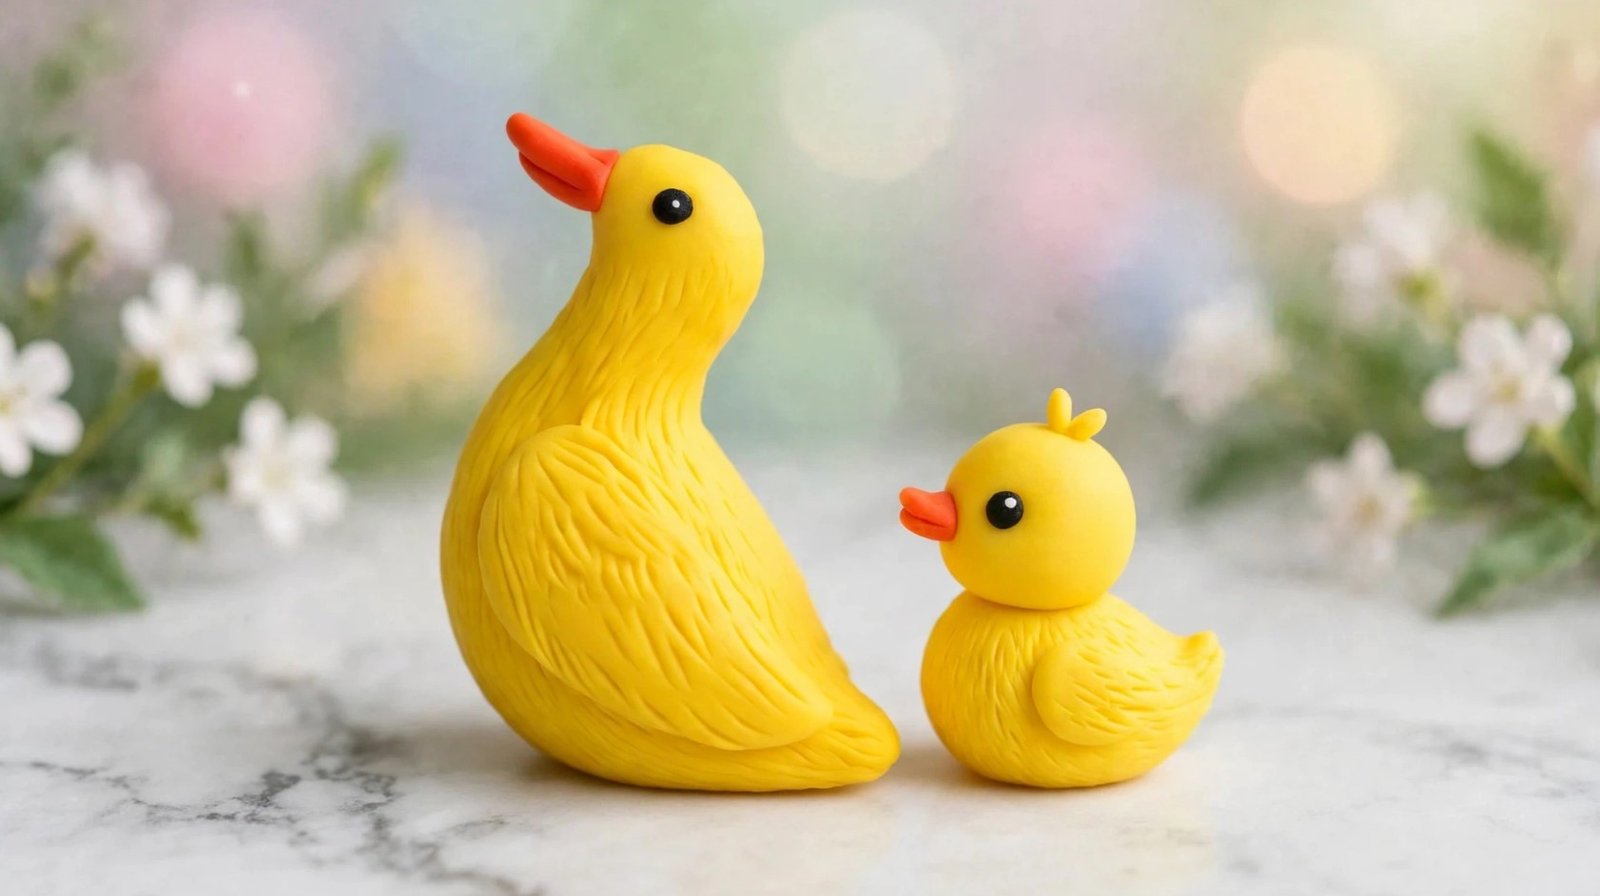
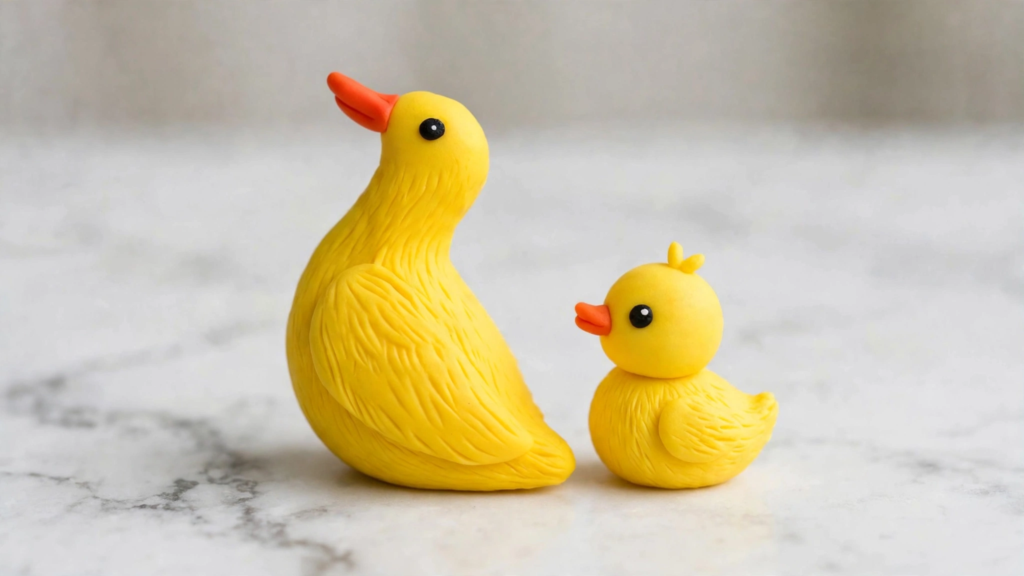
13. Mini Clay Duck
Difficulty: Easy
A tiny duck uses familiar basic shapes: a rounded body, a small beak, and two flat feet. It works well as a standalone figure or alongside a chick in a miniature farmyard collection.
What you’ll need: Yellow clay, orange clay, and black clay or paint for the eyes.
How to make it:
- Roll yellow clay into a plump oval.
- Narrow the front slightly to create a head-and-body shape.
- Add a small orange beak.
- Press two tiny wings onto the sides.
- Flatten two orange pieces into simple feet.
- Add dot eyes near the front of the head.
Beginner tip: A single connected body is easier to make than a separate head and neck. Try this version first before adding more complex shapes.
14. Tiny Clay Axolotl
Difficulty: Moderate
An axolotl is a playful choice for anyone who wants something a little different from traditional farm or woodland animals. Its wide head and small external gills create a recognizable silhouette.
What you’ll need: Pink or lavender clay, a little black clay, and a toothpick.
How to make it:
- Form a wide, rounded head.
- Add a short, compact body underneath.
- Shape four tiny legs and press them against the body.
- Make three short, thick gill branches on each side of the head.
- Add two small eyes and a curved smile.
- Use a contrasting pink shade for the gills if desired.
Beginner tip: Make the gills short and thick instead of thin and wispy. This keeps the design manageable at a miniature scale.

15. Tiny Clay Ladybug
Difficulty: Very easy
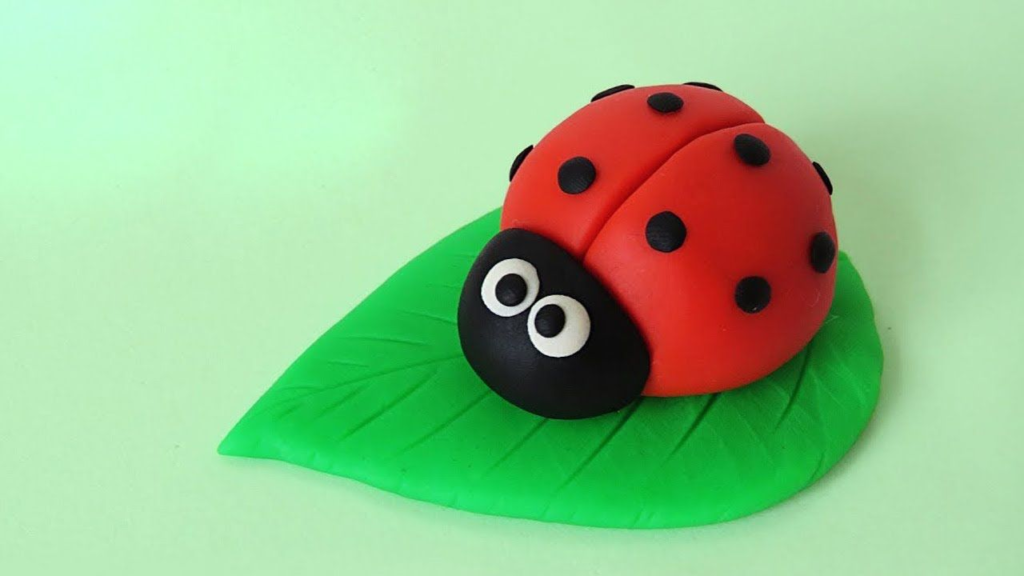
A ladybug is a great final project because it needs very little sculpting. Its rounded red shell and dark spots create a clear design even if you have never made a clay animal before.
What you’ll need: Red and black clay, plus a little white clay for the eyes if desired.
How to make it:
- Roll red clay into a small ball.
- Flatten the bottom and gently shape the top into a dome.
- Make a small black head and attach it to the front.
- Roll tiny black dots and press them onto the red shell.
- Add two little eyes.
- Use a toothpick to mark a line down the center of the shell if you want to suggest its wing covers.
Beginner tip: Make the spots slightly larger rather than trying to create many tiny ones. A few clear details look better than a crowded shell.
Tips for Making Tiny Clay Animals Successfully
Start With Simple Shapes
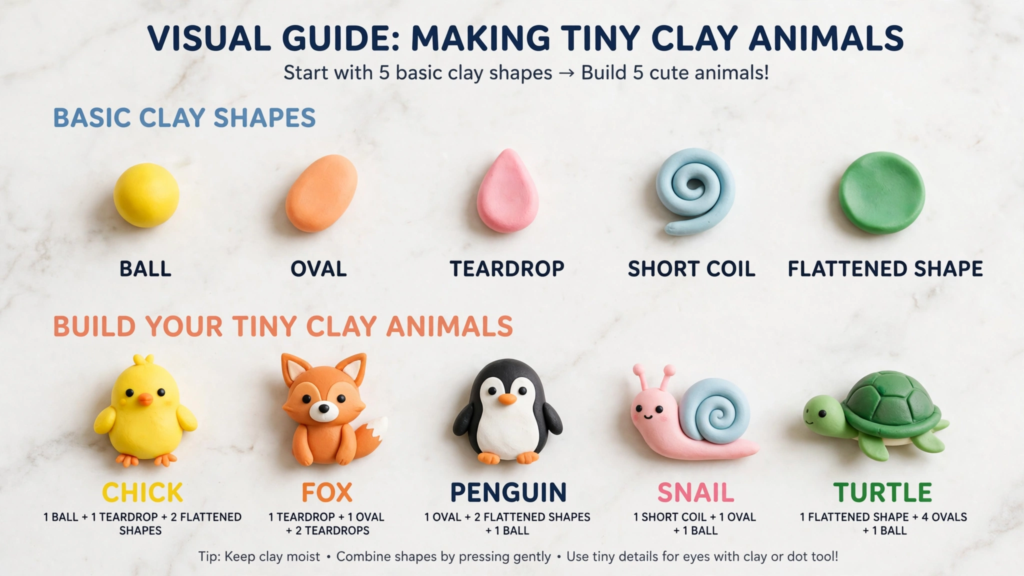
Most miniature animals can be built from a handful of basic forms:
- Balls: Heads, bodies, eyes, and tails.
- Ovals: Bodies, bellies, and shell bases.
- Teardrops: Chicks, foxes, penguins, and ears.
- Short coils: Tails, snail shells, and tentacles.
- Flattened shapes: Wings, feet, fins, and shell patches.
Start with one main body shape and add only the features that make the animal recognizable.
Attach Small Parts Carefully
Tiny ears, legs, and tails can detach if they are attached too lightly. For compatible clay, gently score the joining surfaces and use the manufacturer’s recommended bonding method. Air-dry clay may be joined with a little water or slip when appropriate; polymer clay generally uses different joining techniques.
Press pieces together gently, smooth the seam, and support delicate parts while shaping the rest of the figure.
Keep Your Animals Small but Sturdy
For a first project, aim for a miniature that fits comfortably between your fingers rather than one with extremely thin legs or long, unsupported features.
A compact body, flattened base, and short appendages are easier to shape and less likely to bend or break. If you want to make a larger or taller sculpture, consider whether it needs internal support.
Let the Clay Dry or Cure Correctly
Air-dry clay hardens through drying, while polymer clay requires oven curing according to the product’s instructions. These processes are not interchangeable.
For air-dry clay, avoid rushing the process with excessive heat. Let the figure dry in a suitable, ventilated area and follow the manufacturer’s guidance. For polymer clay, use the specified temperature and curing time rather than relying on a generic recipe.
Paint Only When the Figure Is Ready
If you’re using white air-dry clay, allow it to dry completely before painting. Apply thin coats of acrylic paint and let each coat dry before adding small details.
For polymer clay, check the product’s instructions before choosing paints, coatings, or finishes. A sealant is not always necessary, and not every varnish or resin is compatible with every clay.
Common Beginner Mistakes to Avoid
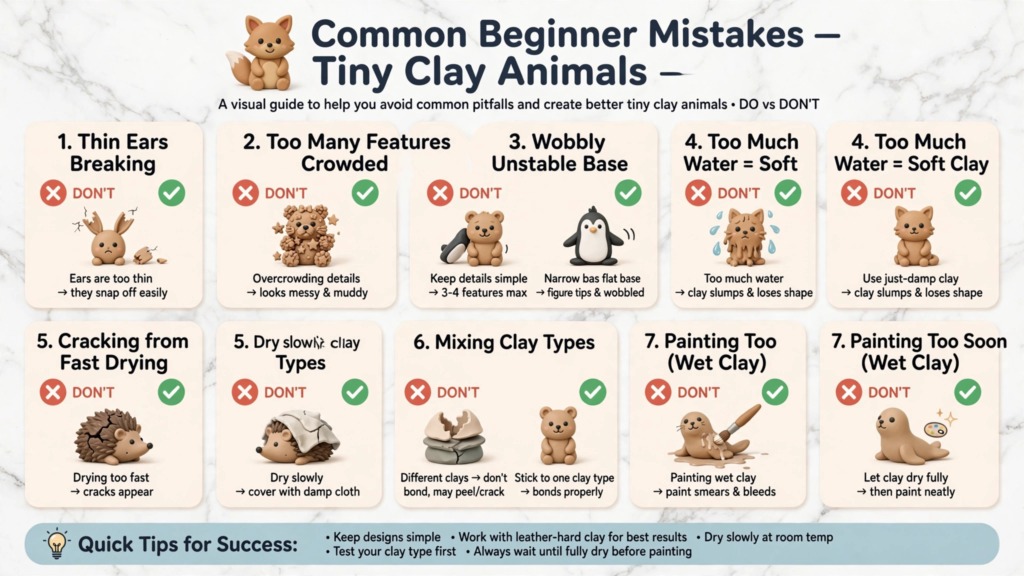
- Making details too thin: Tiny ears, tails, and legs are easier to break. Keep them short and sturdy.
- Adding too many features: A miniature animal can look cute with just a few defining details.
- Ignoring the base: Flatten the bottom of standing animals so they remain stable.
- Using too much water: Excess moisture can make some air-dry clays soft or difficult to shape.
- Rushing the drying process: Uneven or overly rapid drying can contribute to cracking.
- Mixing up clay types: Follow the instructions for your specific clay rather than treating air-dry clay and polymer clay the same way.
- Painting too soon: Paint can behave poorly on clay that is not fully dry or ready for finishing.
Final Thoughts
Making tiny clay animals is a rewarding way to practice sculpting without taking on a complicated project. Start with a chick, frog, ladybug, or duck if you want a simple first attempt. Once you’re comfortable with rounded bodies and small details, try a turtle, fox, owl, or axolotl.
The key is to keep the shapes simple, attach small parts carefully, and give your clay the time it needs to dry or cure. Each miniature can have its own colors and expression, so don’t worry about making every animal look exactly alike.
Choose one favorite animal, gather a few basic supplies, and make your first tiny clay creature today.
FAQ SECTION
A chick, ladybug, or frog is among the easiest clay animals for beginners. These designs use simple rounded shapes and only a few details, such as eyes, a beak, or spots.
Ten easy clay projects include a chick, frog, cat, bunny, turtle, snail, penguin, duck, bear, and ladybug. Start with animals that use one main body shape before trying figures with more attached parts.
Try chubby cats, tiny frogs, miniature turtles, little snails, baby penguins, clay chicks, bear cubs, foxes, hedgehogs, and ladybugs. Use contrasting colors and simple facial features to make each animal distinctive.
Beginner-friendly clay ideas include small animal figurines, simple flowers, miniature food, beads, trinket dishes, and decorative charms. If you are new to sculpting, start with compact shapes that do not require delicate or unsupported parts.
Both can work. Air-dry clay hardens without oven curing, while polymer clay needs to be cured according to its package instructions. Your choice depends on the desired finish, available equipment, and the specific project.
You can use your fingers for shaping and a toothpick for eyes, smiles, and simple textures. A clean, smooth work surface and a small paintbrush are helpful, but you do not need a complete sculpting-tool set for basic figures.
Use the clay according to its instructions, avoid unnecessary moisture, and let air-dry clay dry gradually. Keep thickness reasonably even and avoid placing wet figures near strong heat. Polymer clay should be cured according to the manufacturer’s directions.
Yes. Acrylic paint is commonly used to decorate fully dried air-dry clay. For polymer clay, check the manufacturer’s guidance for compatible paints and finishes. Test any coating on a small sample if compatibility is uncertain.