


Cutting boards can be so much more than just functional kitchen tools! These Decorative Cutting Board Display Ideas showcase their beautiful grain patterns, interesting shapes, and natural textures, turning everyday kitchen essentials into lovely decorative features that add warmth and charm to your kitchen.
They don’t have to cost a lot of money either! These Decorative Cutting Board Display Ideas make it easy to style your kitchen on a budget. Lean them against your backsplash, put them in a woven basket, hang them on a rail, or pair them with ceramic pitchers and plants!
No matter if you are a fan of farmhouse kitchens, rustic cottages or sleek modern spaces, you’ll find lots of lovely ways to turn your basic kitchen tools into something extra special using these decorative cutting board ideas!
For more inspiration, explore these 12 Kitchen Pantry Door Decorating Ideas for a Stylish Kitchen to discover creative ways to make your kitchen look more beautiful and cohesive.
10 Decorative Cutting Board Display Ideas
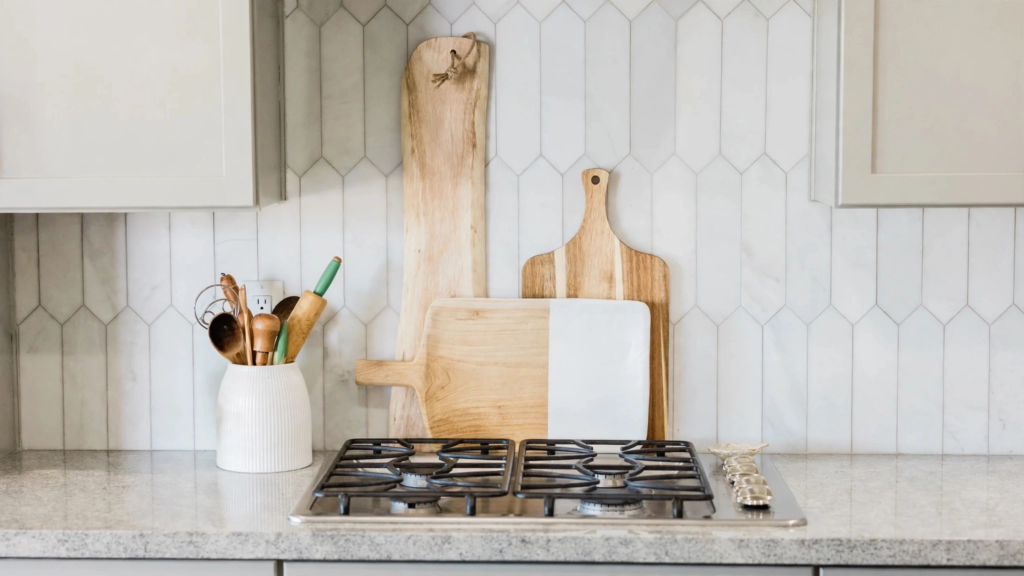
1.Decorative Cutting Board Display Against the Backsplash
A great way to incorporate cutting boards into your decor is to stack them up against your back splash.
Begin with a large rectangle board. Then place a medium paddle board on top and finally add a small round or unique shape. By using a variety of heights and shapes it will be far more interesting than just stacking up the same boards.
To create a warm farmhouse feel, use light oak, warm acacia and dark walnut. This provides a lovely contrast to white kitchens.
Styling tips:
- Choose three boards in different heights and shapes.
- Place the largest board at the back.
- Add a small ceramic pitcher or utensil crock nearby.
- Keep enough countertop space available for everyday food preparation.
This arrangement works especially well on kitchen counters, islands, and open areas beside the stove.
If you love cozy kitchen decor, explore these 12 Kitchen Counter Lamp Styling Ideas for a Cozy, Stylish Kitchen to add warmth and charm to your space.

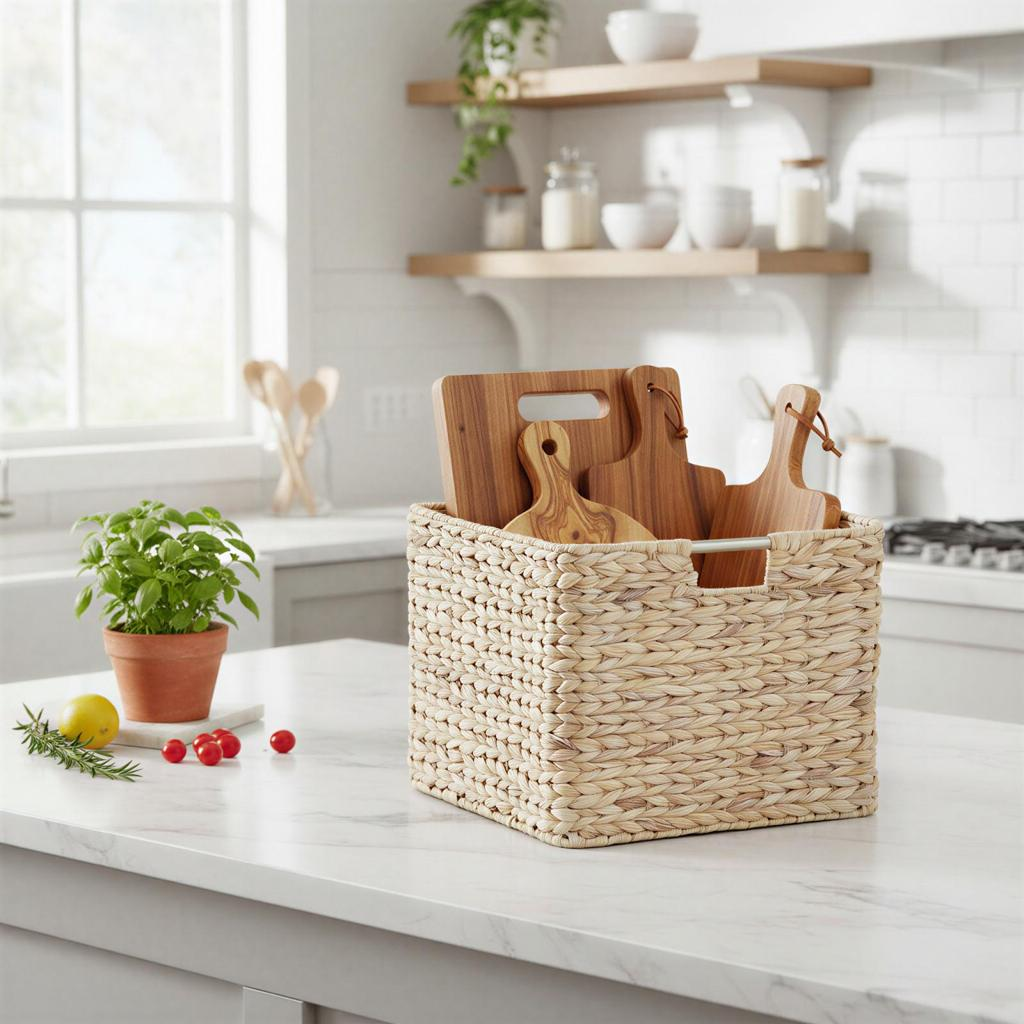
2. Woven Basket Decorative Cutting Board Display
A woven basket offers a beautiful and practical way to store and display your cutting boards. Its natural texture adds warmth and charm to your kitchen, especially when paired with wooden cutting boards. Choose a basket made from natural fibers to create an airy, cozy, and welcoming look while keeping your boards neatly organized.
Opt for a rectangular or oval basket that is strong and deep enough to hold your cutting boards. Place the largest cutting boards at the back of the basket and the smaller cutting boards at the front so that you can see the shape of them.
If you want to really make it look more put together you can place a folded neutral kitchen towel or tiny wooden bread board inside.
To keep things evenly balanced place the basket either by the backsplash of your kitchen or the end of your counter top.
Styling tips:
- Choose natural wicker, seagrass, or rattan.
- Mix rectangular and paddle-shaped boards.
- Use cream, beige, or muted green accessories.
- Avoid overcrowding the basket.
3. Rustic Decorative Cutting Board Display with a Wooden Crate
Make a cute display using an old crate.
Look for a small rustic box, an old fruit crate, or a container made from reclaimed wood. These Decorative Cutting Board Display Ideas add a charming, farmhouse-inspired touch to your kitchen, and you can easily arrange a few boards inside. We love the beautiful worn look and natural wood texture!
Place the cutting boards upright in the crate with the largest boards on the bottom. Mix up your boards so you have a range of finishes to give an authentic, collected look.
This crate looks great paired with a ceramic vase, retro kitchen scales or a small collection of cooking books.
Styling tips:
- Look for crates with distressed natural wood.
- Choose boards with different handle designs.
- Avoid adding too many decorative objects.
- Check that the crate is stable and has no rough edges that could damage the boards.
This idea is particularly attractive in rustic, farmhouse, and country-style kitchens.
For more decorating inspiration, explore these 10 Kitchen Island Centerpiece Ideas for a Beautiful, Stylish Kitchen to create an elegant and welcoming space that complements your kitchen counter lamp decor.

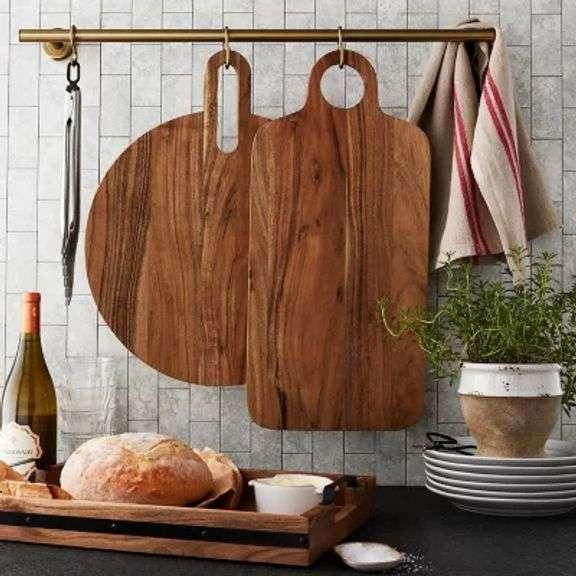
4. Decorative Cutting Board Display With a Wall Rail
A pretty wall rail is great if you are short on worktop space.
Add a sturdy rail with hooks to an empty section of your kitchen wall or backsplash to create one of these practical Decorative Cutting Board Display Ideas. Hang your cutting boards from the rail using their handles or built-in holes, leaving a little space between each one so their shapes and natural wood finishes can stand out.
A black metal rail will give a modern farmhouse vibe, however a brushed brass rail will give a little more of an elegant kitchen, or you can go for a natural wooden peg rail to give a cosy cottage feel.
Pair your cutting boards with a plain kitchen cloth or small hanging utensils for some extra interest but keep it simple so it still looks like it’s not cluttered.
Styling tips:
- Use hooks suitable for the weight of each board.
- Secure the rail properly to the wall.
- Mix round, rectangular, and paddle-shaped boards.
- Leave enough space between hanging pieces.
Make sure frequently used boards are completely cleaned and dried before hanging them.
For more inspiration, explore our article 10 Open Kitchen Shelf Styling Ideas for a Beautiful, Organized Kitchen to discover simple ways to create a stylish, clutter-free kitchen that complements your island centerpiece.
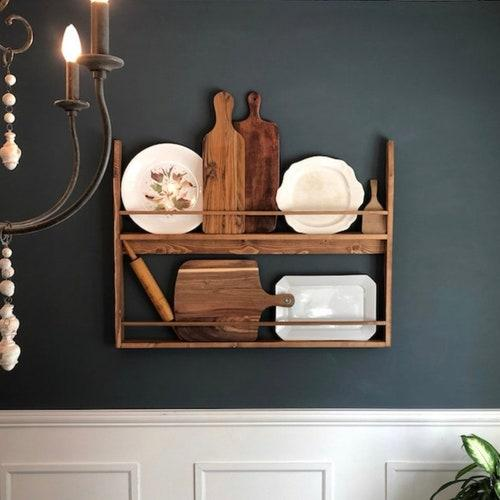
5. Decorative Cutting Board Display on a Plate Rack
A plate rack can be a great spot to display your pretty cutting boards.
Choose a plate rack that you can place on your countertop or mount on the wall. This is one of the easiest Decorative Cutting Board Display Ideas for creating an attractive kitchen feature. Make sure it has deep slots to hold your cutting boards securely. Arrange boards of different sizes and shapes in the rack, along with a few ceramic plates or serving platters, for a layered and stylish display.
Use natural wood with white crockery and pale blue and white patterns for a soft, classic look. Dark wood cutting boards look fabulous with cream coloured ceramics too.
This looks great on an open shelf in the kitchen, on the countertop or in a built-in display.
Styling tips:
- Mix two or three boards with a few plates.
- Use similar colors to create a cohesive display.
- Keep the tallest pieces toward the back.
- Make sure the rack supports the boards without allowing them to tip.
6. Decorative Cutting Board Display on Open Shelves
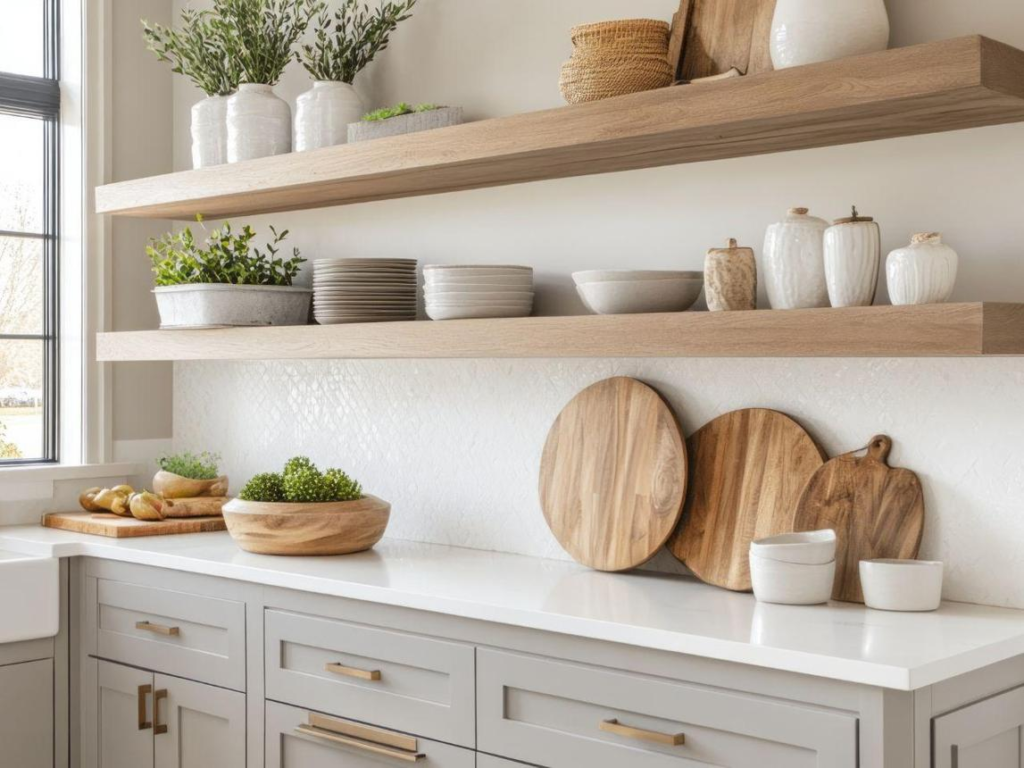
Decorative chopping boards look great on open shelving.
Instead of overcrowding your shelves with crockery, use them to create a beautiful Decorative Cutting Board Display. Place a few cutting boards at the back of the shelf, positioning larger boards upright and smaller ones slightly in front. This layered arrangement adds depth, warmth, and visual interest while keeping your kitchen shelves neat and stylish.
The natural wood looks really pretty with white bowls, glass jars, stoneware and neutral serving dishes.
If your kitchen is quite light with white or pale shelving, dark walnut chopping boards can add some contrast. Alternatively if you have dark cabinets, light maple or bamboo chopping boards can add some brightness.
Styling tips:
- Dedicate one section of a shelf to your board collection.
- Combine vertical boards with horizontally stacked dishes.
- Leave some empty space around the display.
- Avoid placing heavy boards on unstable shelves.
This is a simple way to add warmth and personality without making your kitchen feel overly decorated.
Interior designers featured in Martha Stewart’s kitchen island decor guide also highlight the value of sculptural vessels, natural greenery, and grouped tray displays for balancing beauty with function.
7. Decorative Cutting Board Gallery Wall
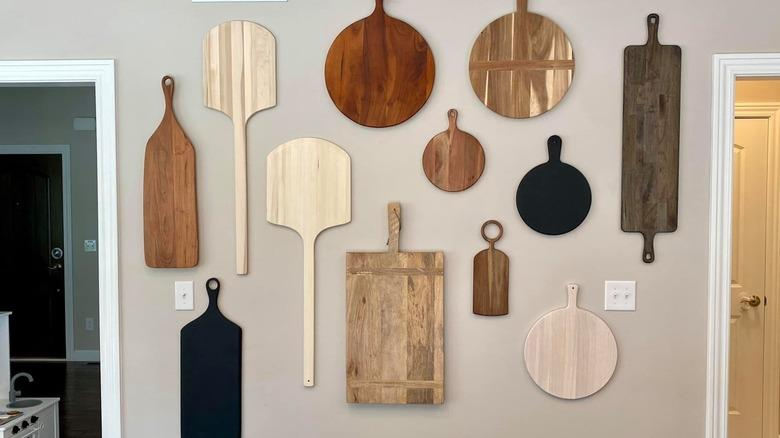
Create a gallery-style cutting board display.
Find a variety of cutting boards in different shapes, sizes and wood types. Find some unusual ones with interesting shapes such as round breadboards, longer rectangular boards, paddles and vintage boards with pretty handles.
Lay out your cutting boards on the floor to see what looks nice. Place a large one in the middle and surround it with smaller ones.
Cutting boards can be paired with a small framed kitchen print or vintage wall decor.
Use sturdy hooks or mounting equipment to hang them securely. If you are using heavy wooden boards, ensure they are hung securely.
Styling tips:
- Mix different shapes rather than choosing identical boards.
- Keep a consistent visual balance.
- Repeat similar wood tones throughout the arrangement.
- Avoid overcrowding the wall.
A cutting board gallery wall is especially beautiful in farmhouse, rustic, and cottage-inspired kitchens.
For more kitchen styling inspiration, explore these creative kitchen decor ideas, featuring simple ways to make your kitchen feel more beautiful, welcoming, and organized.
8. Style a Countertop Vignette With Decorative Accessories
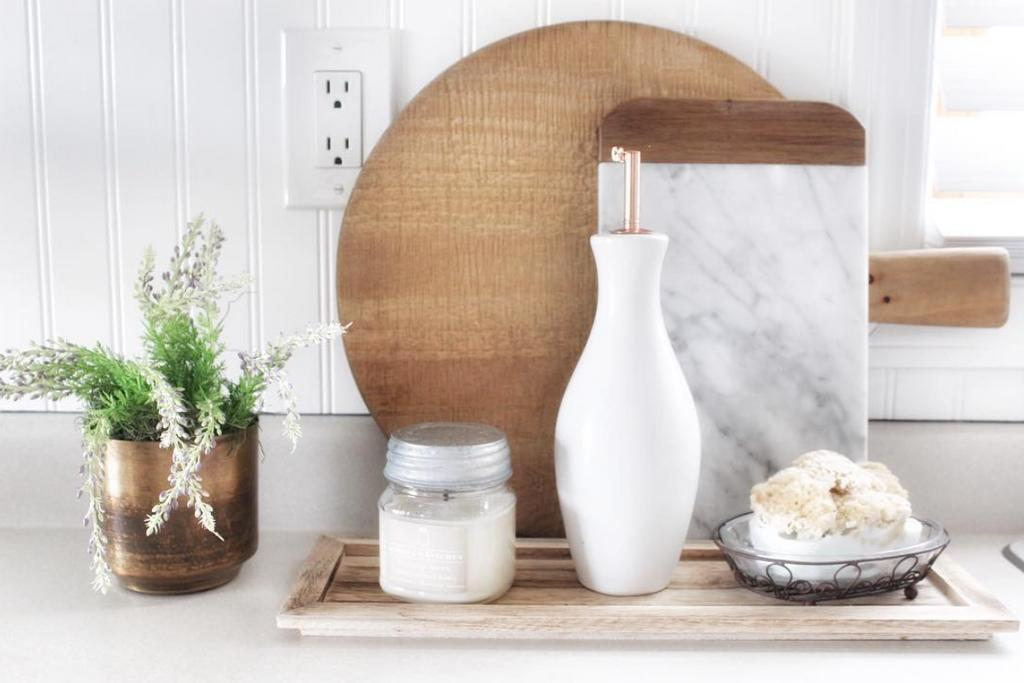
A cutting board can help you create a lovely kitchen vignette.
Begin by placing a large decorative cutting board on your backsplash. Place a smaller cutting board in front of it and then add a few items to compliment it. This could be a ceramic jug, a small potted plant or a wooden utensils jar.
If you’re going for a neutral country look, use cream ceramics, warm wood and dull plants. However if you’d like to add some colour to your kitchen, try using pastel blue ceramics or a pretty kitchen cloth.
The key is keeping it small and looking deliberate.
Styling tips:
- Use a larger board as the visual backdrop.
- Add one or two complementary accessories.
- Vary the height of the objects.
- Keep the arrangement away from busy cooking and sink areas.
This idea is perfect for an unused corner of your countertop or a small section of your kitchen island.
9. Display Cutting Boards in a Built-In Kitchen Niche
If you have a built-in niche or recessed shelving unit in your kitchen then you can use this space to create a dedicated chopping board display.
These make great displays to add some style to your kitchen without them getting mixed up with everything else.
Use one or two larger chopping boards and place smaller ones in front. Add a ceramic bowl, small vase or decorative serving dish to your display.
Choose chopping boards which match your kitchen cabinets and backsplash.
This looks great in kitchens which have neutral cabinetry, natural stone and warm wood accents.
Styling tips:
- Choose boards that fit comfortably inside the niche.
- Keep the arrangement simple.
- Mix wood with ceramic or stone accessories.
- Avoid placing boards where they obstruct nearby doors or shelves.
If you don’t have a built-in niche, a recessed-style open shelf can create a similar decorative effect.

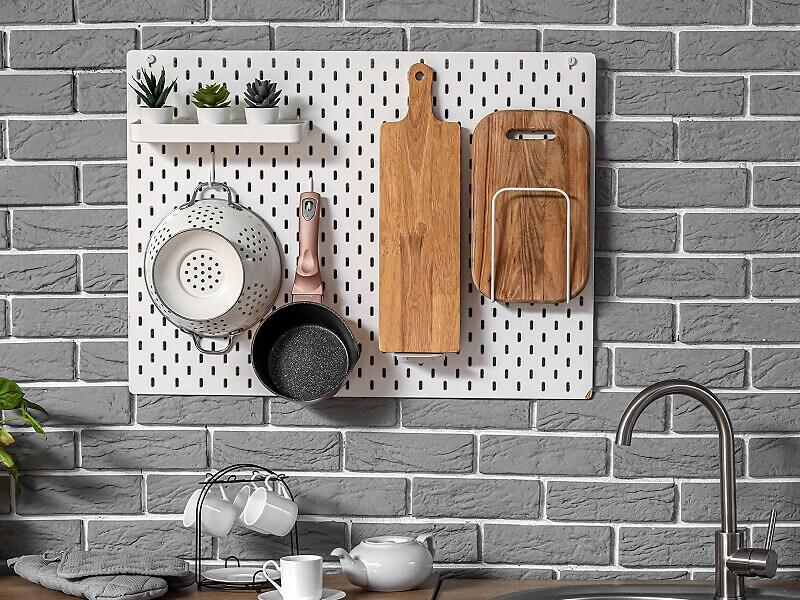
10. Use a Pegboard or Cabinet-Side Hanging Display
Use a pegboard or the side of a kitchen cabinet.
A pegboard will give you flexibility as you will be able to move the hooks around and will give you a useful place to hang your light cutting boards, small utensils and other kitchen bits.
Alternatively you could add a rail to the side of your island or cabinet.
Choose black hooks for a modern look or wooden pegs if you want something more rustic.
Styling tips:
- Check the weight capacity before hanging boards.
- Space the hooks according to board size.
- Keep heavier boards on properly secured supports.
- Leave enough room for cabinet doors and drawers to open.
This is a particularly useful option for smaller kitchens where every inch of countertop space matters.
How to Make Your Cutting Board Display Look Beautiful
A beautiful display isn’t necessarily about having the largest collection. It’s about choosing the right combination of shapes, materials, and accessories.
Here are a few simple decorating principles to follow.
Mix Different Wood Tones
Combining light and dark wood finishes creates visual interest. Try pairing pale maple or bamboo with richer walnut or acacia tones.
You don’t need every board to match. A little variation makes the arrangement feel more natural and collected.
Combine Wood With Marble and Ceramic
Wooden boards look beautiful beside marble serving boards, white stoneware, and ceramic accessories.
These contrasting materials help create a layered appearance without relying on lots of colors or patterns.
Add Small Natural Accents
A small plant, a ceramic vase, or a neutral kitchen towel can soften a wooden display.
Choose just a few accessories so the cutting boards remain the main attraction.
Pay Attention to Height and Proportion
Place larger boards toward the back and smaller pieces toward the front. If every object is the same height, the display may look flat.
A little variation creates depth and makes the arrangement more visually appealing.
Common Cutting Board Display Mistakes to Avoid
Even beautiful boards can look out of place if they are arranged without considering the surrounding space.
Avoid these common mistakes:
- Using too many boards: A crowded countertop can make a kitchen feel smaller.
- Choosing identical shapes: Mix round, rectangular, and paddle-style boards for variety.
- Ignoring color balance: Try to coordinate wood tones with cabinets, countertops, and nearby accessories.
- Blocking preparation space: Keep decorative arrangements away from your main cooking area.
- Using unstable supports: Make sure boards cannot easily slide or fall.
- Ignoring moisture: Never place damp cutting boards in a closed basket or stack them while wet.
For food-contact boards, follow appropriate cleaning instructions. The USDA recommends washing cutting boards with hot, soapy water and replacing boards that develop excessive wear or hard-to-clean grooves.
How to Display Cutting Boards in a Small Kitchen
You don’t need a large kitchen to create an attractive cutting board display.
The trick is to use vertical space and choose arrangements that don’t interfere with everyday activities.
Try these simple solutions:
- Hang lightweight boards from a secure wall rail.
- Use the side of a cabinet or kitchen island.
- Choose a narrow basket that fits into an unused corner.
- Display just two or three boards against the backsplash.
- Use existing open shelves instead of adding more countertop decorations.
If your kitchen has very little counter space, consider storing everyday boards vertically in a cabinet or dedicated rack and displaying only your favorite decorative pieces.
This keeps your kitchen functional while still allowing you to enjoy the natural beauty of wooden accessories.
Final Thoughts
Decorative cutting boards are an easy way to bring warmth, texture, and personality into your kitchen. Whether you prefer a layered countertop arrangement, a rustic basket display, or a creative gallery wall, there are plenty of ways to make these everyday essentials part of your home decor.
Start with a few boards you already own, experiment with different shapes and wood tones, and add simple accessories that complement your kitchen.
The best display is one that looks beautiful while keeping your kitchen comfortable, organized, and practical.
Frequently Asked Questions
You can display cutting boards by leaning them against the backsplash, arranging them in a woven basket, placing them on open shelves, or hanging them from a decorative wall rail. Mix different sizes and wood finishes for a more interesting arrangement.
Three boards in different sizes usually make a balanced countertop arrangement. However, two carefully selected boards can look just as beautiful in a smaller kitchen.
Yes. Wooden cutting boards add natural texture and warmth to kitchen interiors. Their grain patterns and different wood tones complement farmhouse, rustic, cottage, and modern kitchen styles.
Use vertical storage options such as wall hooks, peg rails, cabinet-side racks, or narrow countertop baskets. These solutions keep boards accessible without taking up too much workspace.
Ceramic pitchers, woven baskets, small plants, wooden utensils, neutral kitchen towels, marble serving boards, and vintage kitchen accessories complement wooden cutting boards beautifully.
Yes. Use secure hooks, a wall rail, or suitable mounting hardware. Make sure the wall and hardware can support the weight of the boards.