


Making miniature clay fruits and vegetables is a fun way to turn small pieces of clay into cute handmade creations. You can make a variety of fruits and vegetables, including tiny strawberries, colorful carrots, adorable pumpkins, and realistic corn.
No advanced skills are needed and you can do this using basic tools and a few colours of clay.
These would be perfect to put in your doll house, make cute mini kitchen items, hand made pendants and fun weekend projects.
Whether you have air dry clay or polymer clay you are sure to get some inspiration from these 10 mini fruits and vegetables in clay.
For more creative DIY projects, explore these 10 Small Clay Decorative Objects to Make at Home and discover easy ways to make beautiful handmade decorations.

Supplies You’ll Need to Make Miniature Clay Food
Before getting started, gather a few basic crafting supplies. Most miniature fruits and vegetables can be shaped using your fingers and simple household tools.
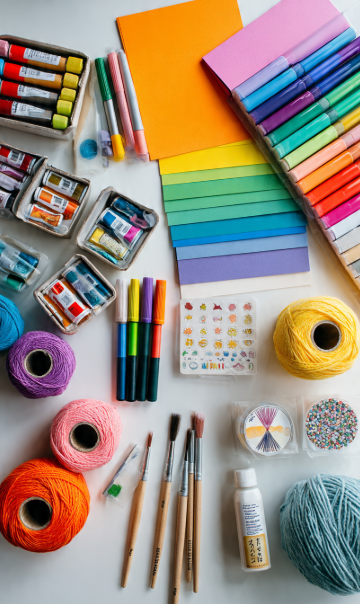
Basic supplies:
- Air-dry clay or polymer clay
- Colored clay in red, green, yellow, orange, purple, and brown
- Toothpicks for adding tiny details
- A plastic sculpting tool or craft-safe shaping tool
- A smooth, clean work surface
- Acrylic paints and a small paintbrush, if using plain clay
- Optional clay-compatible varnish
- Optional miniature display tray
Which clay should you choose?
Air-dry clay is convenient for beginners because it hardens naturally without an oven. Polymer clay is another option for small decorative projects, particularly when you want to sculpt fine details before curing.
Always follow the drying or baking instructions for your chosen clay.
If you love making tiny handmade decorations, explore these 10 Miniature Clay Birds That Are Tiny and Adorable for more cute and creative clay craft ideas.
10 Miniature Clay Fruits and Vegetables Ideas
1. Miniature Clay Strawberries: Cute and Easy Fruit Miniatures
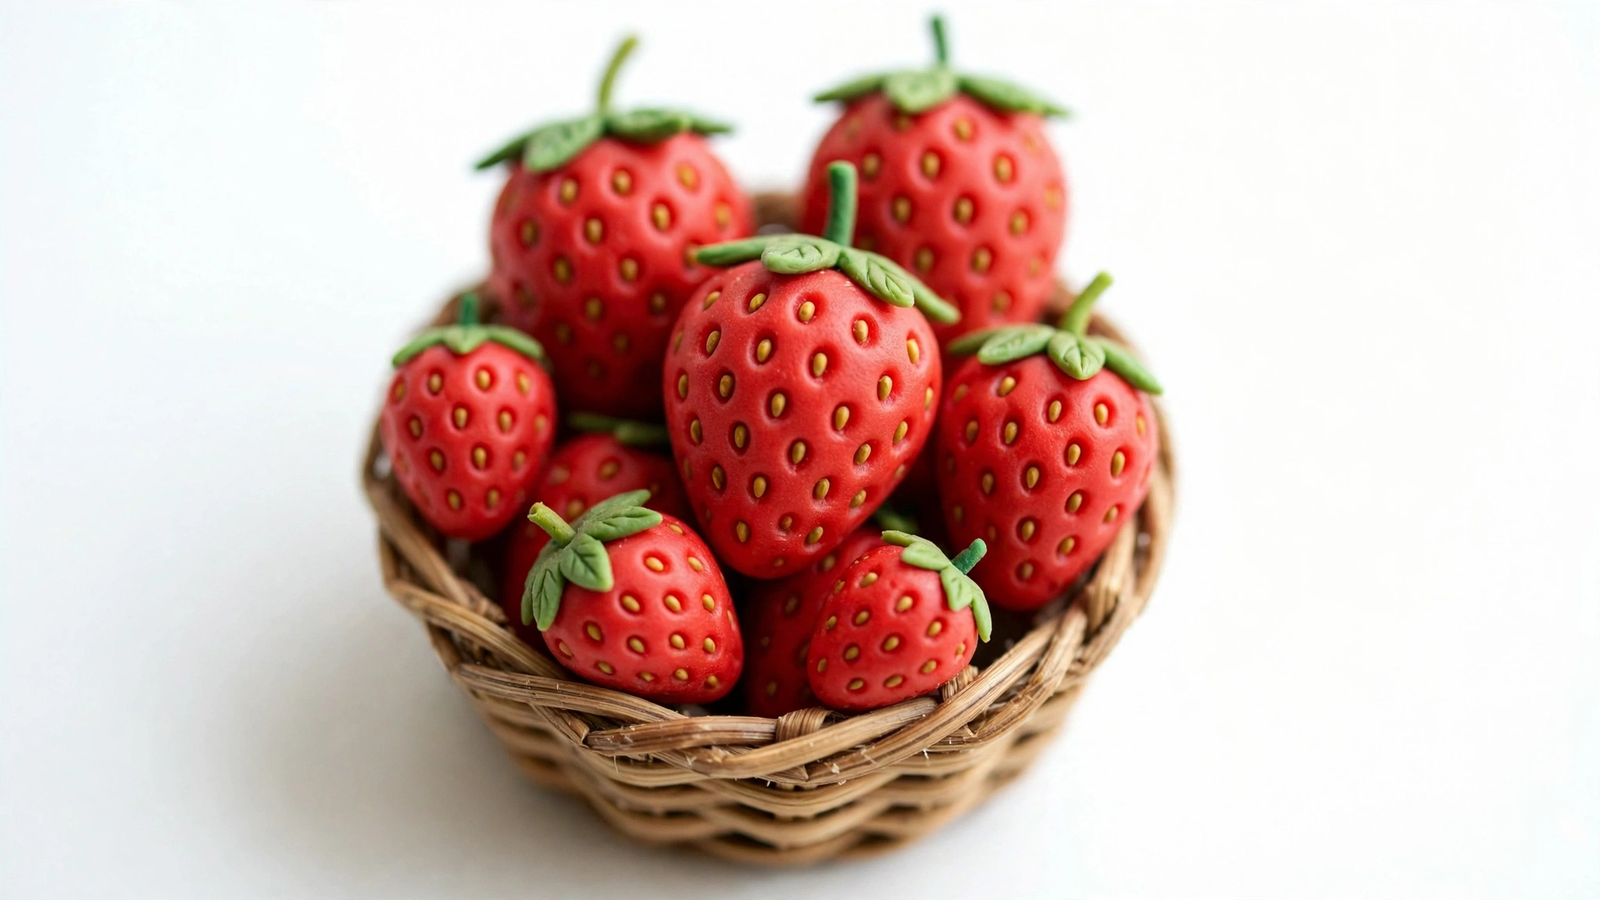
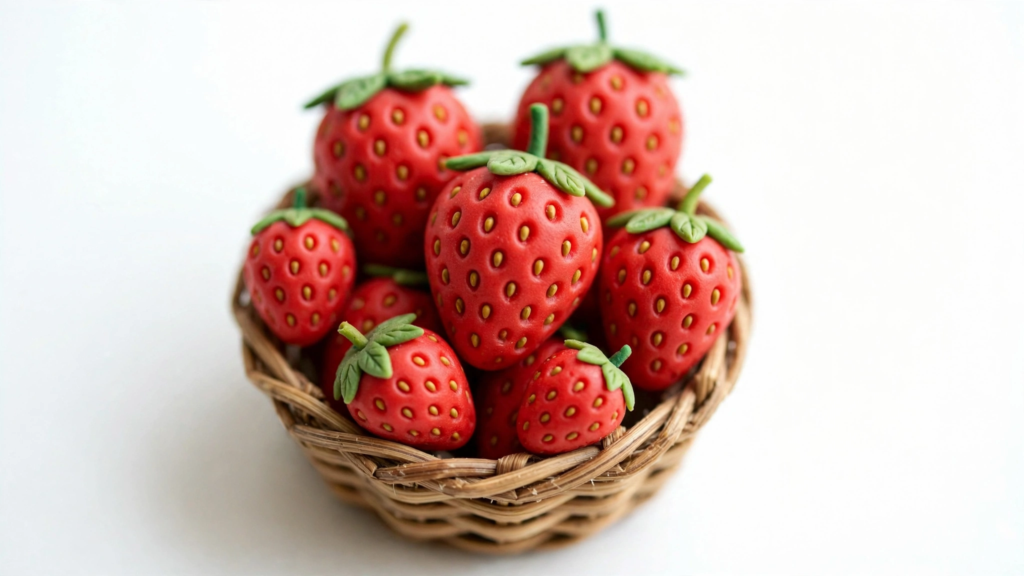
Miniature strawberries made from clay are super cute! The bright red colour, tiny seeds and pretty green leaves make them easily identifiable.
A few of the strawberries can be made in different sizes and placed in a mini basket to create a cute kitchen display.
How to make it:
Begin by shaping your red clay into a small smooth ball. Pinch one end to make it slightly pointed.
Use the tip of a toothpick to make little seeds. Flatten some green clay and roll into a few pointed leaves.
Attach the leaves to the top of your strawberry and attach a little green stalk.
Best for: Beginners, miniature fruit collections, and dollhouse decorations.
Crafting tip: Make the seed impressions shallow and evenly spaced so the strawberry looks detailed without appearing overly textured.
If you enjoy making tiny clay creations, explore 10 Miniature Clay Dollhouse Accessories to Make Yourself for more fun DIY ideas to decorate your miniature home.
2. Tiny Clay Carrots: Simple Miniature Clay Vegetables
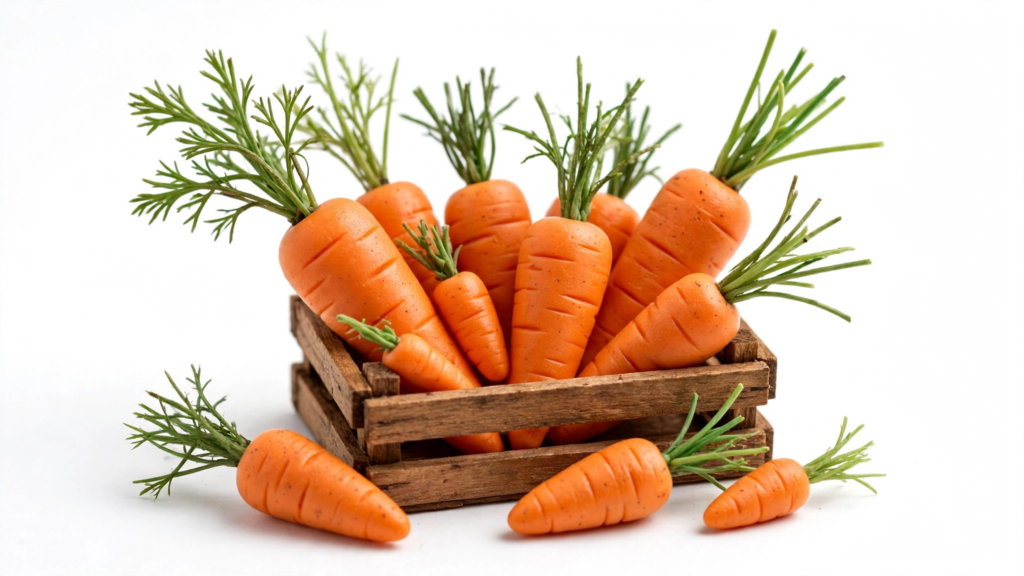
Tiny clay carrots are an excellent starting point if you’re learning how to shape miniature vegetables.
Their simple tapered shape makes them easy to sculpt, while the leafy green tops add a playful finishing touch.
These miniature carrots look especially adorable when grouped together in a tiny wooden crate or arranged as part of a miniature vegetable garden.
How to make it:
Roll a small piece of orange clay into a short cylinder. Gently narrow one end until it forms a carrot shape.
Use a toothpick to create a few shallow horizontal lines along the surface.
For the leafy top, roll tiny pieces of green clay into thin strands. Gather them together and carefully attach them to the wider end of the carrot.
Best for: First-time clay crafters and miniature garden displays.
Crafting tip: Make carrots in slightly different lengths and thicknesses for a more natural-looking collection.
If you enjoy making mini crafts, explore these 15 Tiny Clay Keychains That Are Cute and Easy to Make for more adorable DIY inspiration.
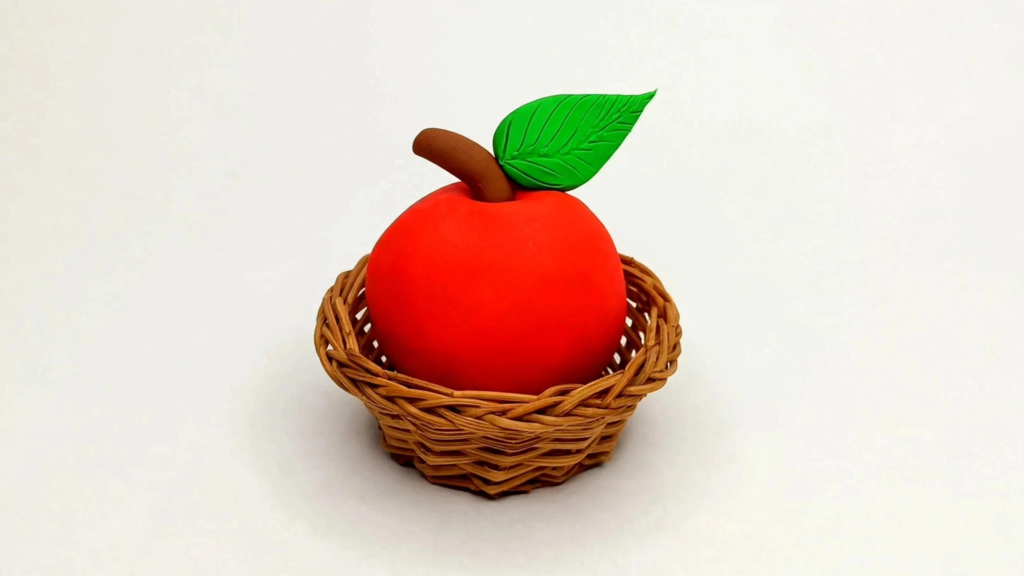
3. Miniature Clay Apples: Easy Miniature Clay Fruits and Vegetables
Miniature clay apples are a charming addition to any handmade fruit collection.
Their rounded shape makes them beginner-friendly, and you can experiment with different colors to create red, green, or golden-yellow apples.
A small collection of these tiny fruits looks beautiful inside a miniature bowl or displayed alongside other clay food creations.
How to make it:
Roll a small ball of red or green clay between your palms.
Gently flatten the top and bottom to create a recognizable apple shape. Use the rounded end of a sculpting tool to make a shallow indentation at the top.
Roll a tiny piece of brown clay into a short stem and place it inside the indentation.
Finish with a small green leaf.
Best for: Miniature kitchen decorations, clay charms, and beginner sculpting practice.
Crafting tip: Mix a tiny amount of lighter clay into the main color to create subtle variation rather than making every apple identical.
If you’re looking for cute and easy animal crafts, explore these 15 Tiny Clay Animal Ideas for Beginners to create adorable miniature animals for keychains, gifts, and decorations.
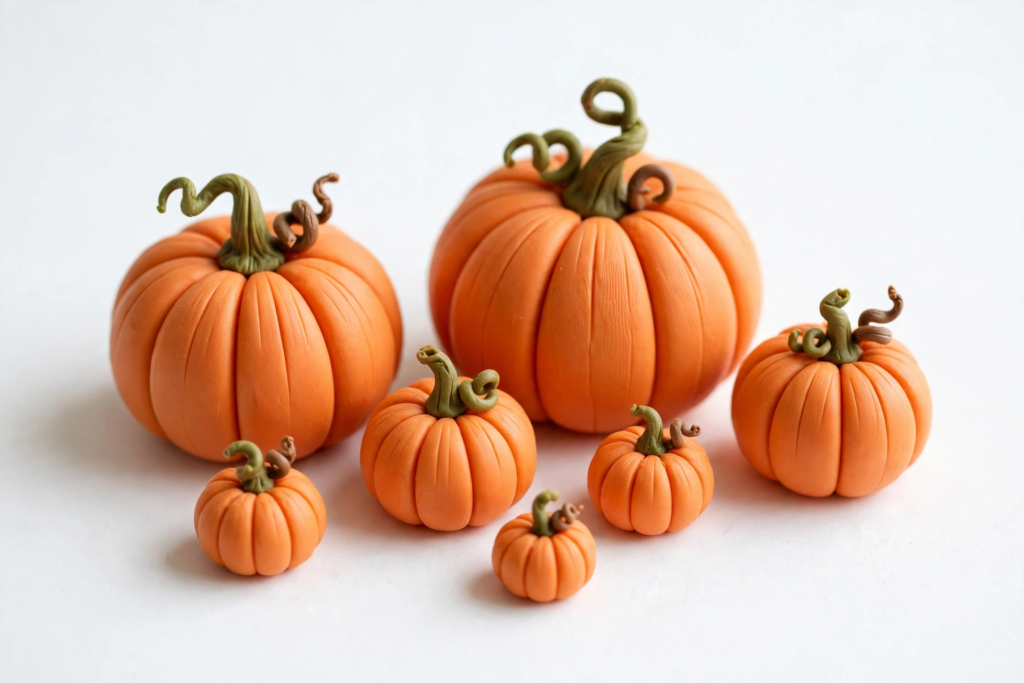
4. Miniature Clay Pumpkins: Cute Fall-Inspired Vegetables
Miniature clay pumpkins are perfect for fall-inspired crafts and seasonal decorations.
Their rounded bodies, curved ridges, and little green stems give them a charming appearance without requiring complicated sculpting techniques.
You can make traditional orange pumpkins or experiment with cream, sage green, and pale yellow for a softer decorative style.
How to make it:
Begin with a small ball of orange clay and gently flatten the top and bottom.
Use a toothpick or sculpting tool to press curved vertical grooves around the pumpkin.
Keep the grooves evenly spaced, following the natural shape from top to bottom.
Roll a tiny piece of green or brown clay into a stem and attach it to the top.
Best for: Fall decorations, miniature farmhouse displays, and seasonal clay crafts.
Crafting tip: Make several pumpkins in different sizes and colors to create a tiny pumpkin patch.
If your kids enjoy hands-on crafting, explore [15 Fun Air-Dry Clay Toys for Kids to Make at Home] for more creative and beginner-friendly projects to try together.
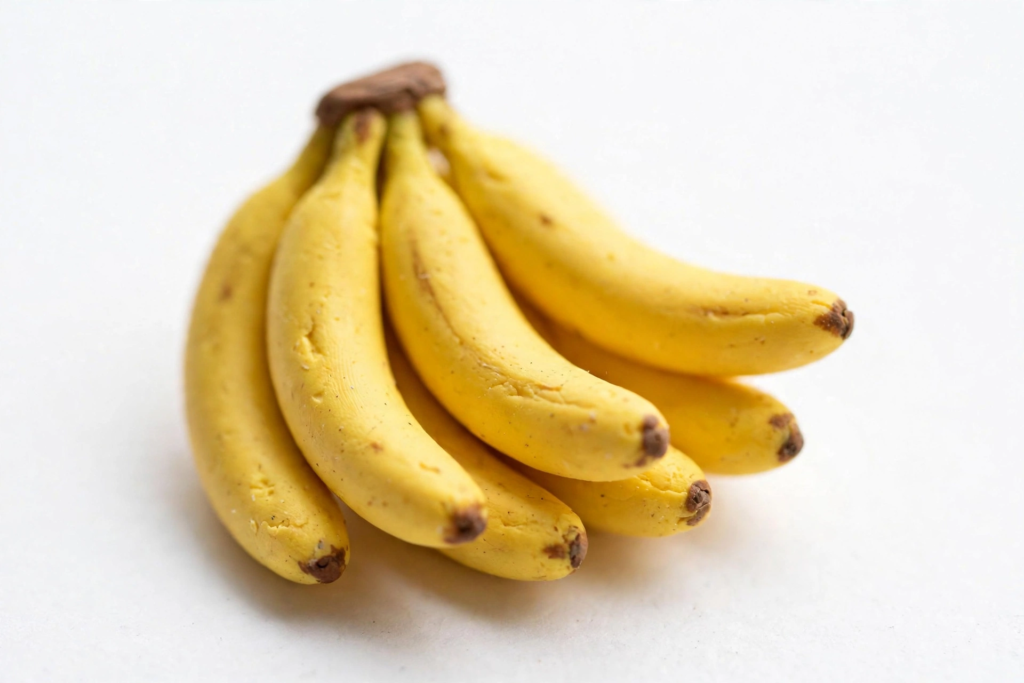
5. Miniature Clay Bananas: Easy Miniature Clay Fruits and Vegetables
Miniature clay bananas are a fun way to practice shaping curved objects.
Their simple form makes them approachable for beginners, while small details such as brown tips and subtle surface shading can make them look surprisingly realistic.
Create individual bananas or arrange several together to make a tiny bunch.
How to make it:
Roll yellow clay into a thin cylinder, keeping the middle slightly thicker than the ends.
Gently curve the cylinder into a banana shape.
Pinch both ends slightly to create the familiar tapered appearance.
Add tiny pieces of brown clay to the tips, or paint the details after the clay has fully hardened.
Best for: Miniature fruit baskets, pretend market displays, and simple clay projects.
Crafting tip: Keep the curve gentle and slightly irregular. Perfectly symmetrical bananas often look less natural.
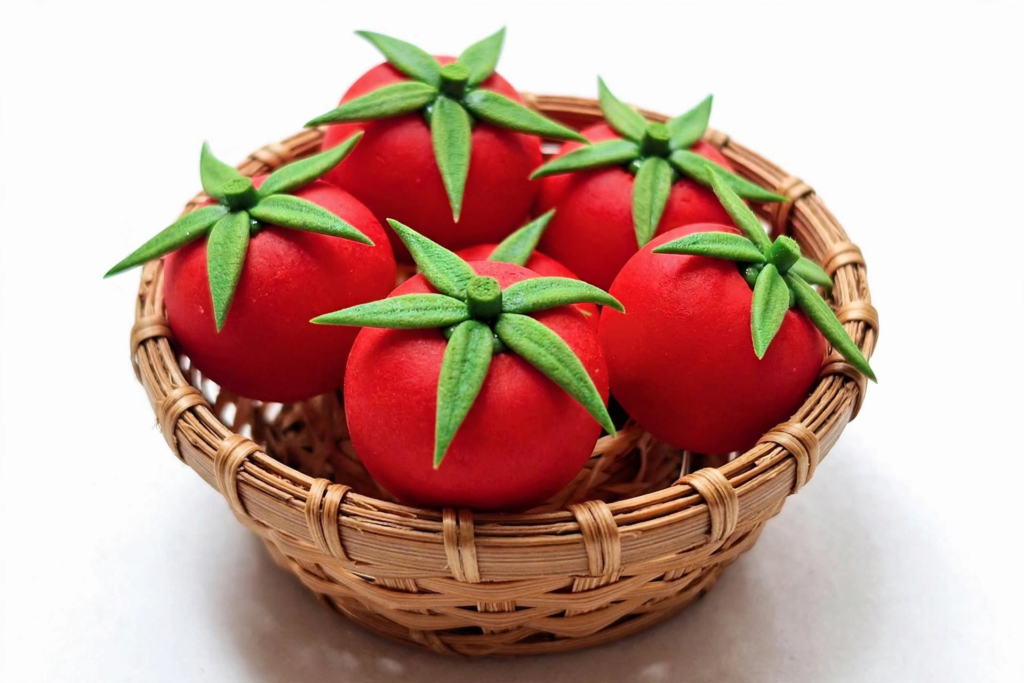
6. Miniature Clay Tomatoes: Realistic Miniature Clay Fruits and Vegetables
Miniature clay tomatoes are another easy project that can add beautiful color to your collection.
You can make small cherry tomatoes, slightly flattened garden tomatoes, or a mixture of both.
Their smooth red surfaces and tiny green tops make them recognizable even at a very small scale.
How to make it:
Roll red clay into a small, smooth ball.
For a garden tomato, gently flatten the ball and create a subtle indentation at the top.
Flatten a tiny piece of green clay and shape it into a star-like leafy top.
Attach the green piece to the tomato and add a short stem if desired.
Best for: Miniature vegetable markets, dollhouse kitchens, and food-themed crafts.
Crafting tip: Use slightly different shades of red and orange to make your tomatoes look more natural.
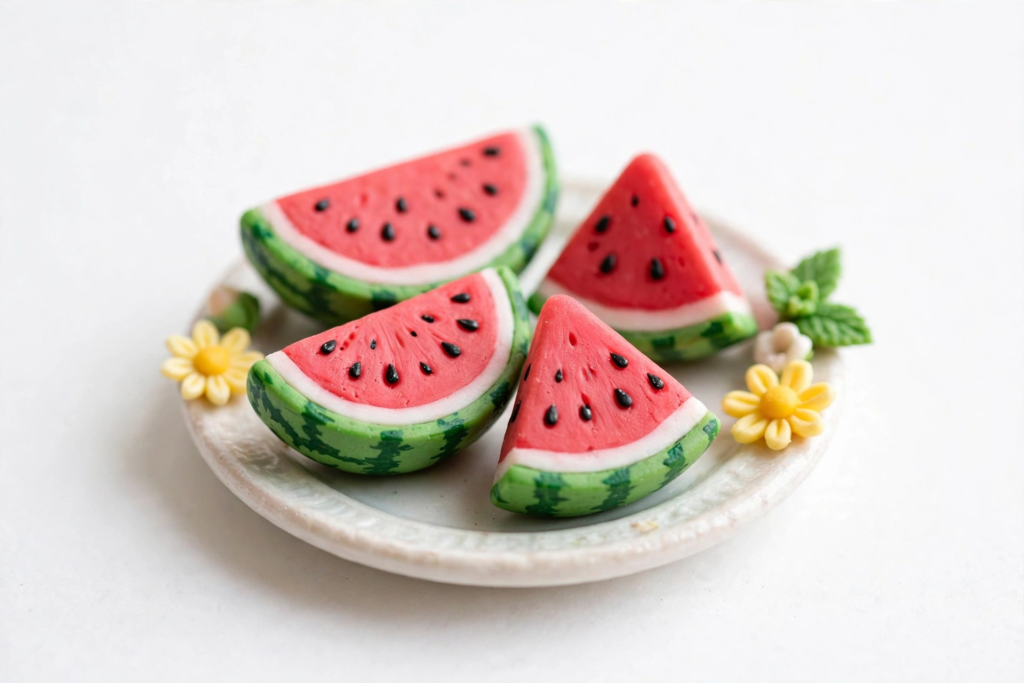
7. Tiny Clay Watermelon Slices: Colorful Miniature Fruit Crafts
Tiny clay watermelon slices are a colorful project that looks impressive even though the basic shapes are simple.
The combination of bright pink-red fruit, green rind, and tiny black seeds creates a cheerful summer-inspired design.
These miniature slices can be displayed on a small plate or turned into decorative charms with suitable hardware.
How to make it:
Shape a small piece of pink or red clay into a flattened wedge.
Add a thin strip of white clay along the curved outer edge, followed by a slightly thicker layer of green clay to create the rind.
Smooth the layers together without blending away the colors.
Use tiny pieces of black clay to add seed details on the exposed fruit surface.
Best for: Summer crafts, miniature food displays, and colorful clay charms.
Crafting tip: Make the rind relatively thin so the watermelon slice stays delicate and proportional.
8. Miniature Clay Corn: Detailed and Fun Vegetable Sculptures
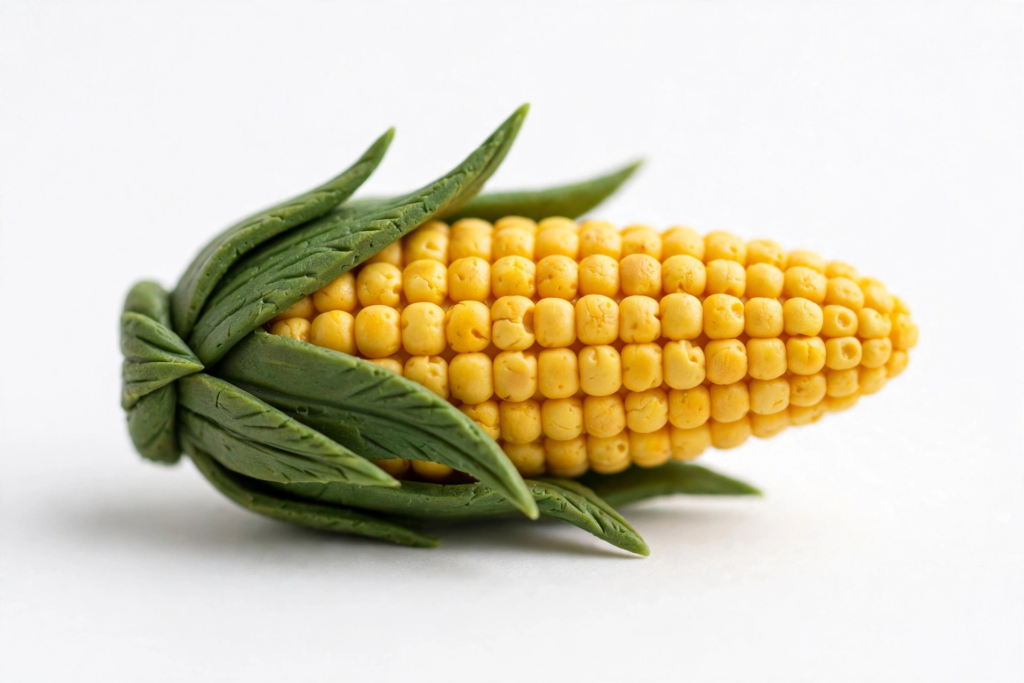
Miniature clay corn is a lovely project for crafters who enjoy adding texture.
The small yellow kernels and green outer leaves give this vegetable a detailed appearance, making it a standout piece in any miniature food collection.
Although it requires a little patience, the overall shape is simple enough for beginners to attempt.
How to make it:
Roll yellow clay into a short cylinder and gently taper one end.
Use a toothpick to press shallow intersecting lines across the surface, creating the appearance of rows of corn kernels.
Alternatively, attach tiny yellow clay balls in neat rows for a more dimensional design.
Flatten green clay into thin, pointed leaves and wrap them around the lower portion of the corn.
Best for: Miniature farm displays, dollhouse food, and detailed sculpting practice.
Crafting tip: If you’re making very small corn, use impressed lines instead of individual kernels to keep the project manageable.
9. Miniature Clay Grapes: Tiny Fruit Clusters for Beginners
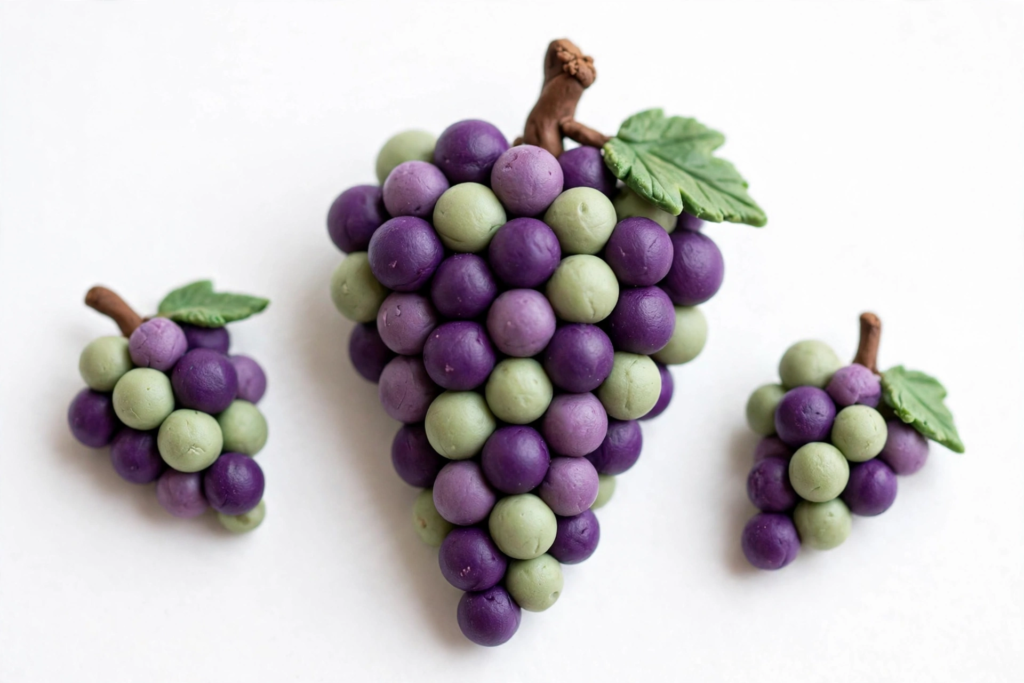
Miniature clay grapes are a great way to practice creating consistent shapes.
Each grape is simply a tiny ball of clay, but grouping them together creates a realistic bunch of fruit.
You can use purple, pale green, or a combination of both colors to make different varieties.
How to make it:
Roll several tiny balls of purple or green clay.
Arrange the balls into a small cluster, beginning with a wider section at the top and gradually narrowing toward the bottom.
Gently press the pieces together so they hold their shape without becoming flattened.
Add a small brown stem and a green leaf to complete the bunch.
Best for: Miniature fruit bowls, dollhouse displays, and beginner clay practice.
Crafting tip: Make the grapes slightly different sizes to create a more organic-looking cluster.
10. Miniature Clay Eggplants: Cute Purple Vegetable Creations
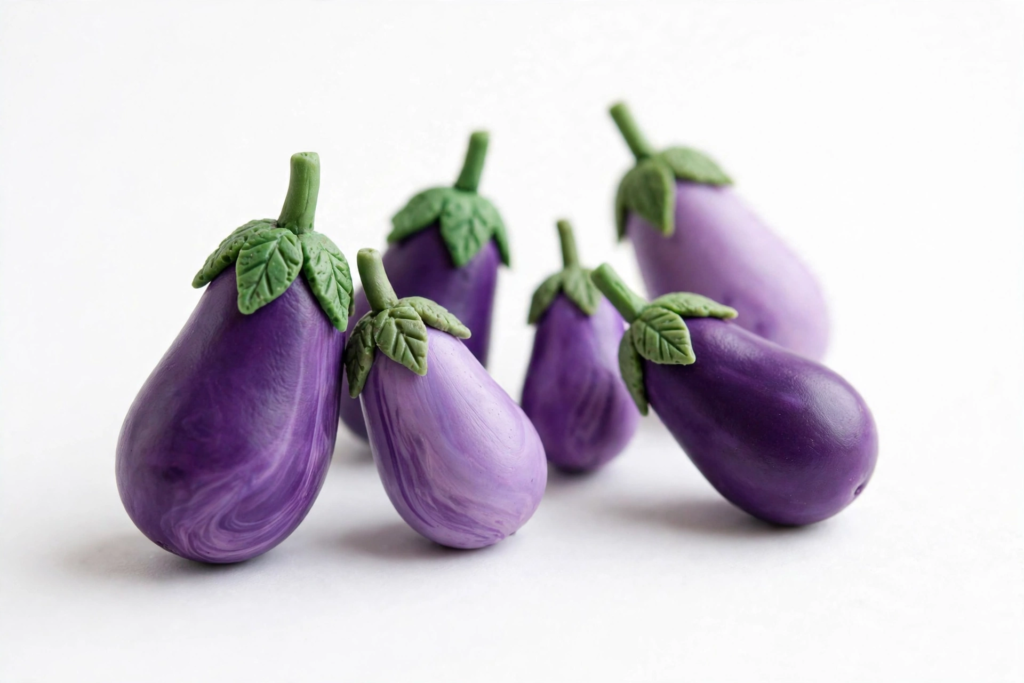
Miniature clay eggplants are a beautiful choice if you want to add a rich purple color to your collection.
Their rounded bodies and slightly tapered shapes make them easy to sculpt, while the green leafy tops create an attractive contrast.
You can make traditional deep-purple eggplants or experiment with lighter lavender shades for a playful miniature design.
How to make it:
Roll a small piece of purple clay into an oval.
Gently narrow one end while keeping the opposite end fuller and rounded.
Flatten a small piece of green clay and shape it into a leafy cap.
Attach the green cap to the narrow end and add a short stem.
Best for: Miniature vegetable collections, decorative displays, and beginner sculpting projects.
Crafting tip: Smooth the purple surface carefully before adding the green top to give the eggplant a clean, polished appearance.
How to Make Miniature Clay Fruits and Vegetables Look Realistic
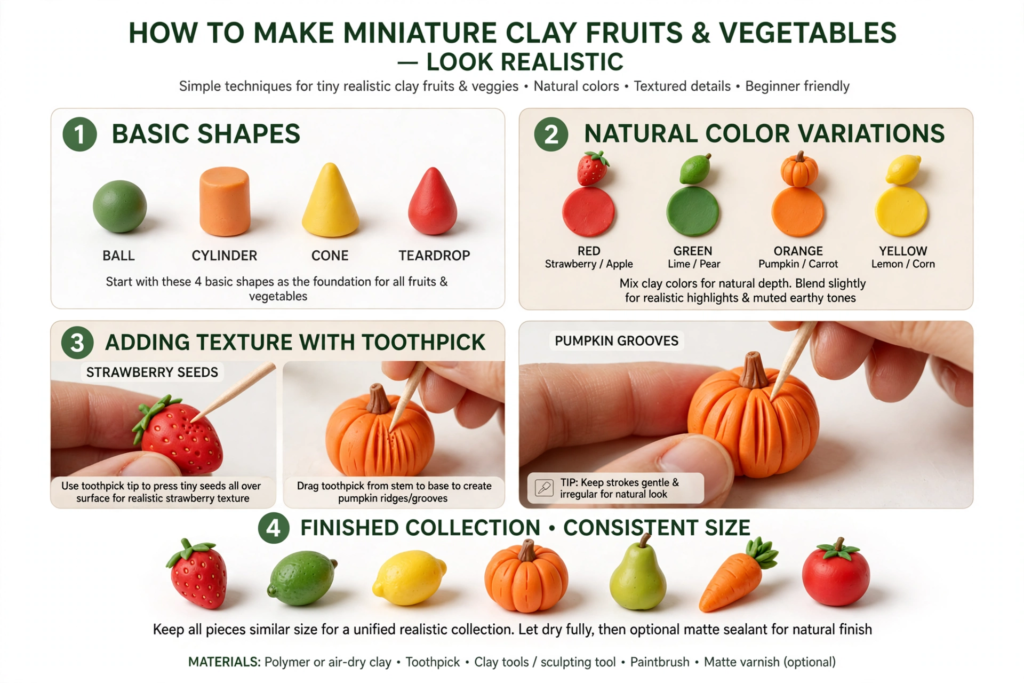
Even simple miniature clay food can look beautiful when you pay attention to a few small details.
Start With Basic Shapes
Most miniature fruits and vegetables begin with simple forms such as balls, cylinders, cones, and flattened ovals.
For example, strawberries begin as rounded teardrops, carrots as tapered cylinders, and apples as slightly flattened balls.
Learning these shapes makes more complicated miniature food projects easier.
Use Natural Color Variations
Real fruits and vegetables rarely have perfectly uniform colors.
Try combining slightly different shades of red, green, orange, or yellow to make your clay creations feel more realistic.
Avoid blending too many colors together, which can make the clay look muddy.
Add Texture Carefully
A toothpick can help create strawberry seeds, pumpkin grooves, carrot lines, and corn kernels.
Keep your details proportional to the size of the miniature.
Too many deep marks can make a tiny sculpture look crowded rather than realistic.
Keep Your Miniatures Consistent in Size
If you’re making a complete miniature food collection, choose an approximate scale before starting.
For example, you might make a tiny apple around half an inch wide and create the other fruits and vegetables in proportion to it.
These are suggested craft dimensions, not required measurements.
How to Dry, Bake, and Finish Miniature Clay Food
Once your miniature clay fruits and vegetables are shaped, they need to harden according to the material you’re using.
For air-dry clay: Allow the pieces to dry fully following the manufacturer’s instructions. Keep delicate stems and leaves supported while drying.
For polymer clay: Bake according to the specific clay package. Check the recommended oven temperature and curing time for the product and thickness. An adult should handle baking.
Once your miniatures have hardened and cooled, you can add painted details or a compatible protective finish.
For air-dry clay, a suitable acrylic varnish may be used after complete drying, but sealing does not necessarily make the pieces waterproof.
Keep all decorative clay miniatures away from food and drinks. They are not edible, and small pieces can present a choking hazard for young children.
Creative Ways to Display Miniature Clay Food
After finishing your collection, there are plenty of fun ways to display your handmade pieces.
- Arrange strawberries, apples, and grapes inside a miniature fruit bowl.
- Create a tiny vegetable market with carrots, tomatoes, and eggplants.
- Display pumpkins in a small fall-themed decorative tray.
- Make miniature food charms using suitable jewelry findings.
- Decorate a dollhouse kitchen with tiny fruits and vegetables.
- Create a small handmade produce stand as a miniature craft project.
For more creative projects, explore other DIY clay ideas such as handmade clay flowers, tiny clay animals, and decorative clay objects.
For helpful baking and curing tips, check Sculpey’s polymer clay baking guide before finishing your miniature creations.
Conclusion
Making miniature clay fruits and vegetables is a creative way to explore clay crafting without needing advanced skills or complicated tools.
From simple apples and carrots to detailed strawberries, corn, and watermelon slices, each project offers a chance to experiment with colors, shapes, and textures.
Start with one or two easy designs, then gradually build your own collection of handmade miniature food.
With a little patience and imagination, even the smallest piece of clay can become something adorable.
Frequently Asked Questions
Ten easy things you can make with clay include miniature strawberries, carrots, apples, pumpkins, bananas, tomatoes, watermelon slices, corn, grapes, and eggplants. These projects are ideal for beginners because most begin with simple shapes.
Popular miniature clay items include tiny fruits, vegetables, flowers, animals, cupcakes, mushrooms, jewelry charms, miniature dishes, dollhouse decorations, and small decorative figurines.
Start with a small piece of colored clay and shape it into the basic form of your chosen fruit. Add details using a toothpick or sculpting tool, attach any leaves or stems, and let the clay harden according to its instructions.
Choose a simple food item, break its shape into smaller parts, and sculpt each part separately. Assemble the pieces carefully, add realistic textures, and finish the miniature using the appropriate drying or baking method.
Air-dry clay is a convenient choice for simple projects because it doesn’t require oven curing. Polymer clay is also suitable for miniature sculpting and allows you to work on fine details before baking.
Yes. Beginners can start with simple projects such as apples, carrots, tomatoes, and bananas. These require only basic shapes and a few decorative details.
Avoid making stems and leaves excessively thin, support delicate pieces while they harden, and follow the clay manufacturer’s curing instructions. Store finished miniatures somewhere they won’t be crushed or knocked over.