





Air-dry clay Christmas ornaments are a beautiful way to add a personal touch to your holiday decorations without needing an oven or pottery kiln. With a little clay, a rolling pin, and a few simple supplies, you can create everything from minimalist white stars to colorful candy canes and personalized keepsakes.
The best part is that you can customize each ornament to match your Christmas tree, give it as a handmade gift, or use it to decorate wrapped presents. Whether you love neutral farmhouse décor, colorful holiday decorations, or simple Scandinavian-inspired designs, these 12 air-dry clay Christmas ornaments offer plenty of inspiration for your next crafting session.
You can also explore 15 DIY Clay Ring Holder Ideas for a Pretty Jewelry Display for creative ways to organize your rings and add a handmade touch to your vanity or dresser.
Supplies for Making Air-Dry Clay Christmas Ornaments
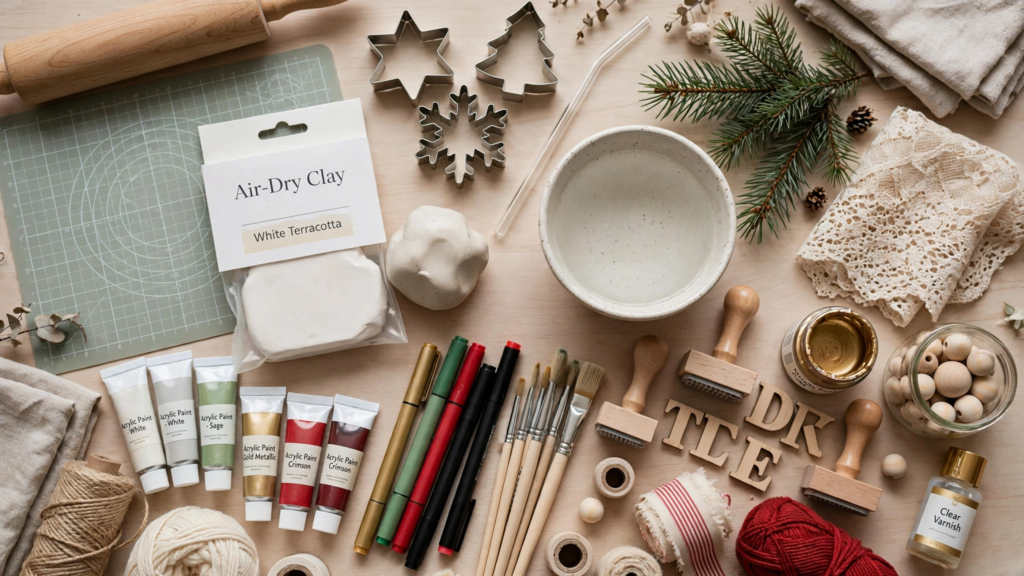
Before choosing your favorite designs, gather a few basic supplies. You probably won’t need every item on this list because the materials depend on the ornament style you want to create.
Basic supplies:
- Air-dry clay in white, terracotta, or your preferred colors
- Rolling pin or smooth glass bottle
- Silicone craft mat or another suitable work surface
- Christmas cookie cutters
- Drinking straw for making hanging holes
- Small bowl of water for smoothing edges
- Pine sprigs, leaves, lace, or textured fabric
- Acrylic paint or suitable craft markers
- Ribbon, twine, or yarn
- Paintbrushes and optional decorative details
Letter stamps, metallic paint, wooden beads, and clear craft sealer are optional extras. Follow the instructions for your particular clay and finishing products, especially when choosing paints and sealers.
You can also explore 15 DIY Clay Flower Decorations to Brighten Your Home for more creative clay craft ideas that add a handmade touch to your living space.
12 Air-Dry Clay Christmas Ornament Ideas
1. Botanical Imprint Clay Ornaments
Botanical ornaments are a lovely choice if you prefer natural textures and understated Christmas decorations. Pine needles, evergreen sprigs, and small leaves create delicate impressions that look beautiful against white or terracotta clay.
How to make them:
- Roll your clay into an even sheet approximately 1/4 inch thick.
- Place a small evergreen sprig or leaf on the surface.
- Gently roll over it or press it with your fingertips to transfer the texture.
- Remove the greenery carefully and cut out a circle, oval, or other simple shape.
- Make a hanging hole before the clay becomes too firm.
- Let the ornament dry completely before adding twine or ribbon.
Styling tip: Leave the ornament in its natural clay color and use a simple linen ribbon or jute twine. This style works especially well with wooden ornaments, dried orange slices, and warm white Christmas lights.

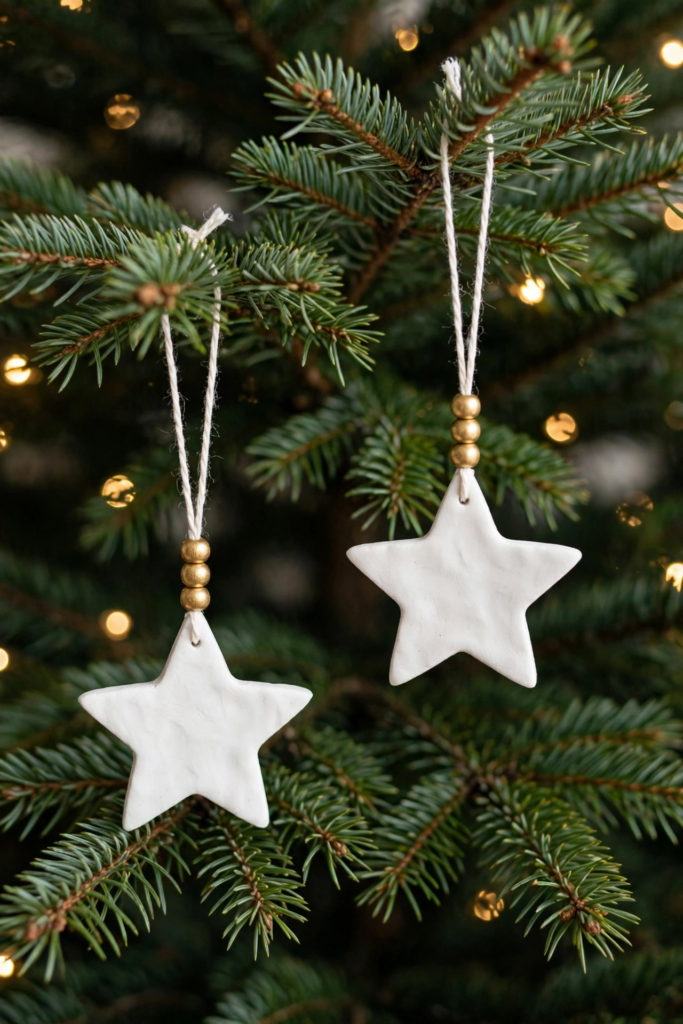
2. Minimalist White Star Ornaments
White star ornaments are perfect for a clean, timeless Christmas tree. Their simple shape looks elegant without much extra decoration, making this one of the easiest designs for beginners.
How to make them:
- Roll out white air-dry clay to an even thickness.
- Cut out stars using a cookie cutter.
- Smooth the points and edges with a slightly damp fingertip.
- Add a small hanging hole near the top of each star.
- Allow the pieces to dry fully.
- Finish with neutral ribbon or thin cotton twine.
Styling tip: Keep the stars unpainted for a soft, matte appearance. For a little contrast, add a tiny metallic accent after the clay has dried.
For even more beginner-friendly inspiration, check out 30 Air Dry Clay Ideas for Beginners That Are Cute, Creative, and Easy to Make and discover more fun projects to try.
3. Marbled Christmas Tree Ornaments
Marbled clay ornaments combine several colors in a single design. Red, green, and white create a traditional Christmas palette, while cream and sage green offer a softer look.
How to make them:
- Choose two or three compatible clay colors.
- Roll each color into a small rope.
- Twist the ropes together gently.
- Fold the twisted clay and roll it lightly to create a marbled pattern.
- Flatten the clay evenly and cut out Christmas tree shapes.
- Make the hanging holes and allow the ornaments to dry according to the clay instructions.
Styling tip: Avoid overmixing the colors. A few gentle twists help preserve the distinct marbled pattern rather than blending everything into one shade.

4. Candy Cane Clay Ornaments
Candy cane ornaments add a playful touch to a Christmas tree. Their curved shape and contrasting colors make them especially suitable for colorful or traditional holiday decorations.
How to make them:
- Roll red and white clay into thin ropes of similar length.
- Place the ropes next to each other and twist them together.
- Gently roll the twisted ropes to help the colors meet.
- Shape the clay into a candy cane with a rounded hook.
- Make a small hole near the top of the curved end.
- Let the ornament dry completely before threading ribbon through it.
Styling tip: Use red and white for a classic candy cane appearance, or try forest green and cream for a more subtle color combination.
If you’re new to clay crafting, explore 20 Easy Air-Dry Clay Crafts for Beginners to Make at Home for more simple and creative projects to try.

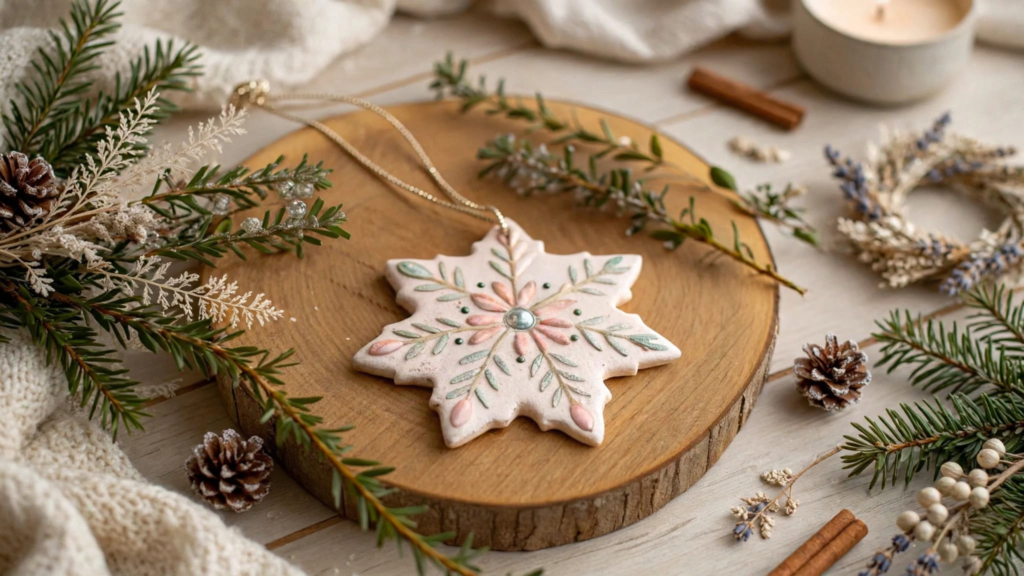
5. Textured Snowflake Ornaments
Snowflake ornaments bring a winter-inspired look to your Christmas tree. You can use a snowflake cookie cutter for a defined shape or create a simple round ornament with an embossed snowflake pattern.
How to make them:
- Roll white clay into an even sheet.
- Cut out snowflakes with a suitable cookie cutter.
- Alternatively, use a stamp to press a snowflake design into a round piece of clay.
- Smooth any rough edges without flattening the texture.
- Create a hanging hole and leave the ornaments to dry fully.
- Add a small amount of silver or pearly paint if desired.
Styling tip: Pair white snowflakes with silver ribbon, frosted greenery, or clear lights for a soft winter look.

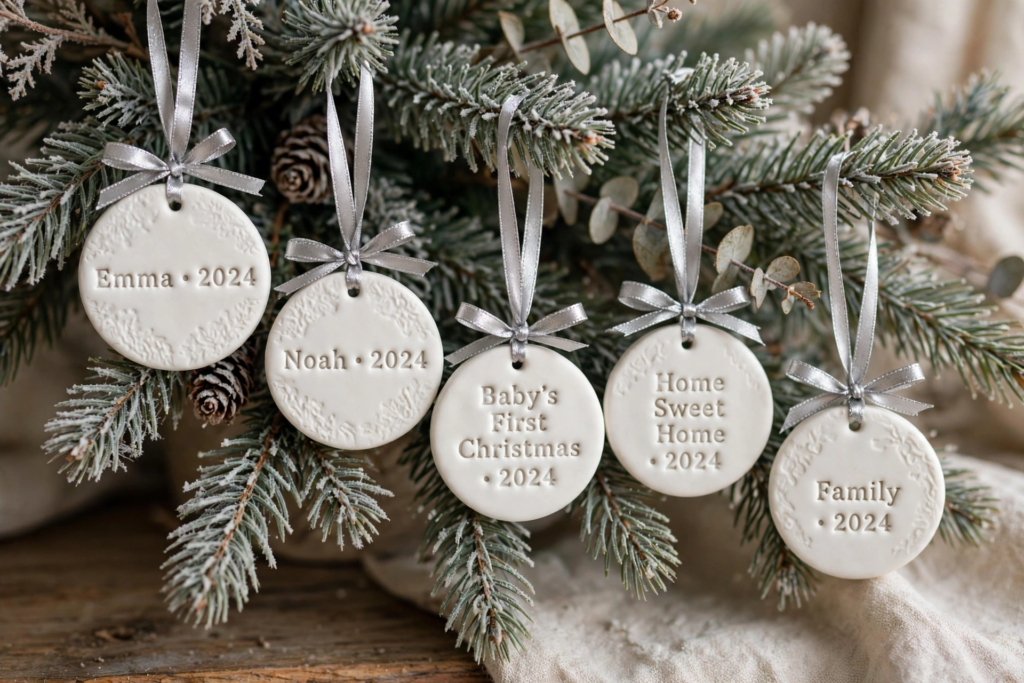
6. Personalized Name Christmas Ornaments
Personalized clay ornaments can celebrate a child’s first Christmas, a wedding, a new home, or a meaningful family tradition. They also make thoughtful handmade gifts because each piece can be customized for the recipient.
How to make them:
- Roll out the clay and cut circles, stars, or simple tree shapes.
- Press a name, initials, or a short year into the clay using letter stamps.
- Check the placement before the clay starts to firm up.
- Add a hanging hole and smooth the edges.
- Allow the ornament to dry completely.
- Add a ribbon that complements the design.
Styling tip: Use a small, simple design and leave enough room for the lettering to remain readable. For children, an initial or short name may be easier to fit than a long message.
7. Gingerbread-Inspired Clay Ornaments
Gingerbread-inspired ornaments bring the charm of holiday cookies to your tree without using edible dough. Brown or terracotta clay works well for this design, while white paint can imitate icing.
How to make them:
- Roll out brown or terracotta-colored clay.
- Cut out gingerbread people, stars, hearts, or house shapes.
- Smooth the edges and create a hanging hole.
- Allow the clay to dry fully.
- Use suitable white craft paint or markers to add simple lines, dots, and decorative details.
- Thread a coordinating ribbon through the hole.
Styling tip: Keep the painted details simple. Small dots, scalloped lines, and tiny hearts can create a charming gingerbread look without overcrowding the ornament.

8. Mini Christmas House Ornaments
Tiny house ornaments look especially charming on trees decorated in a neutral or Scandinavian-inspired style. You can use a house-shaped cookie cutter or cut a simple house silhouette by hand.
How to make them:
- Roll the clay into an even sheet.
- Cut out small house shapes.
- Use a wooden modeling tool or blunt stylus to mark windows and a door.
- Add a hanging hole above the roofline.
- Smooth the edges and allow the clay to dry completely.
- Paint the roof, door, or windows if you want more contrast.
Styling tip: Try warm white houses with beige details and natural twine. A few small house ornaments can create a coordinated village theme across the tree.

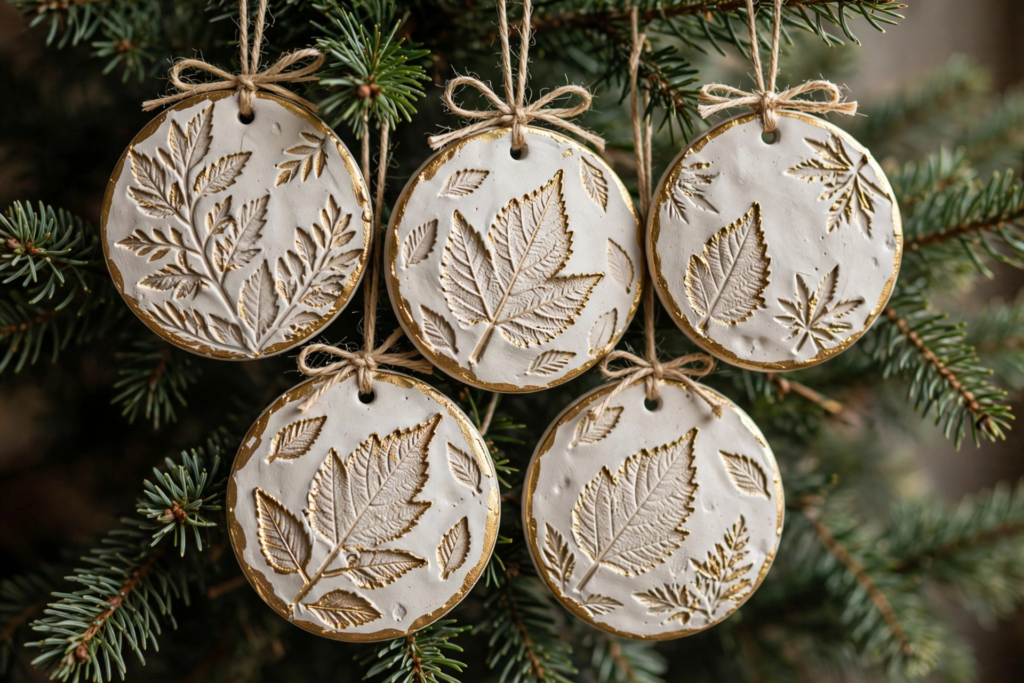
9. Gold-Accented Clay Ornaments
Gold accents can make simple clay ornaments look festive without requiring elaborate designs. This technique works particularly well with round ornaments, stars, and botanical impressions.
How to make them:
- Cut your preferred shapes from white or terracotta clay.
- Add a leaf impression, stamp, or simple embossed pattern while the clay is still workable.
- Make the hanging holes and allow the ornaments to dry completely.
- Apply a small amount of suitable gold craft paint to selected areas.
- Let the finish dry according to the paint manufacturer’s instructions.
- Add ribbon or twine.
Styling tip: Highlight only the edges, raised details, or a small section of the ornament. This keeps the design balanced and lets the clay texture remain the main feature.
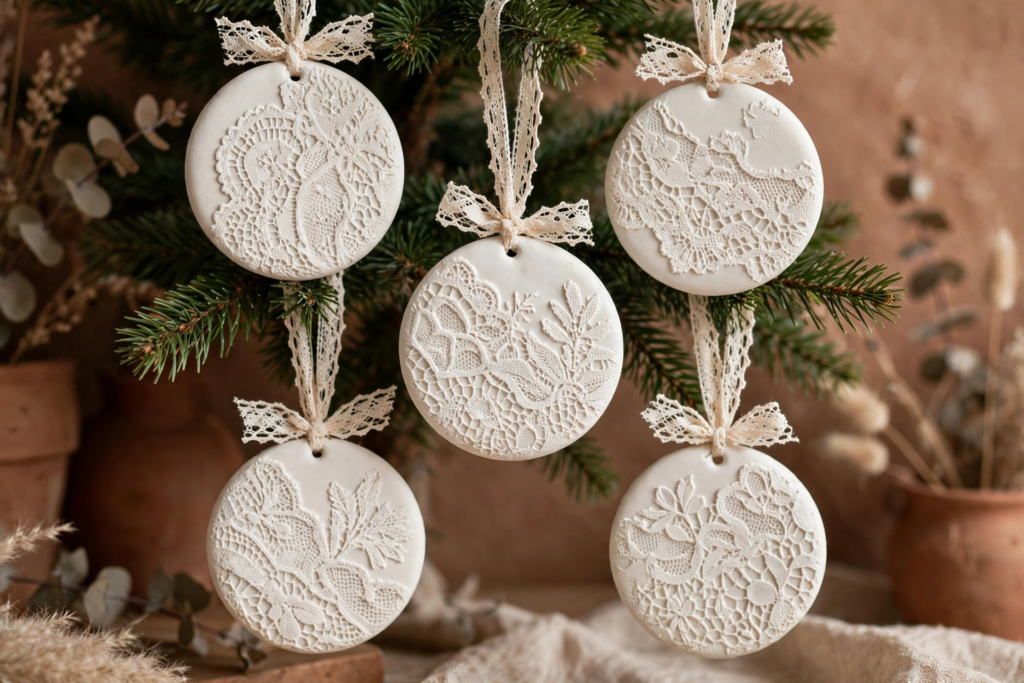
10. Lace-Imprint Clay Ornaments
Lace-imprint ornaments are a lovely option when you want detailed texture without hand-painting every piece. Lace fabric, textured ribbon, or a small doily can leave a decorative pattern in soft clay.
How to make them:
- Roll the clay into a smooth, even sheet.
- Lay a clean piece of lace or textured fabric over the surface.
- Press gently and evenly with a rolling pin.
- Lift the fabric carefully to reveal the impression.
- Cut out circles, stars, or other shapes.
- Add hanging holes, smooth the edges, and let the pieces dry fully.
Styling tip: Use a simple shape and let the lace pattern do the work. White clay with cream ribbon creates a delicate look, while terracotta clay gives the ornament a warmer finish.
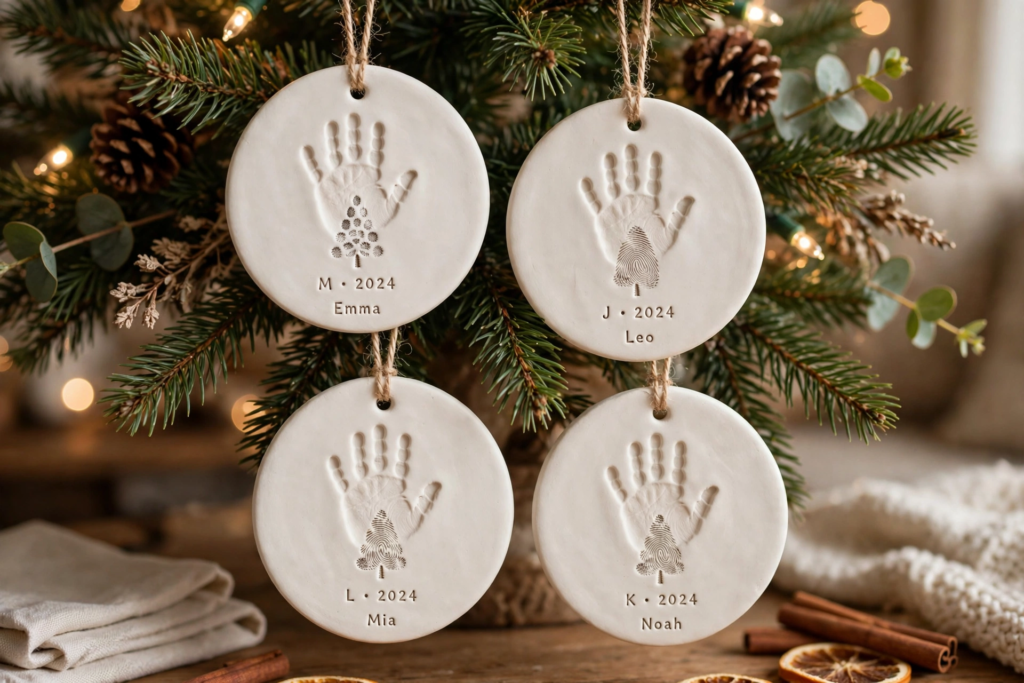
11. Handprint and Fingerprint Keepsake Ornaments
Handprint and fingerprint ornaments can turn a simple Christmas craft into a meaningful family keepsake. A child’s handprint, a few fingerprints arranged like a small tree, or a set of family initials can make the ornament personal.
How to make them:
- Roll the clay slightly thicker than you would for a basic flat ornament if needed to capture the impression.
- Press a clean hand or fingertip gently into the clay.
- Cut the surrounding clay into a circle or another suitable shape.
- Add the year or a short name if space allows.
- Make a hanging hole and smooth the edges.
- Allow the ornament to dry completely before decorating it.
Styling tip: Keep the impression clear and avoid adding too many decorative details. An understated finish helps the keepsake remain the focus.
Safety note: Adults should help young children with cutting tools and other potentially sharp supplies. Follow the clay manufacturer’s age guidance and supervise the project.
12. Clay Gift-Tag Ornaments
Gift-tag ornaments can decorate your Christmas tree and your wrapped presents. They are especially useful when you want a handmade gift that also serves as a personalized finishing touch.
How to make them:
- Roll out the clay and cut small rectangles, circles, or tag shapes.
- Press a name, initial, or short holiday message into the clay.
- Create a hole near the top for the ribbon.
- Smooth the edges and allow the clay to dry completely.
- Add small painted details if desired.
- Tie the tag to a gift or hang it on the tree.
Styling tip: Use neutral clay, simple lettering, and thin ribbon for a refined gift-wrap look. You can make a coordinated batch with different names but the same shape and finish.
Before you begin making your ornaments, check the manufacturer’s instructions for drying times and handling tips, as different clay products may require different care. You can also explore Crayola’s air-dry clay guide for additional information about working with air-dry clay.

How to Make Air-Dry Clay Christmas Ornaments
Most flat clay ornaments follow the same basic process, even when their designs are different.
Step 1: Prepare your workspace. Cover a clean, flat surface with a suitable craft mat or another nonstick work surface. Keep unused clay covered so it does not dry out while you work.
Step 2: Roll the clay evenly. A thickness of approximately 1/4 inch is a useful starting point for many flat ornaments. Follow the instructions supplied with your particular clay, because formulations differ.
Step 3: Add the design. Press in leaves, lace, stamps, or other textures before the clay becomes too firm. Use light, even pressure to avoid tearing the surface.
Step 4: Cut out the shapes. Use cookie cutters or a suitable craft tool. Remove the surrounding clay carefully and smooth rough edges with a slightly damp fingertip.
Step 5: Create the hanging hole. Use a drinking straw or another suitable tool to make a hole near the top. Leave enough clay around the opening so the ornament is less likely to break when you thread the ribbon.
Step 6: Dry the ornaments completely. Place them flat in a well-ventilated area away from direct heat. Turn them over when appropriate so both sides can dry evenly, following the clay manufacturer’s instructions.
Step 7: Decorate and finish. Once the clay is completely dry, add suitable paint, markers, or other decorations. Let each finish dry before handling the ornaments.
Step 8: Add the hanger. Thread ribbon, twine, or yarn through the hole and secure it with a knot or loop.

How Long Do Air-Dry Clay Christmas Ornaments Take to Dry?
Air-dry clay ornaments may need around 24 to 72 hours or longer to dry, depending on their thickness, the type of clay, room humidity, and airflow. The drying time printed on your clay packaging should take priority over a general estimate.
Thin ornaments may dry sooner than thicker pieces, but they should not be painted or handled as finished decorations simply because the surface looks dry.
To check whether an ornament is ready:
- Look for a consistent color across the piece.
- Check that it feels firm rather than soft or damp.
- Follow the manufacturer’s instructions for determining when the clay is fully dry.
- Allow additional drying time if you are unsure.
Avoid placing ornaments directly beside a radiator or using intense heat to speed up drying. Rapid or uneven moisture loss can contribute to cracking or warping.
Tips for Preventing Cracks and Breakage
Air-dry clay ornaments are decorative pieces, so gentle handling matters. A few simple precautions can help you achieve a cleaner finish.
- Keep the thickness consistent. Uneven areas may dry at different rates.
- Smooth edges while the clay is workable. This is easier than trying to repair rough edges after the ornament hardens.
- Make the hanging hole before the clay dries completely. The hole should be large enough for the ribbon but not so close to the edge that it weakens the ornament.
- Handle partly dried pieces gently. The hanging-hole area can be particularly vulnerable to breakage.
- Dry the ornaments evenly. Avoid rushing the process with direct heat.
- Keep unused clay sealed. Exposed clay can become difficult to shape as it dries.
- Store finished ornaments carefully. Wrap them individually in soft tissue paper and keep them in a sturdy box between holiday seasons.
Painting and Finishing Your Clay Ornaments
Once your ornaments are fully dry, you can leave them natural or decorate them to match your Christmas theme.
Here are a few finishing options:
- Natural matte finish: Leave white or terracotta clay unpainted for a simple handmade look.
- Metallic accents: Use gold or copper paint to highlight selected details.
- Traditional Christmas colors: Add red, green, or white paint to candy canes, trees, and gingerbread-inspired designs.
- Personalized details: Use suitable markers to add names, initials, or dates.
- Protective finish: If desired, apply a compatible craft sealer according to its label.
A clear sealer may help protect the surface from handling and minor marks, but it does not make air-dry clay waterproof or unbreakable. Keep finished ornaments away from moisture and handle them with care.
Conclusion
Air-dry clay Christmas ornaments are a simple way to make your holiday decorations more personal. From botanical impressions and minimalist stars to colorful candy canes and family keepsakes, there is a design for almost every decorating style.
Start with a few basic shapes, experiment with different textures, and choose finishes that complement your Christmas tree. With careful shaping, complete drying, and gentle storage, your handmade ornaments can become decorations you look forward to bringing out each holiday season.
FAQ section
Yes. Air-dry clay works well for flat, decorative Christmas ornaments because it hardens at room temperature without an oven or kiln. Make the hanging holes before the clay becomes too firm, allow each piece to dry completely, and handle the finished ornaments gently.
You can make Christmas tree ornaments, snowflakes, candy canes, miniature houses, personalized gift tags, name decorations, and keepsake handprints. You can also use small clay pieces as decorative additions to wrapped gifts.
Personalized ornaments, initial decorations, family handprint keepsakes, botanical ornaments, and handmade gift tags are thoughtful options. Choose a design that reflects the recipient’s interests or a meaningful family memory.
Roll air-dry clay into an even sheet, press in a design, cut out the desired shape, and make a hole for hanging. Smooth the edges, let the ornament dry fully according to the clay instructions, and finish it with paint or ribbon if desired.
Many flat ornaments need approximately 24 to 72 hours or longer. The actual time depends on clay thickness, humidity, airflow, and the clay formulation. Follow the package directions and make sure the ornament is completely dry before painting.
Yes. Once the clay is completely dry, you can use a suitable craft paint or marker to add color and details. Let the finish dry fully before handling, and use a compatible sealer if you want additional surface protection.