


Looking for unique air-dry clay crafts that you can make without using a pottery wheel and kiln? The medium is perfect for creating decorations, gifts, jewelry holders, ornaments, and many other small items at home.
The advantage of air-dry clay is that even a complete beginner can achieve nice results using simple tools and basic techniques. Many current beginner’s guides focus on making small trinket dishes, pinch pots, jewelry organizers, ornaments, and other home accessories.
If you are a complete novice or want to have fun making something creative this weekend, check out these 20 easy air dry clay crafts. They include small kitchenware, magnets, personalized decorations, mini-gifts, and much more.
A pro tip: remember that air-dry clay should be treated as a decorative material unless the manufacturer states that it is food-safe. Sealing the surface will make it more water-resistant but not completely waterproof or moisture-proof.
For even more beginner-friendly inspiration, check out 30 Air Dry Clay Ideas for Beginners That Are Cute, Creative, and Easy to Make and discover more fun projects to try.
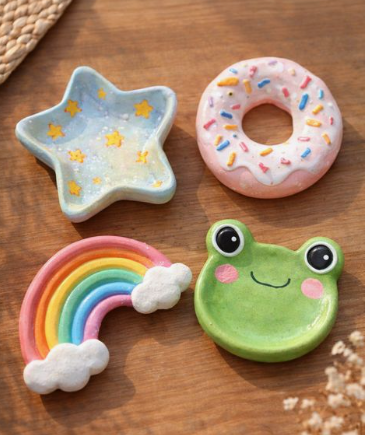
What You Need to Start Making Air-Dry Clay Crafts
You don’t need a professional pottery setup to begin. For many beginner projects, a small collection of basic supplies is enough:
- Air-dry clay
- Rolling pin or smooth bottle
- Craft knife or blunt modeling tool
- Toothpicks or wooden skewers
- Small bowl of water
- Sponge
- Acrylic paint
- Paintbrushes
- Sandpaper for smoothing completely dry pieces
- Varnish or compatible acrylic sealer
- Cookie cutters or household objects for shaping and texture
Some air-drying clays are designed specifically for hobby and educational use and can be painted, sanded, drilled, and varnished after hardening. Always follow the instructions for the particular clay you purchase.
20 Easy Air-Dry Clay Crafts
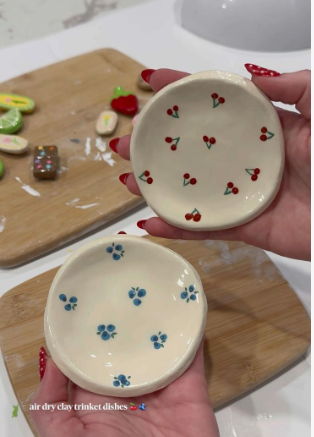
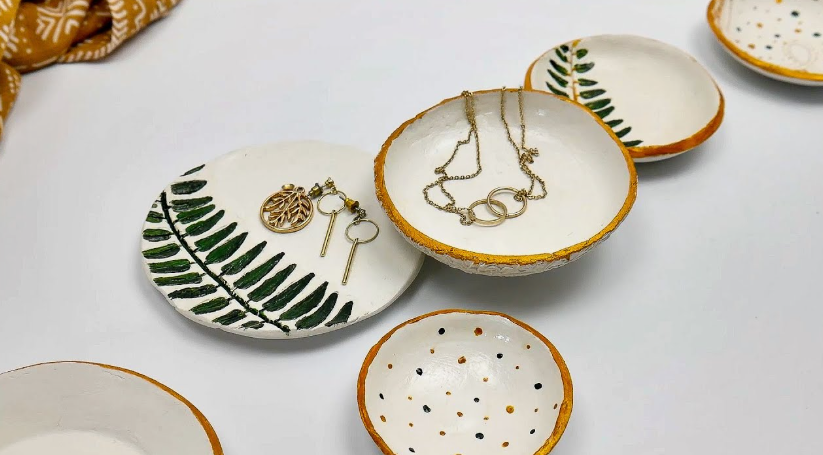
1. Make a Minimalist Trinket Dish
A small trinket dish is among the easiest air dry clay crafts to make for beginners.
Roll out a small portion of clay, cut out a simple circle or an organic shape, and simply lift the edges to form a dish. The sides do not have to be completely straight.
Once dry, paint the air dry clay crafts dish in a light color, such as cream, beige, terracotta, or gray. You can add a few dots, stripes, a painted border, or your monogram to its surface.
Use your new dish to hold hairpins and clips, coins, and your favorite small jewelry.
2. Create a Leaf-Imprint Jewelry Tray
Add a natural element to your decor with a clay tray.
Take a clean leaf, place it on a blob of soft clay, then roll the leaf with a rolling pin to imprint leaf texture on the clay.
Then carefully lift the leaf out of the clay.
You can let the leaf texture be the only feature of the piece, or you can paint the raised ridges of the leaf after the clay has dried.
This is a great way to practice working with texture in air dry clay without having to sculpt something elaborate.
If you’re looking for more quick and creative projects, explore 20 Crafts You Can Finish in One Hour for easy DIY ideas you can complete in a short time.
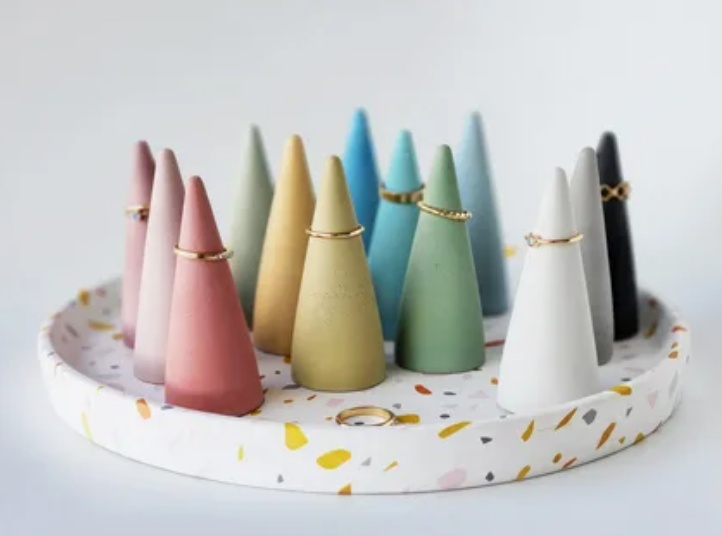
3. Shape a Simple Clay Ring Cone
Turn a bit of clay into a jewelry organizer by making this ring cone. Roll the clay into a small cone shape, then form a stable base to allow it to stand upright. Sand any rough edges and paint if desired.
A monochrome, speckled, or contrasting base can all work beautifully for these air dry clay crafts. Set them on a dresser or nightstand with a few matching cones to create a simple, handmade jewelry display.
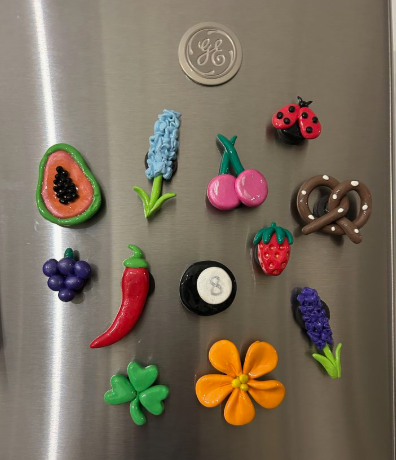
4. Make Personalized Initial Magnets
Turn small clay shapes into personalized refrigerator magnets.
Cut out circles, hearts, stars, flowers, or other simple shapes. Before they dry, press an initial or simple pattern into the clay.
Once they are dry, paint them in coordinating colors and attach appropriate craft magnets according to the magnet manufacturer’s instructions.
This is also a great handmade gift, since you can make one for each family member, friend, or co-worker.
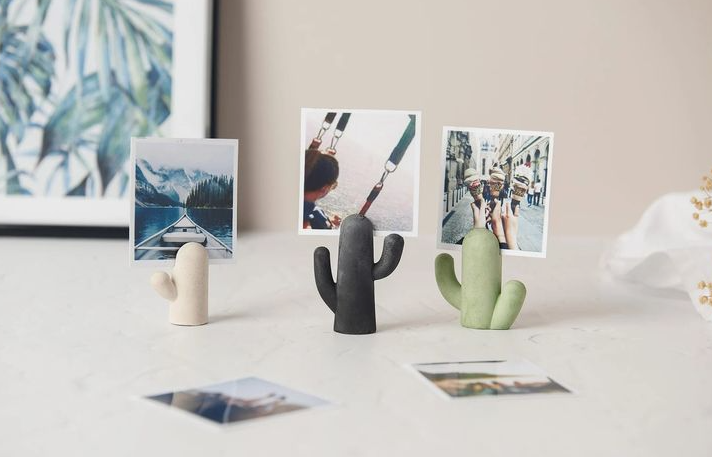
5. Create a Mini Photo Holder
Make a small clay base with a simple slot for holding a photograph, note, or small art print.
The base can be a rounded pebble shape, arch, heart, cloud, or geometric form. Add texture with a fork, lace, fabric, or a textured household object while the clay is still soft.
For a modern look, keep the clay neutral and let the photograph provide the color.
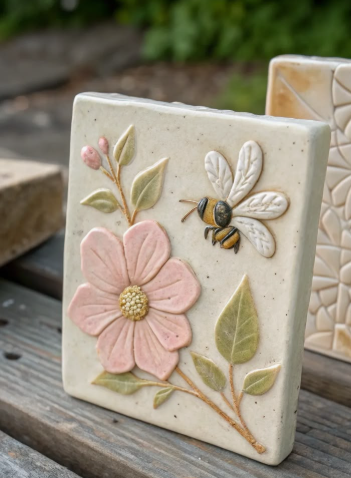
6. Design a Decorative Wall Tile
Flat clay slabs are great for experimenting.
Roll out the clay and cut your desired shape from the slab, such as a square, rectangle, arch, or another creative form. Decorate your air dry clay crafts with botanical imprints, lines, dots, or another pattern that matches your style.
After drying, you can paint the surface of the tile or leave it natural.
A few such tiles can be placed on a shelf or a wall (with special mounts) to create a gallery of handcrafted mini-works of art.
7. Make a Scalloped Clay Garland
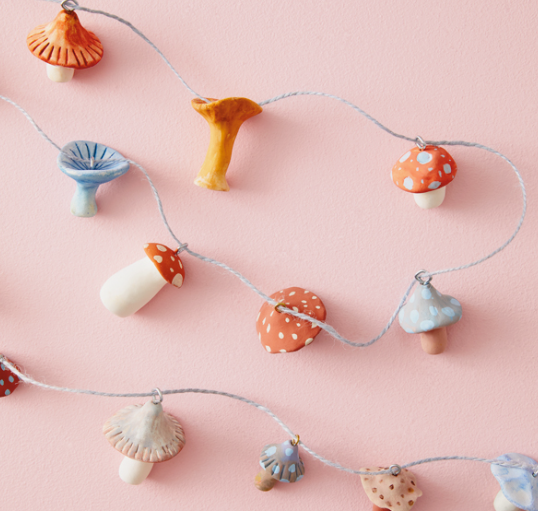
Create a beautiful light garland using repeating shapes of clay.
Roll out clay and cut shapes such as circles, arches, flowers, hearts, scallops or other designs. Make sure to cut away material creating the hole in the shape you desire before the clay is completely dry, so that they can be strung together later.
Once the shapes are completely dry, paint them with one color or multiple coordinating colors. String the painted shapes together using cord or ribbon.
Display your beautiful, lightweight garland on a shelf, desk, bedroom wall or holiday display.
8. Create Air-Dry Clay Ornaments
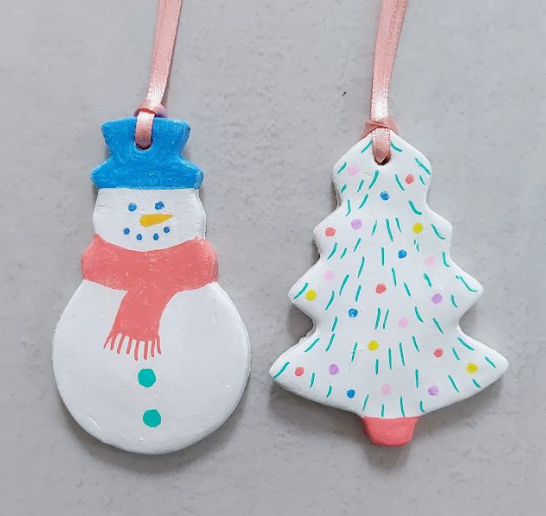
Air-dry clay ornaments are simple, customizable, and useful throughout the year.
Roll the clay flat and cut shapes using cookie cutters or handmade templates. Add names, dates, stars, leaves, hearts, initials, or stamped patterns.
Make a small hole near the top while the clay is still soft. After drying and decorating, add ribbon or twine.
You can create:
- Christmas ornaments
- Birthday decorations
- Baby keepsakes
- Initial ornaments
- House-shaped ornaments
- Seasonal decorations
- Gift tags
Keep the designs simple if you’re a beginner. Clean shapes often look more polished than overly complicated ones.
9. Make Tiny Bud Vases for Dried Flowers
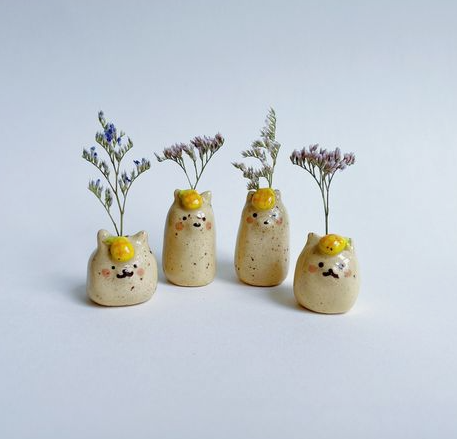
Small clay vessels may be used to make beautiful shelf decorations with dried flowers.
Make little vases or bottles of shapes and let them dry. You can paint stripes, carve lines, flick specks, or paint botanicals on them to decorate.
Since air-dry clay is not necessarily waterproof, make sure to use it for dried or artificial flowers rather than filling it with water unless you are precisely using an approved system for the specific clay you selected. Several makers and suppliers of air-dry clay explicitly mention that their finished work is not waterproof or fit to hold liquid.
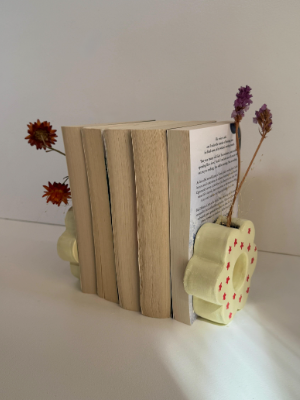
10. Build Decorative Bookends
Create chunky clay shapes that complement your bookshelf.
You can make simple geometric blocks, arches, abstract forms, or miniature sculptures. The important part is creating enough size and weight for the intended decorative purpose and allowing the clay to dry thoroughly.
For a stronger visual effect, make a matching pair.
Paint both pieces the same color or create a two-tone design using complementary shades.
11. Make Botanical Clay Plaques
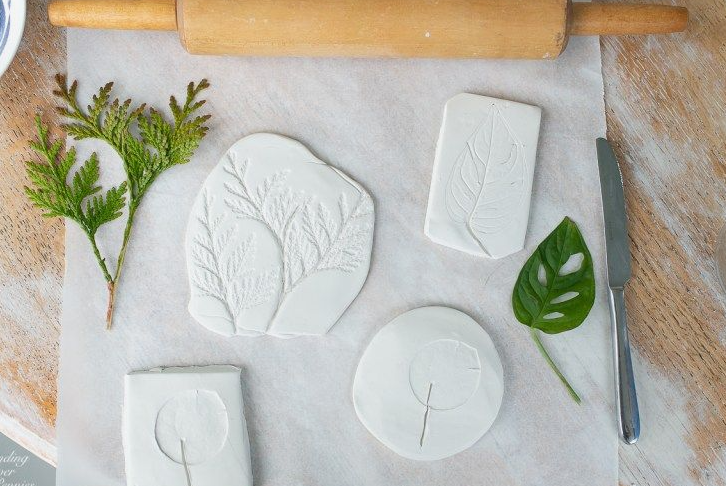
Botanical designs are a great addition to a simple clay surface.
For this one-of-a-kind decoration, roll out a slab and press leaves and small flowers, as well as other items with an interesting texture, into the clay. Gently remove the items before the clay can dry.
After it dries, you can leave it as it is, lightly brush the top of raised features with a paintbrush, or make a two-tone design.
This unique plaque would look great displayed on a shelf, desk, or even a gallery wall.
12. Create a Small Desk Organizer
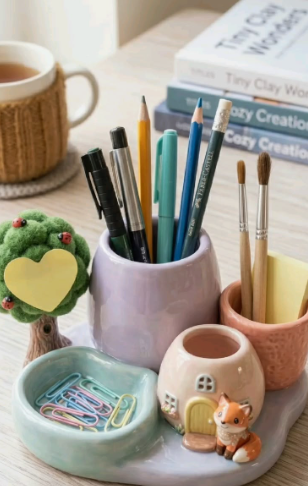
Use air-dry clay to make a simple holder for lightweight desk supplies.
Instead of attempting a large container, start with a small open shape for items such as:
- Paper clips
- Erasers
- Washi tape
- Small brushes
- Decorative pencils
- Craft supplies
Keep the walls reasonably even and avoid making them unnecessarily thin. Once dry, sand rough edges gently and add paint.
A simple cream, white, terracotta, or stone-inspired finish can give the organizer a modern handmade appearance.
13. Make a Beaded Catchall Dish
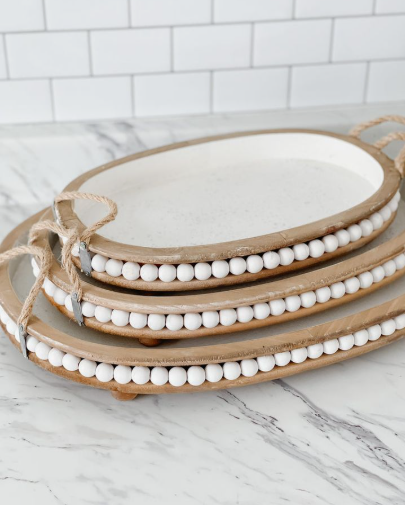
Make a catchall tray more interesting by adding beads to its edge.
First, make a simple shallow dish out of clay. While it’s still wet, push small craft beads around the edge or make a pattern with them. If you want something less startling, use beads the same color as your paint. For more fun, choose several colors.
The dish you’ve made will hold small trinkets, not liquids, so don’t use it for food or drinks.
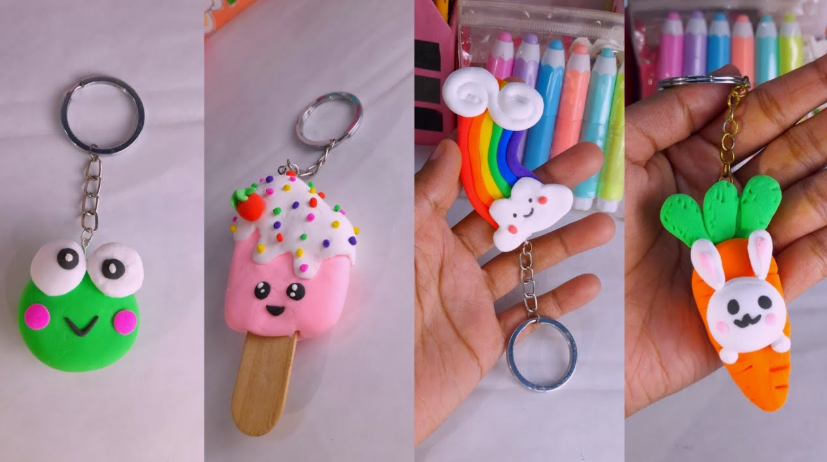
14. Create a Clay Keychain
Small clay shapes can easily become personalized accessories.
Cut out a heart, flower, initial, star, animal, or geometric shape. Make the hole for the keychain hardware before the clay dries.
Once completely dry, paint and decorate your shape, then attach suitable hardware.
This is also a good way to use leftover pieces of clay instead of throwing them away.
15. Sculpt Miniature Clay Figures
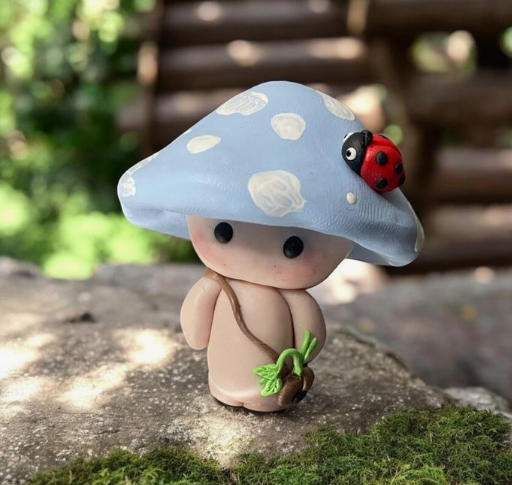
If you enjoy tiny details, try making miniature figures.
Start with simple forms such as:
- Mushrooms
- Flowers
- Clouds
- Tiny houses
- Cats
- Fruits
- Abstract faces
- Small plants
Don’t worry about making every detail perfectly symmetrical. Miniature projects are especially fun because small imperfections can add personality.
If you’re new to sculpting, begin with basic geometric forms rather than complicated characters.
16. Make a Decorative Planter Cover
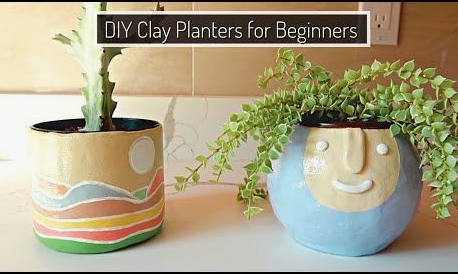
Create a decorative clay sleeve or cover around a suitable existing plant container.
This approach is more practical than relying on an air-dry clay vessel to hold wet soil or standing water. Air-dry clay is not automatically waterproof, and some manufacturers recommend indoor decorative use because moisture can damage finished pieces.
Decorate the outer piece with arches, stripes, dots, botanical patterns, or a textured finish.
Use a separate waterproof plant pot inside it when appropriate.
17. Make a Handmade Bookmark
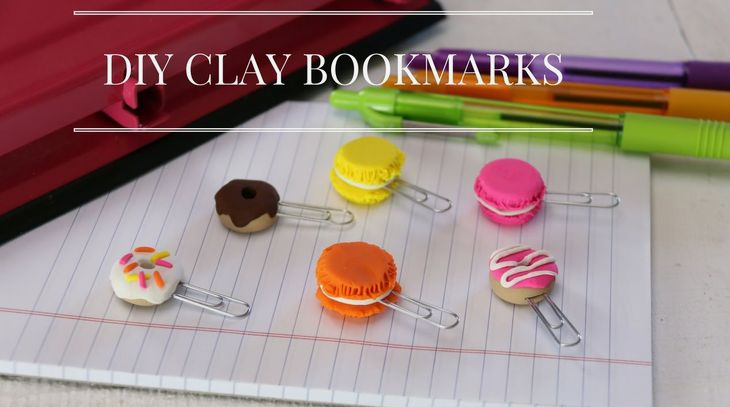
Create a thin decorative clay pendant that can be attached to ribbon or cord.
Simple shapes work best for bookmarks because they keep the project lightweight. Try a leaf, flower, heart, moon, star, or initial.
Add a small hole before the clay dries, then paint the finished piece and attach it to a ribbon.
This makes a thoughtful handmade gift for readers, teachers, students, or book lovers.
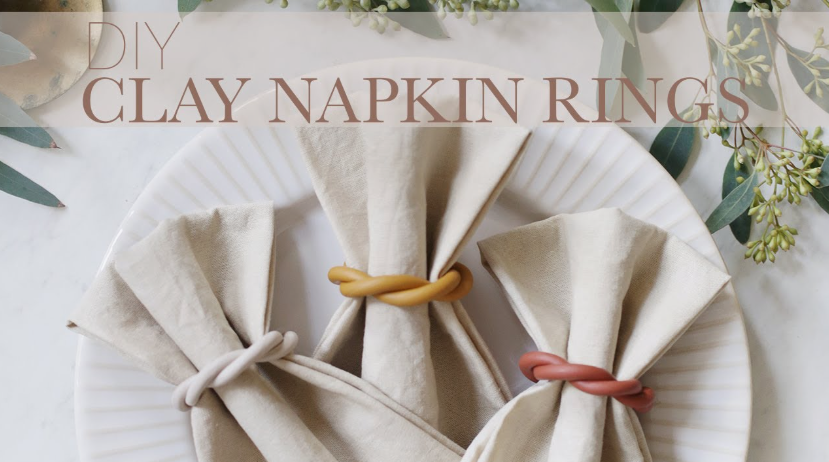
18. Create Clay Napkin Rings
For a decorative table setting, shape clay into simple rings.
You can make smooth bands, textured rings, floral shapes, or geometric designs. Personalize them with initials or use different colors for different guests.
Because air-dry clay products vary and aren’t generally intended for food or liquid contact, keep the finished pieces decorative and follow the manufacturer’s instructions for the particular clay you’re using.
19. Design Colorful Clay Coasters
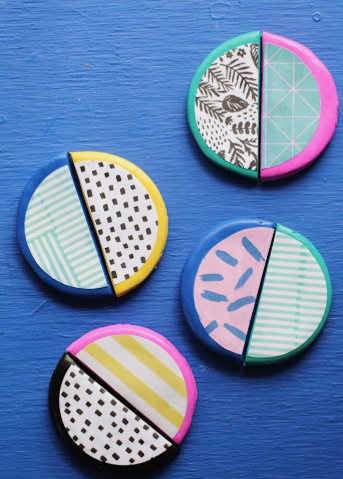
Coasters are another beginner-friendly project because they use relatively simple flat shapes.
Roll the clay evenly and cut circles, squares, arches, or organic forms. Add pressed textures or painted patterns after the pieces have dried.
For an attractive set, choose one design and repeat it across several pieces.
However, remember that air-dry clay isn’t automatically waterproof. A coaster exposed to frequent moisture may not perform like a fired ceramic coaster, so treat this as a decorative craft and follow the specifications of your chosen clay and sealer.
If you enjoy simple DIY projects, explore 25 Easy Paper Crafts: Simple DIY Ideas for Beginners for more creative and budget-friendly craft inspiration.
20. Make a Personalized Keepsake Box
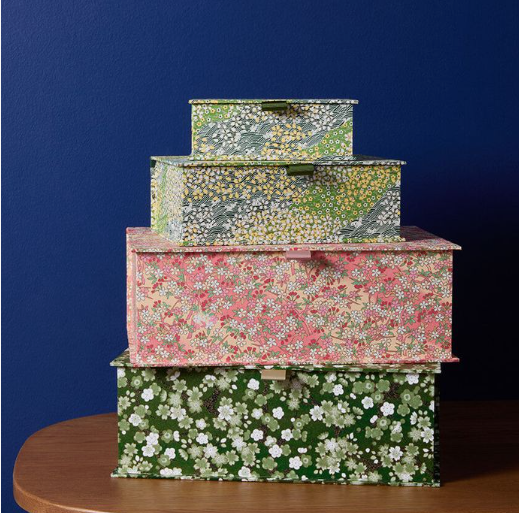
For a more ambitious beginner project, create a small decorative keepsake box.
Build a simple base and separate lid rather than trying to sculpt a complicated hinged box. Keep the walls consistent and allow each component to dry properly before assembling or decorating.
Add:
- Initials
- Flowers
- Geometric patterns
- Painted borders
- Small clay decorations
- A simple name or date
Use it to store tiny mementos, jewelry, notes, or other lightweight keepsakes.
Before sealing your finished air dry clay crafts, check the manufacturer’s instructions to make sure the clay and sealer are compatible. For additional guidance, see Crayola’s air-dry clay sealing tips.
How to Get Better Results With Air-Dry Clay
The easiest way to improve your projects is to focus on the basics before adding complicated details.
Keep the Clay at an Even Thickness
Very thin areas can be more fragile, while thick pieces can take longer to dry.
Try to keep slabs and walls reasonably consistent throughout the project.
Smooth the Surface While You Work
Use slightly damp fingers or a sponge to smooth fingerprints and small imperfections.
Don’t add excessive water. The goal is to refine the surface, not saturate the clay.
Join Separate Pieces Carefully
When attaching clay components, roughening the contact areas and using the appropriate clay-joining method can help create a stronger connection.
For larger or more detailed projects, follow the instructions supplied with your specific clay.
Let Pieces Dry Naturally
Drying time varies depending on the clay, thickness, size, humidity, and environment.
For example, Crayola says its Air-Dry Clay should be completely dry after about 72 hours before sealing. Other air-dry clay products may have different drying instructions, so always check the packaging.
Avoid assuming that a piece that feels dry on the outside is completely dry throughout.
Paint Only After the Clay Is Dry
Acrylic paint is a common option for decorating hardened air-dry clay. FIMOair also supports several painting and finishing approaches after the clay has hardened.
Test your paint or varnish on a small sample first if you’re unsure how the materials will react.
Common Air-Dry Clay Mistakes to Avoid
Making Pieces Too Thin
Extremely thin pieces can be fragile. Give delicate projects enough material to handle normal use.
Drying Pieces Too Quickly
Trying to force the drying process with heat can contribute to cracking. One air-dry clay supplier specifically recommends natural air drying rather than using an oven to speed the process.
Adding Too Much Water
Water can help smooth clay, but too much can make the surface difficult to control.
Painting Before the Clay Is Completely Dry
If moisture remains inside the piece, finishing problems may occur. Allow the project to dry according to the clay manufacturer’s directions.
Assuming Sealer Makes Clay Waterproof
This is one of the biggest misconceptions.
Crayola explicitly states that sealing its Air-Dry Clay does not make the piece waterproof, while other air-dry clay suppliers similarly describe sealed pieces as water-resistant rather than fully waterproof.
Using Air-Dry Clay for Food
Do not assume that a painted or sealed clay bowl, mug, plate, or spoon rest is food safe.
Multiple air-dry clay manufacturers and suppliers state that their products are not suitable for food or drink contact.
Is Air-Dry Clay Waterproof or Food Safe?
Generally, you should not assume that air-dry clay is waterproof or food safe.
Air-dry clay hardens without the high-temperature firing process used for traditional ceramic pieces. Because products vary, the safest approach is to follow the specific manufacturer’s instructions rather than assuming that a particular sealant changes the clay’s intended use.
For example, Crayola recommends indoor display for its air-dry clay because sealed pieces are still not waterproof.
For that reason, the safest projects in this list are primarily decorative items, organizers, ornaments, jewelry holders, and keepsakes.
If a project will come into contact with food, drinking water, standing water, outdoor weather, or heat, check the exact clay product and finishing system before using it for that purpose.
Which Air-Dry Clay Craft Should You Try First?
If this is your first project, start with something that doesn’t require complicated construction.
Easiest
- Trinket dish
- Initial magnet
- Bookmark
- Botanical plaque
- Simple ornament
Easy With a Little More Detail
- Ring cone
- Photo holder
- Jewelry tray
- Garland
- Miniature sculpture
Best for a Weekend Project
- Keepsake box
- Decorative bookends
- Desk organizer
- Planter cover
- Larger wall decor
Starting small helps you learn how your particular clay behaves before moving into more complicated designs.
Final Thoughts
These 20 easy air dry clay crafts show how much you can create from a simple block of clay. You can make personalized gifts, small organizers, decorative pieces, jewelry holders, ornaments, and colorful home accents without setting up a traditional pottery studio.
Start with a simple shape, experiment with texture, and don’t worry about making everything perfectly symmetrical. The handmade character is part of what makes clay crafts special.
Most importantly, learn the limitations of your particular clay. Dry it properly, follow the manufacturer’s finishing instructions, and don’t assume that paint or sealer makes an air-dry clay piece waterproof or food safe.
If you enjoy beginner-friendly clay projects, you can also explore 30 Air Dry Clay Ideas for Beginners That Are Cute, Creative, and Easy to Make for even more project inspiration.
FAQs
What is the easiest thing to make with air-dry clay?
A small trinket dish, pinch-style tray, magnet, ornament, or simple clay plaque is a good starting point because these projects use basic shapes and don’t require complicated construction.
Does air-dry clay need an oven?
No. Air-dry clay is designed to harden through air drying, although drying times vary by product and project thickness. FIMOair, for example, is specifically designed as an air-drying modeling clay.
Can you paint air-dry clay?
Yes. Once completely hardened, many air-dry clay products can be painted. Acrylic paint is a commonly used option, but always check the instructions for your specific clay.
Is air-dry clay waterproof?
Not necessarily. Sealing can improve resistance to moisture, but it does not automatically make air-dry clay waterproof. Crayola specifically states that sealing its air-dry clay does not waterproof it.
Is air-dry clay food safe?
Do not assume that it is. Several manufacturers and suppliers state that their air-dry clay products are not food safe, even when sealed.
Why does air-dry clay crack?
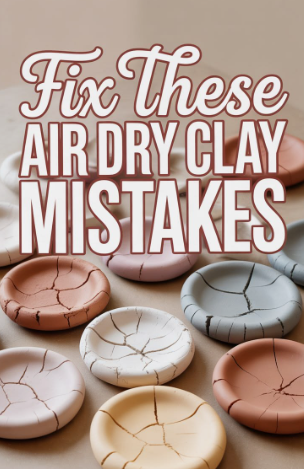
Cracking can be influenced by factors such as uneven thickness, drying conditions, construction, and the specific clay formulation. Keeping pieces reasonably even and allowing them to dry naturally can help reduce common problems.
How long does air-dry clay take to dry?
There is no single drying time for every product. Thickness, size, humidity, and the clay formulation all matter. Crayola recommends allowing its Air-Dry Clay to dry completely for about 72 hours before sealing.
Can beginners use air-dry clay?
Yes. Beginner tutorials commonly recommend simple projects such as pinch pots, trinket dishes, jewelry holders, and other small decorative pieces.