


Looking for a creative way to organize your favorite rings? These 15 DIY clay ring holder ideas offer plenty of inspiration, from minimalist ring cones and delicate flower dishes to playful cactus shapes and elegant gold-trimmed designs. Whether you enjoy simple crafts or want to try something more decorative, you can customize a clay holder to suit your style.
Air-dry clay is a convenient option for many beginner projects because it hardens without kiln firing. With a little clay, a few basic tools, and your favorite colors, you can create a handmade accessory for your bedroom vanity, bedside table, or bathroom shelf. Choose a design that matches your decor, then personalize it with paint, texture, or metallic accents.
You can also explore 15 DIY Clay Flower Decorations to Brighten Your Home for more creative clay craft ideas that add a handmade touch to your living space.

15 DIY Clay Ring Holder Ideas
1. Minimalist DIY Clay Ring Holder Ideas: Simple Cone Design
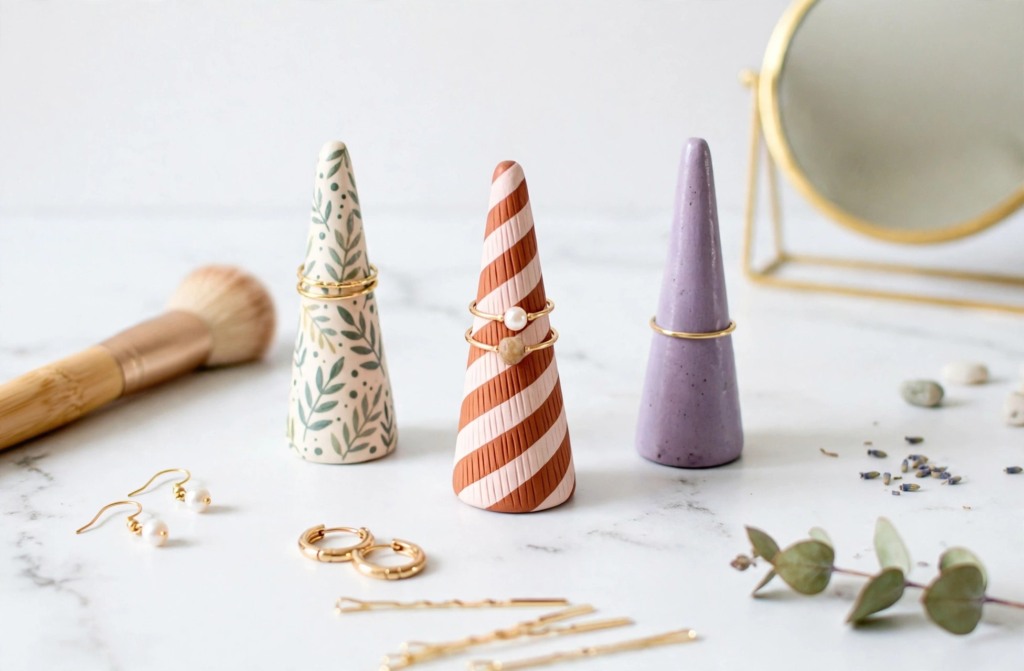
A simple clay cone is an excellent choice if you prefer clean lines and understated decor. Its narrow, rounded shape lets you slide rings over the top, while the flat base helps it stand upright.
Shape the clay into a short cone with a slightly rounded tip and a stable bottom. Once it has hardened, smooth any rough areas and paint it in white, cream, beige, or soft gray.
Styling tip: Place a small cone on a wooden tray or neutral bedside table for a simple, modern look.
2. Flower-Shaped DIY Clay Ring Holder Ideas
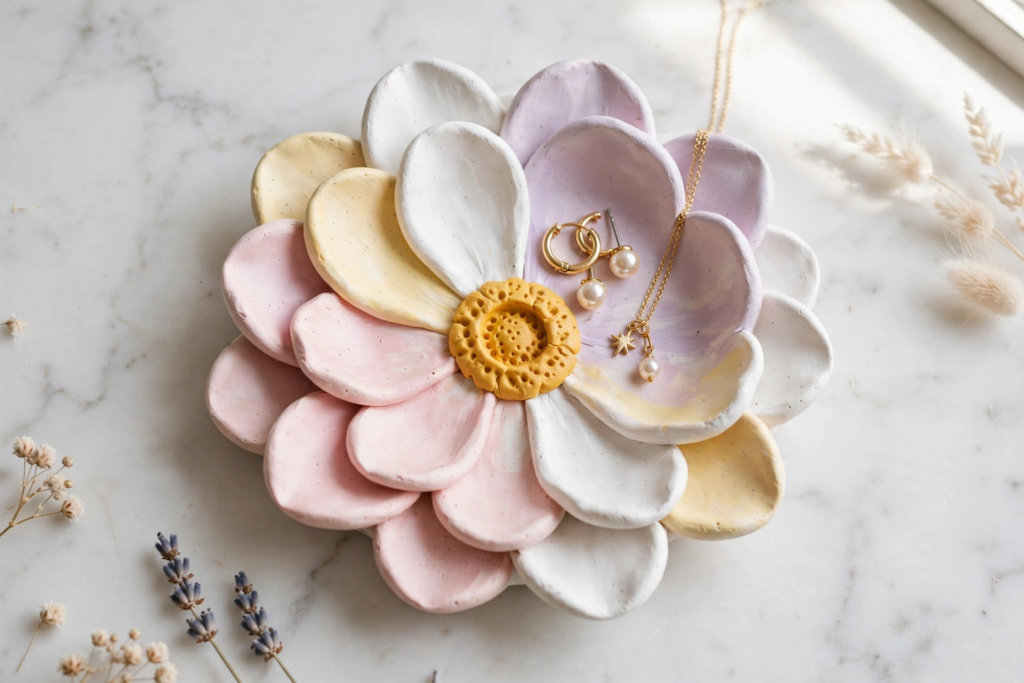
A flower-shaped holder adds a soft, decorative touch to a vanity. Its petal-like edges make the dish look attractive even when it is not holding jewelry.
Roll out your clay, cut a rounded flower shape, and gently curve the petals upward. Smooth the edges with your fingers before allowing the piece to dry according to the clay manufacturer’s instructions.
Choose blush pink, pale yellow, lilac, or white for a delicate finish. You can also add a contrasting color to the center.
Styling tip: Use the shallow dish for earrings and small pendants, with a raised central detail or separate cone for rings if desired.
For even more beginner-friendly inspiration, check out 30 Air Dry Clay Ideas for Beginners That Are Cute, Creative, and Easy to Make and discover more fun projects to try.
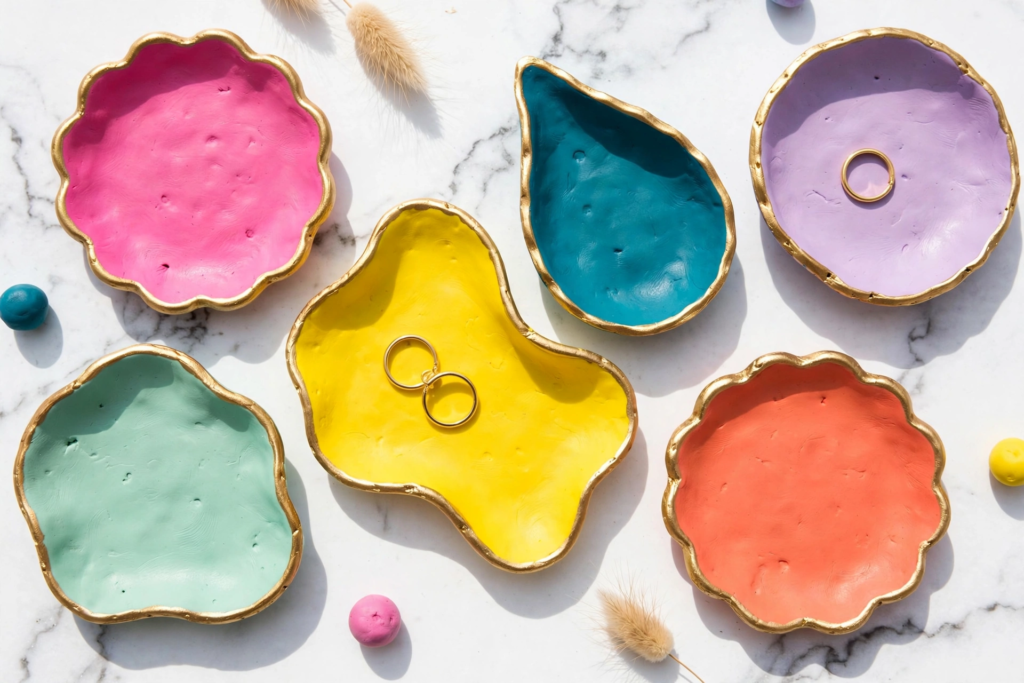
3. Gold-Edged DIY Clay Ring Holder Ideas
For an elegant look, create a simple ring holder and add a narrow metallic border. The combination of matte clay and gold accents works well with warm neutral decor and jewelry in gold or brass tones.
Start with a small dish and a central ring cone, or make a standalone cone if you prefer a smaller design. After the clay has completely dried, apply your chosen paint and add the metallic detail using a compatible craft product.
Keep the gold edging thin for a refined appearance rather than covering the entire piece in metallic paint.
Styling tip: Pair the holder with a small jewelry tray or mirror for a coordinated vanity arrangement.
4. Marbled DIY Clay Ring Holder Ideas
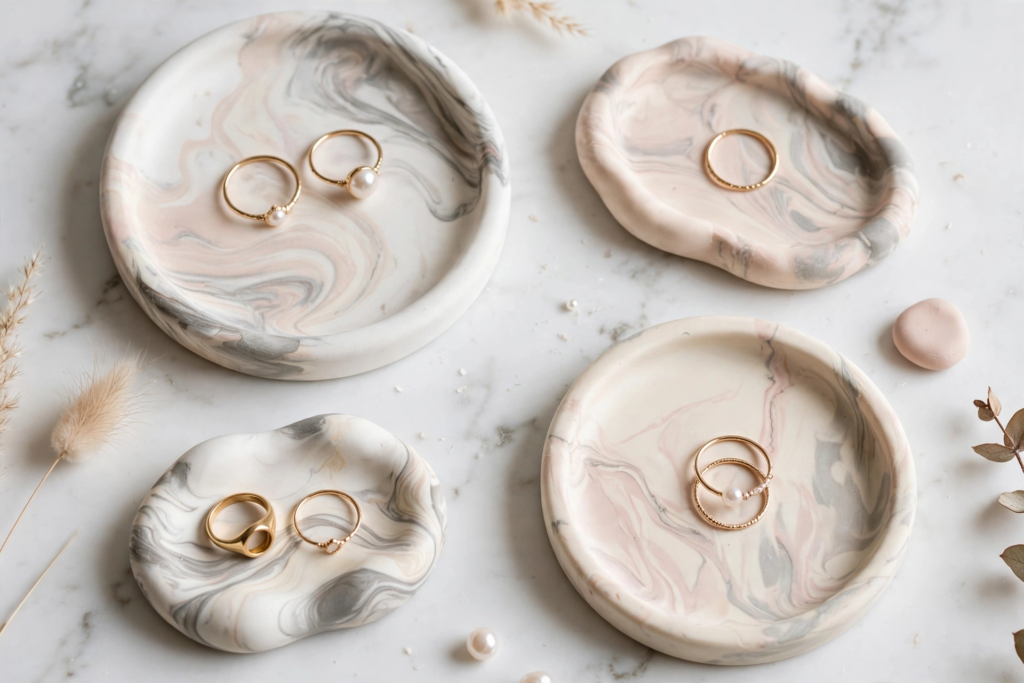
A marbled design creates the look of natural stone without requiring a perfectly uniform finish. It works especially well if you like subtle patterns and contemporary accessories.
Choose two or three compatible clay colors, or use a suitable paint technique after the dish has dried. If mixing colored clay, gently twist the pieces together and roll them out. Stop before the colors blend completely so the pattern remains visible.
Shape the clay into a shallow dish and smooth the rim carefully.
Styling tip: Try white and gray for a stone-inspired look, or combine blush and cream for a softer finish.
If you’re new to clay crafting, explore 20 Easy Air-Dry Clay Crafts for Beginners to Make at Home for more simple and creative projects to try.
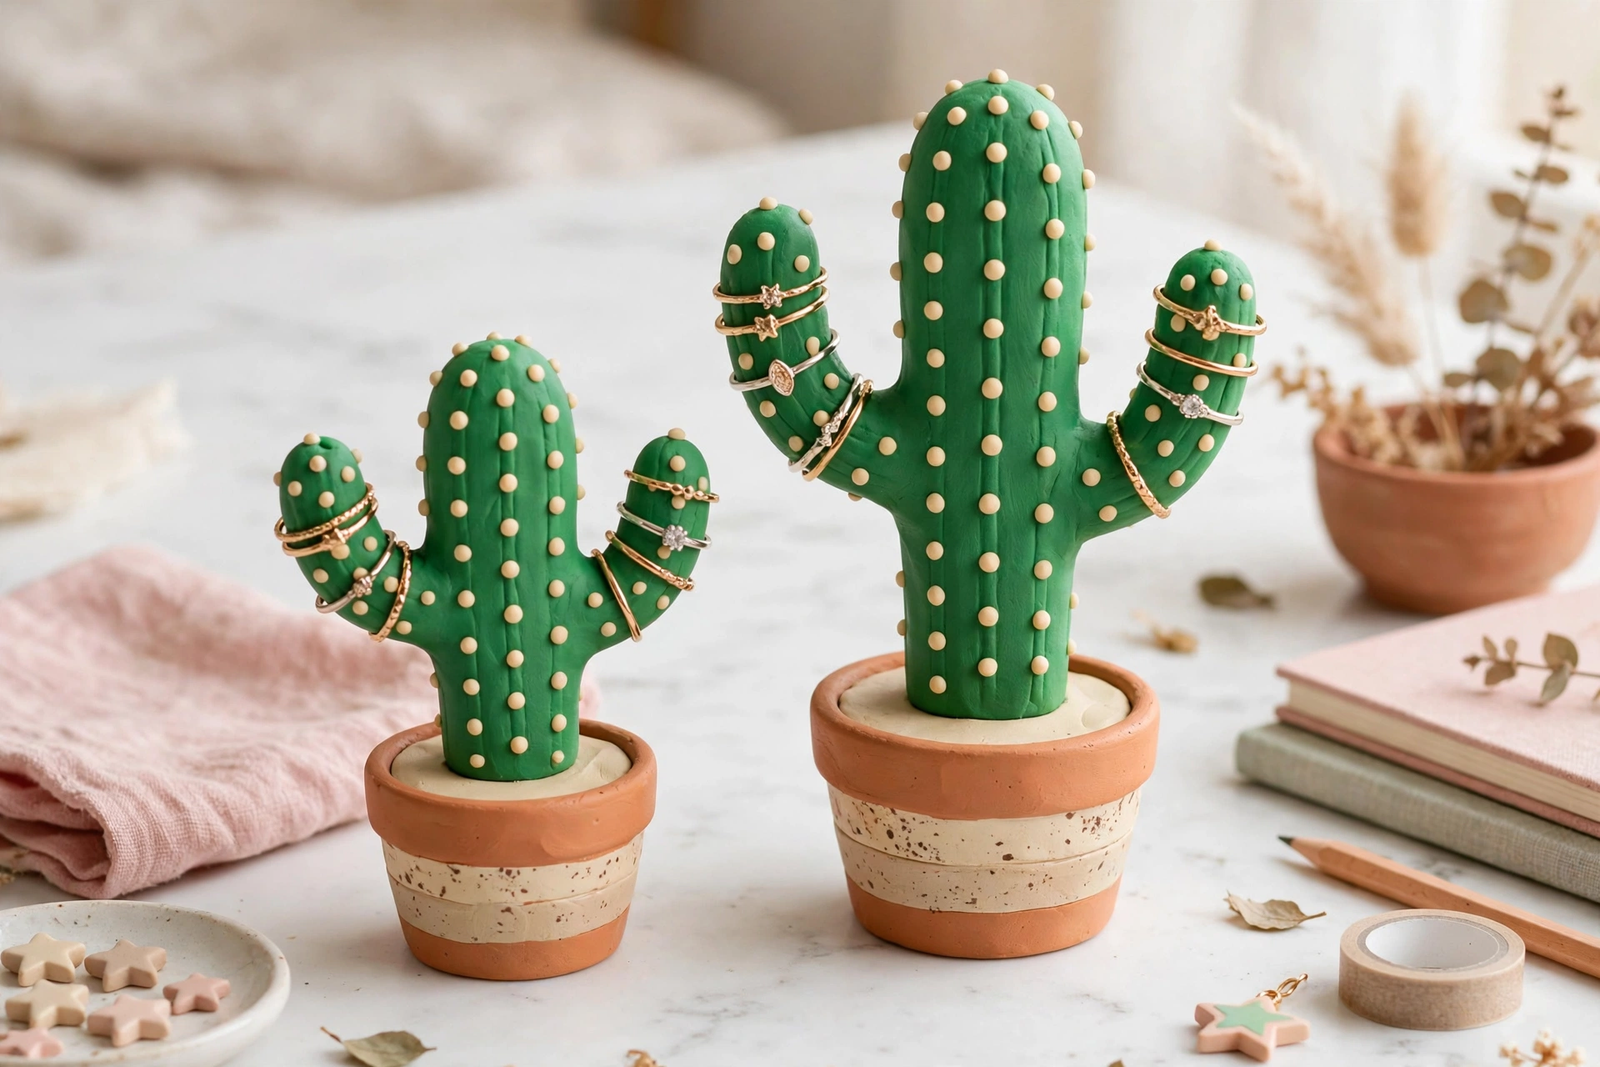
5. Cute DIY Clay Ring Holder Ideas: Cactus Design
A cactus-shaped ring holder is a fun option for a playful bedroom or desk. Its upward arms provide several places to display rings, and the design can be made in different sizes.
Shape the cactus from clay and attach it to a flat, sturdy base. If you add arms, make sure the joints are secure and not excessively thin. Smooth the connections before drying.
Paint the cactus green and the base in terracotta, cream, or sandy beige. Small painted dots can suggest cactus spines without creating a rough surface.
Styling tip: Make a second, smaller cactus to create a coordinated pair.

6. Heart-Shaped Clay Ring Dish
A heart-shaped ring dish makes a thoughtful handmade gift for birthdays, anniversaries, or Valentine’s Day. Its compact shape is ideal for holding a few everyday rings.
Roll out the clay and cut a heart using a simple template. Gently lift the edges to form a shallow dish, then smooth the outline so the shape looks balanced.
Keep the finish simple with white clay and a fine pink border, or choose a pastel color with tiny painted dots.
Styling tip: Add an initial or short decorative detail to personalize the dish. Allow sufficient space so the writing does not overwhelm the design.

7. Crescent Moon Ring Holder
A crescent moon design brings a celestial touch to a bedside table or dressing area. You can make a flat crescent dish for small jewelry or combine a moon-shaped base with a raised ring cone.
Cut a crescent from rolled clay, round off the points slightly, and curve the edges upward if you want a dish-like shape. For a separate ring cone, make sure the base attaches securely to the moon.
Paint the piece midnight blue, ivory, or charcoal, then add small stars or a thin metallic accent using suitable craft paint.
Styling tip: Pair it with a star-shaped trinket dish for a coordinated celestial theme.

8. Terrazzo-Style Clay Ring Holder
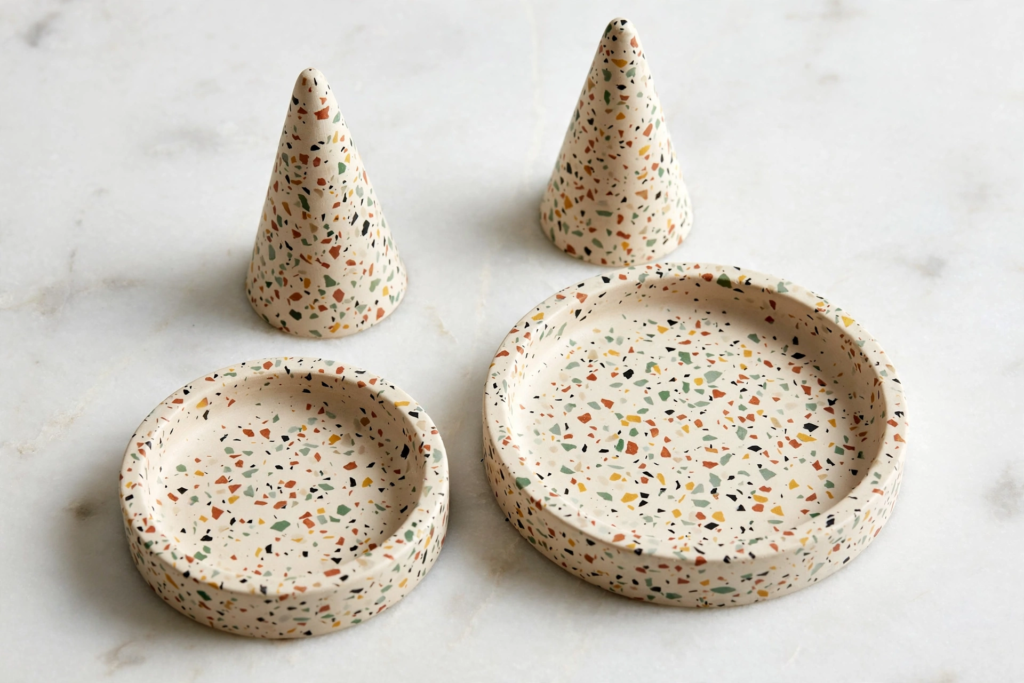
Terrazzo-inspired patterns use small contrasting flecks to create a lively, speckled surface. This look works well on both ring cones and shallow dishes.
For a clay-inlay effect, press tiny pieces of contrasting clay into the main piece before shaping and finishing it. Alternatively, create the speckles with paint after the clay has dried.
Choose a neutral base with small pieces of rust, sage green, mustard, or black for a modern color palette.
Styling tip: Keep the flecks small and spread them evenly for a balanced design.
9. Leaf-Imprint Clay Ring Dish
A leaf-imprint dish brings a natural detail to your jewelry storage. It can complement botanical prints, wooden furniture, and soft green decor.
Roll out the clay and gently press a clean leaf into the surface. Lift it carefully to reveal the pattern, then shape the clay into a shallow tray. Avoid making the dish too thin, especially around the rim.
After drying, leave the piece in a natural clay shade or paint it in muted green, cream, or terracotta.
Styling tip: Use a leaf with visible veins to create a more detailed impression. Remove the leaf before drying unless the material is specifically suitable for embedding.

10. Scalloped Clay Ring Dish
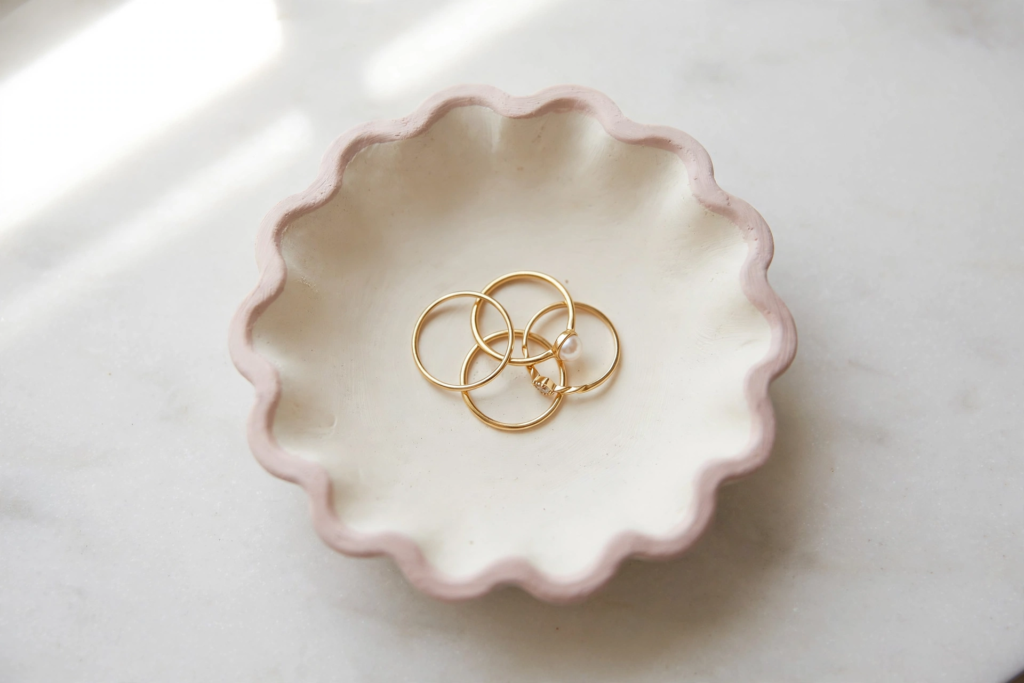
Scalloped edges give a small ring dish a decorative silhouette without requiring complex sculpting. The design suits cottage-inspired, romantic, and vintage-style interiors.
Cut a circle from rolled clay, then create gentle waves around the edge with your fingers or a rounded shaping tool. Place the piece over a suitable curved mold to create a shallow center.
Once dry, paint the dish in ivory, pale pink, or sage. A fine contrasting border can emphasize the scalloped outline.
Styling tip: Keep the inside relatively plain so your rings remain the focus.
11. Rainbow Arch Clay Ring Holder
A rainbow-inspired ring holder adds color to a desk or vanity. It can also be a fun project for a child’s room, although small handmade objects should be kept away from young children who might put them in their mouths.
Shape several rounded clay arches or create one sturdy arch with a broad base. If you make multiple pieces, join them carefully and check that the structure stands without wobbling.
Use soft peach, yellow, lavender, blue, and cream for a pastel palette, or choose stronger colors for a bolder look.
Styling tip: Add a small dish at the base if you want a place for earrings or other tiny accessories.

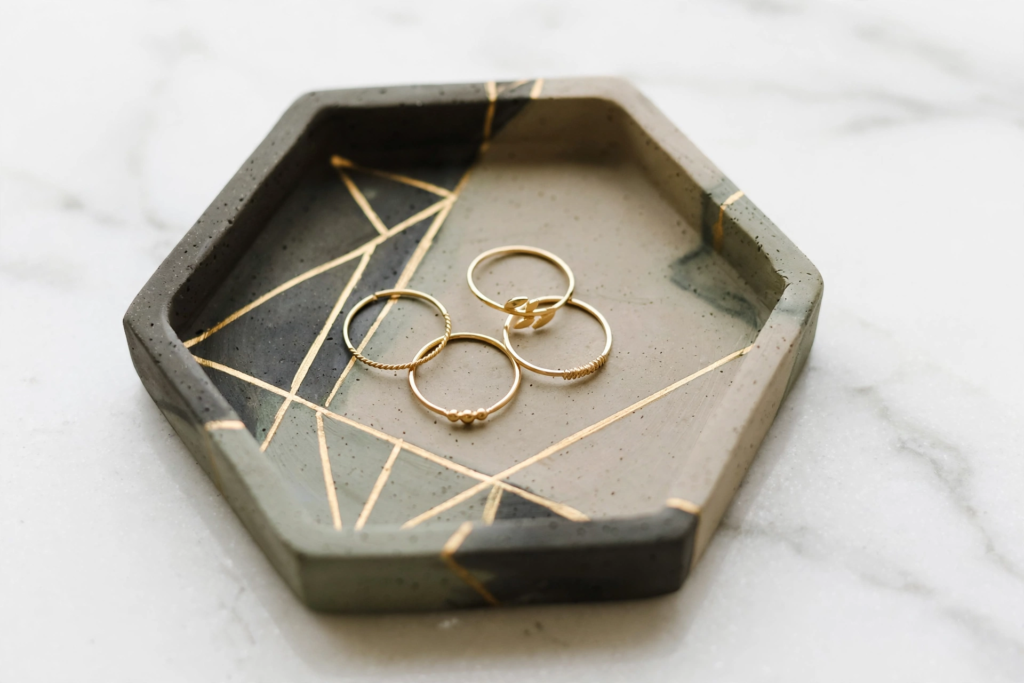
12. Geometric Hexagon Ring Dish
A hexagonal ring dish is a good choice for modern decor. Its straight edges offer a different look from traditional round bowls while keeping the project relatively simple.
Use a paper template to cut an even hexagon from rolled clay. Raise the edges slightly and smooth each corner to avoid sharp, fragile points.
After drying, paint the dish in white, charcoal, muted green, or beige. A small geometric line or metallic detail can add interest without making the surface busy.
Styling tip: Pair the dish with other simple geometric accessories, but leave enough space around it to appreciate its shape.
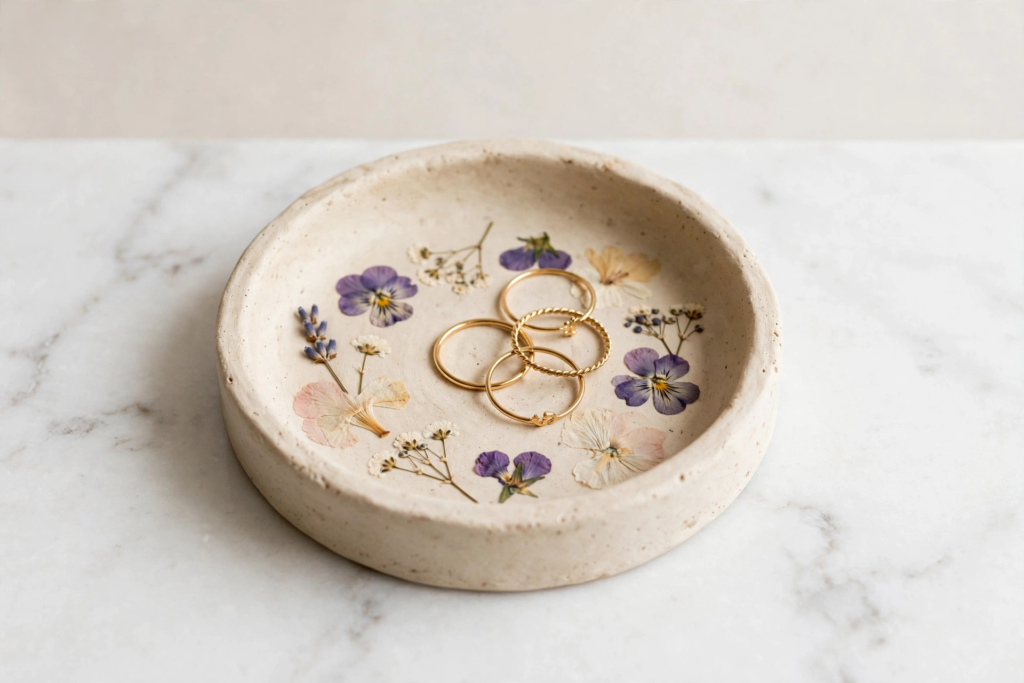
13. Pressed-Flower Clay Ring Dish
A pressed-flower design brings color and delicate detail to a handmade ring dish. It can be especially lovely as a gift for someone who enjoys floral decor.
Roll out the clay and gently press suitable dried petals or small flowers into its surface. Depending on the clay and the finish you choose, you may prefer to use a floral transfer or paint the flower design after drying.
Avoid assuming that every flower, adhesive, or clear coating will be compatible with every clay product. Follow the manufacturer’s directions for embedding materials and applying a finish.
Styling tip: Use a simple background color so the flower details remain easy to see.
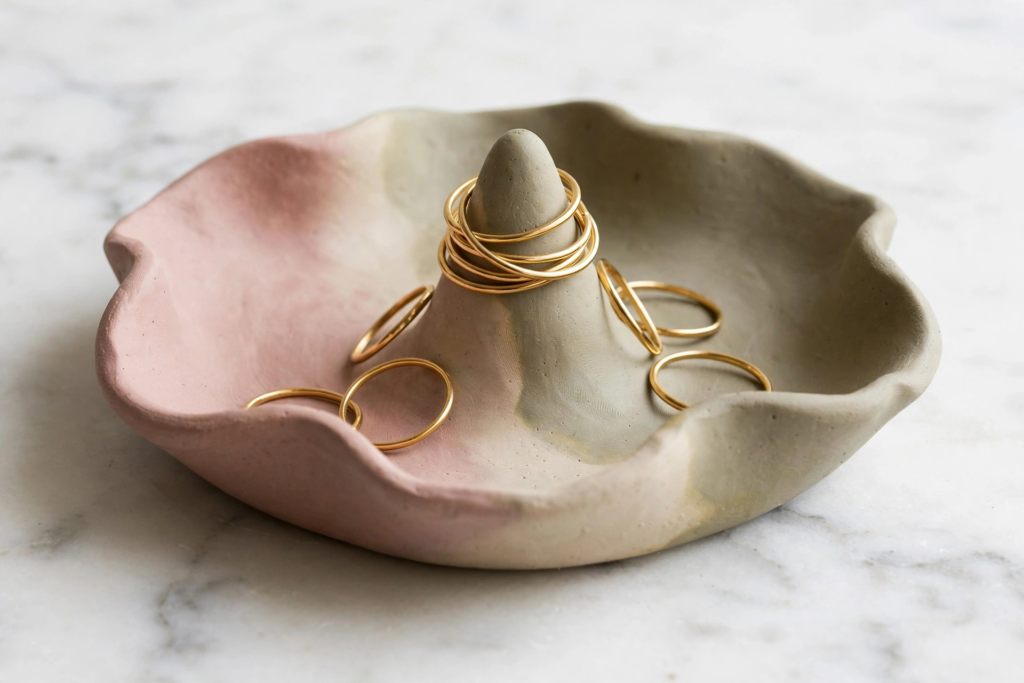
14. Wavy-Edge Organic Clay Ring Holder
An organic-shaped ring holder celebrates the small variations that make handmade decor distinctive. The rim can be gently uneven rather than perfectly round, creating a relaxed, sculptural appearance.
Form a shallow dish by pressing into a ball of clay and gradually thinning the center. Shape the edge with soft curves instead of sharp points. If you add a central ring cone, position it so the dish remains balanced.
Finish it in cream, sand, dusty rose, or muted olive. A matte appearance can preserve the natural, handmade character.
Styling tip: Display it on a stone-look tray or a simple wooden surface to complement its irregular shape.
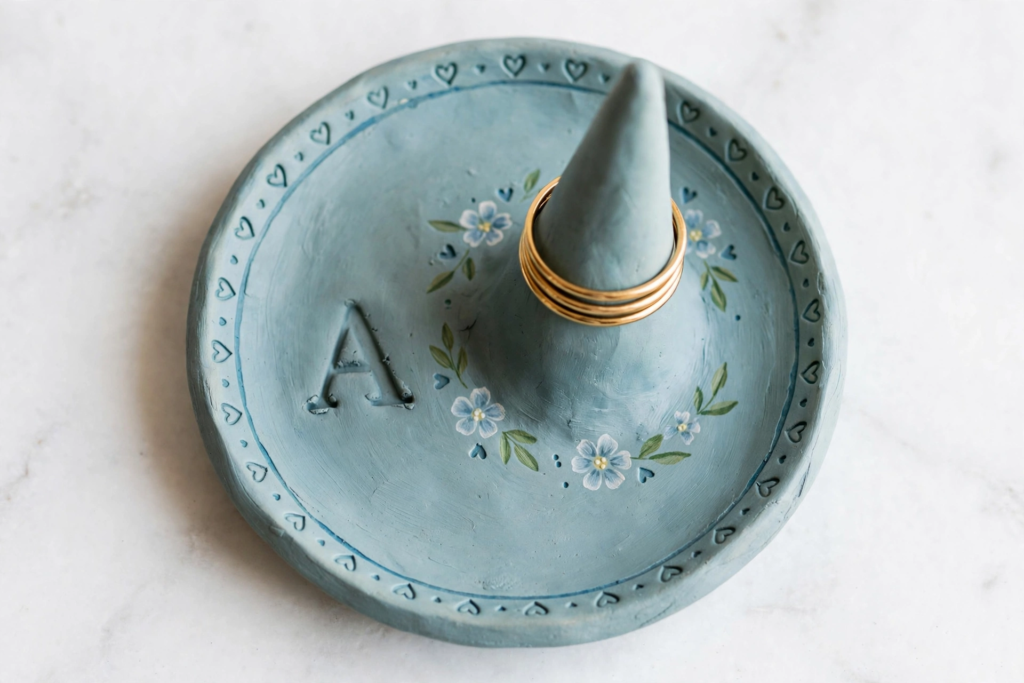
15. Personalized Initial Clay Ring Holder
A personalized holder combines practical jewelry storage with a meaningful decorative detail. It can make a thoughtful gift for a friend, partner, or family member.
Create a small dish or cone and add an initial while the clay is still workable. You can press a letter stamp into the surface or paint the initial after drying. Keep the mark shallow and avoid cutting too deeply into the clay.
Choose the recipient’s favorite color or coordinate the finish with their bedroom decor. A tiny heart, simple border, or painted flower can complete the design.
Styling tip: If you are making several gifts, use the same basic shape and customize each with a different initial or color.
Air-dry clay is a beginner-friendly material for making decorative jewelry holders because it can be shaped by hand without a kiln. For more project inspiration and material guidance, explore this air-dry clay guide from Sculpey.
What You Need to Make a DIY Clay Ring Holder
You do not need an elaborate craft setup to make a simple clay ring holder. Your exact supplies will depend on the design you choose.
- Clay: Air-dry clay is convenient for projects that do not require an oven or kiln. Polymer clay is another option, but it must be hardened according to its package directions.
- Rolling tool: A small rolling pin or smooth, clean cylinder helps create an even sheet of clay.
- Cutting tools: A plastic clay tool, craft knife, or simple template can help shape dishes and decorative edges.
- Shaping tools: Your fingers, a rounded tool, or a suitable bowl can help form curves.
- Paint and brushes: Acrylic craft paint can add color to compatible dried clay.
- Finishing product: Choose a sealer or varnish that is compatible with your clay and paint.
- Work surface: Wax paper or another surface recommended by the clay manufacturer can help keep the workspace clean.
Start with the supplies you already own. A simple cone or shallow dish can be attractive without specialty tools, molds, or elaborate embellishments.

How to Make a Simple DIY Clay Ring Holder
If you are new to clay crafts, start with a small cone attached to a shallow dish. This combination provides a place to slide rings over the cone while leaving room for other small jewelry.
Step 1: Prepare the clay. Follow the package instructions for conditioning or kneading the clay. Work on a clean surface and keep your hands and tools free of debris.
Step 2: Shape the dish. Roll out a piece of clay and cut a circle or another simple shape. Gently press the center into a shallow bowl shape, smoothing the rim with your fingers.
Step 3: Make the ring cone. Shape a smaller piece of clay into a short cone with a rounded top and a flat base. Test the width with one of your rings before finishing the shape.
Step 4: Attach the pieces. If the clay type requires a joining method, follow its instructions. For air-dry clay, lightly score the contact surfaces and use a small amount of water or clay slip only if recommended for that product. Press the cone into place and smooth the joint.
Step 5: Let the holder dry or harden. Air-dry clay needs to dry thoroughly, and the time varies with the product, thickness, and conditions. Polymer clay should be hardened according to its package directions. Do not substitute one method for the other.
Step 6: Decorate the holder. Once the piece is ready for finishing, add paint, a simple pattern, or a metallic border. Allow each layer to dry before adding the next.
Step 7: Apply a compatible finish if needed. Choose a sealer designed for the materials you used. A coating may help protect the finish, but it does not automatically make the piece waterproof.

Tips for a Better Finished Ring Holder
- Make the base stable. A wide, flat base is less likely to tip over when you slide a ring onto the holder.
- Avoid overly thin pieces. Thin edges and narrow attachments can be fragile, especially with air-dry clay.
- Test the fit. Use a ring you wear regularly to check that the cone is neither too wide nor too tall.
- Smooth the joins. If your design has separate pieces, secure the connections according to the clay manufacturer’s guidance.
- Allow enough drying time. A surface that feels dry may not mean a thicker piece has dried completely.
- Protect the work area. Use a suitable surface and tools, and follow any safety instructions for paints, sealers, and sculpting products.
- Keep the holder away from prolonged moisture. Air-dry clay can be vulnerable to water, even when coated, depending on the clay and finish.
- Choose a design that suits your skill level. Start with a cone or simple dish before trying complex sculptural forms.
How to Decorate a Clay Ring Holder
The finishing details can transform a simple shape into a piece that feels personal.
- For a minimalist look: Choose ivory, beige, gray, or matte white.
- For a romantic style: Try blush pink, soft lavender, heart details, or delicate flowers.
- For modern decor: Use geometric patterns, monochrome colors, or a restrained metallic border.
- For a natural look: Choose sage green, terracotta, leaf impressions, or stone-inspired patterns.
- For a playful design: Try a cactus, rainbow, flower, or celestial motif.
Before using paint or a sealer, check that it is suitable for your clay. Test decorative products on a small sample when possible, particularly if you are combining different materials.
Final Thoughts
These DIY clay ring holder ideas show how a small craft project can add both personality and function to a jewelry corner. From a simple cone to a flower dish or personalized design, there is a style for different skill levels and decorating preferences.
Start with a shape you can make comfortably, choose colors that work with your space, and take your time with drying and finishing. Your finished piece can be a useful everyday accessory, a decorative addition to your vanity, or a thoughtful handmade gift.
FAQ section
1. How can I make a DIY clay ring holder?
Shape air-dry clay into a small cone with a flat base, or combine a cone with a shallow clay dish. Secure the pieces according to the clay manufacturer’s instructions, allow them to dry completely, and decorate with suitable paint and a compatible finish.
2. How do you make a simple DIY ring holder?
Roll a small piece of clay into a cone, flatten its bottom, and round the tip. Check that a ring fits over the cone, then allow the clay to dry or harden according to its product instructions.
3. What are some DIY clay jewelry ideas?
Try ring dishes, ring cones, pendant trays, decorative jewelry bowls, bead dishes, and small sculptural holders. You can personalize them with pressed textures, painted patterns, initials, or floral details.
4. What are some easy DIY jewelry holders I can make?
Simple options include a clay cone, a shallow trinket dish, a scalloped ring tray, or a small clay cactus. Other options include repurposed dishes, fabric organizers, and wooden ring stands.
5. Is air-dry clay or polymer clay better for a ring holder?
Air-dry clay is convenient when you want to avoid oven baking or kiln firing. Polymer clay can be useful for small, detailed shapes, but it must be hardened according to the package instructions. The better choice depends on the design and finish you want.
6. How long does an air-dry clay ring holder take to dry?
Drying time depends on the clay brand, the thickness of the piece, and the surrounding conditions. Follow the manufacturer’s directions and allow thicker sections and attached pieces to dry thoroughly before painting or sealing.