

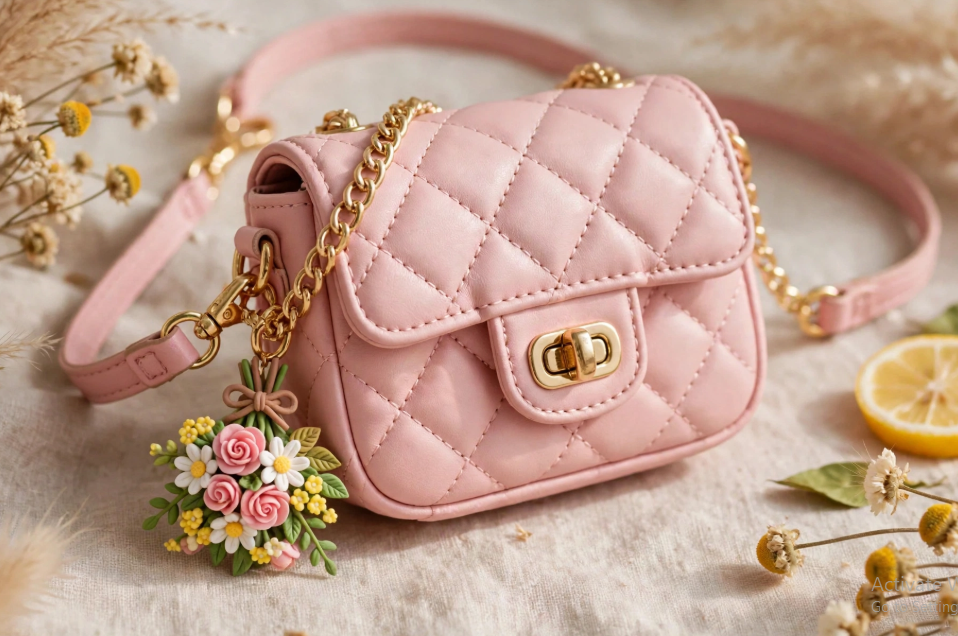
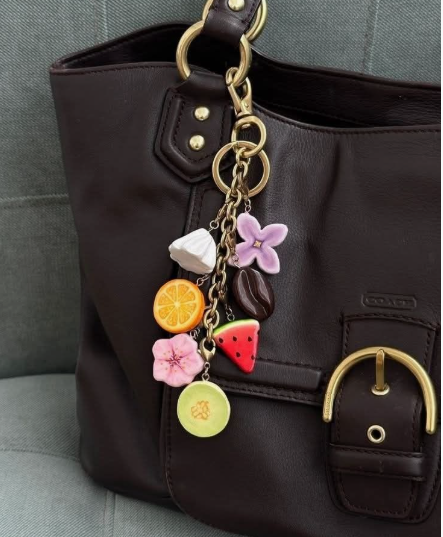
If you want to give your tote, purse, backpack, or zipper pouch (DIY clay bag charms) a sweet touch that personalize it, you can have a ton of fun with making charm things. Using a variety of colors of polymer clay plus some basic jewelry hardware makes it possible to make a variety of charms such as little strawberries, flowers, bows, foods, initials, animals, and beads.
It’s good to remember that not all DIY clay bag charms need to look exactly the same. Small variations in shape, color, and details can make handmade charms feel more unique and personal.
A good way to get started is by learning to flatten out simple charms such as hearts, stars, flowers, and rainbows. Once you’ve learned to condition and shape simple charms, it’s much easier to move on to making tiny foods or sculpted items.
If you enjoy upcycling, explore 20 Recycled Household Item Crafts for a Creative Home for more simple ways to turn everyday items into fun DIY projects.
What You Need to Make Clay Bag Charms
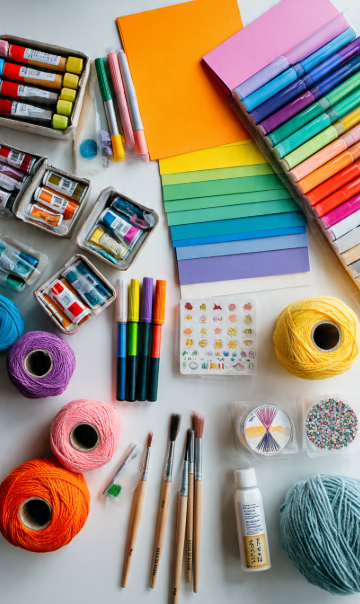
You can keep your supply list fairly small. Many designs can be made with:
- Polymer clay in several colors
- Clay roller or small rolling pin
- Small cookie or clay cutters
- Needle tool or toothpick
- Clay sculpting tools
- Craft blade for trimming
- Eye pins or screw eye pins
- Jump rings
- Key rings or lobster clasps
- Acrylic paint for optional details
- Gloss, satin, or matte finish if desired
- UV resin and a UV lamp if you specifically want a resin finish
Choose the hardware according to the finished design. A flat heart can have a small hole near the top, while a three-dimensional fruit or food charm may work better with an eye pin.
A quick note about polymer clay
Polymer clay stays workable until it is cured in an oven, making it a practical material for DIY clay bag charms. Baking requirements vary by brand and product, so always follow the temperature and baking time printed on your clay package rather than relying on a universal schedule. Sculpey also recommends using an oven thermometer and never microwaving polymer clay.
20 DIY Clay Bag Charm Ideas
1. Mini Strawberry DIY Clay Bag Charm
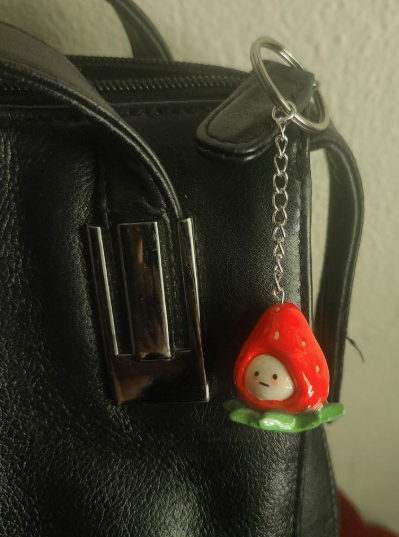
A strawberry is one of the simplest motifs to capture the spirit of miniature food-inspired charm.
For a Strawberry DIY Clay Bag Charm, roll a piece of red clay into a cone shape. Use a toothpick or needle tool to make tiny indentations across the surface, then add a few small leafy fronds to the top of the cone.
To make the fruit look appealing, use two colors of red, or try shading it in pink.
Perfect for: tote bags, backpacks, and other playful accessories.
2. Daisy Flower DIY Clay Bag Charm
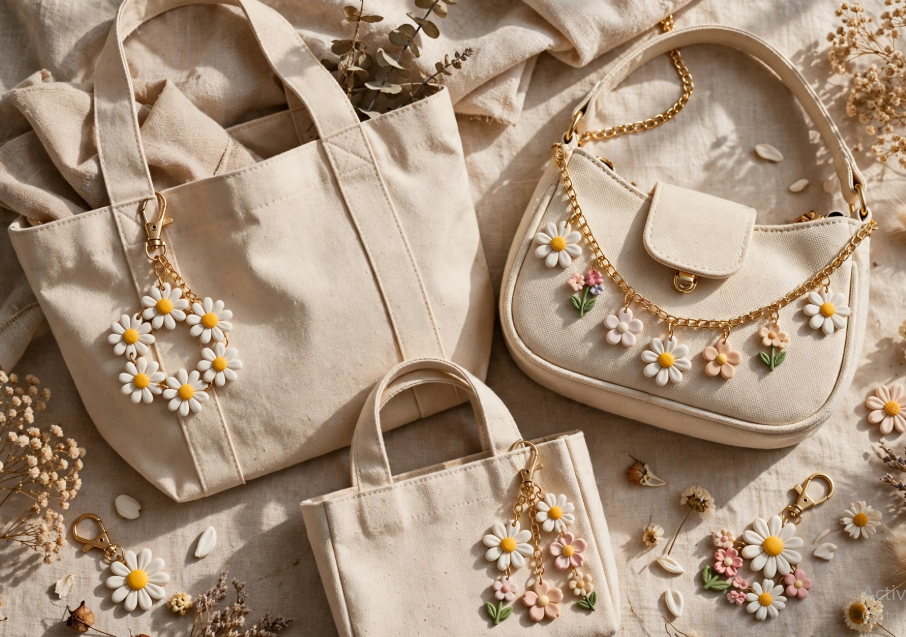
A daisy is such a simple shape that is great for a beginner.
For a Daisy Flower DIY Clay Bag Charm, take white clay and cut out or roll several petals, then make a small yellow center. Attach the petals to the center, smooth the edges where they meet, and bake according to the clay manufacturer’s instructions.
Try to make the petals slightly thicker than average so they won’t be too fragile. Make a few tiny daisies and attach them together for a nice effect. Use pastel colored petals as an alternative to white petals.
If you enjoy working with clay, check out 20 Easy Air-Dry Clay Crafts for Beginners to Make at Home for more simple and creative projects to try.
3. Personalized Heart Initial DIY Clay Bag Charm
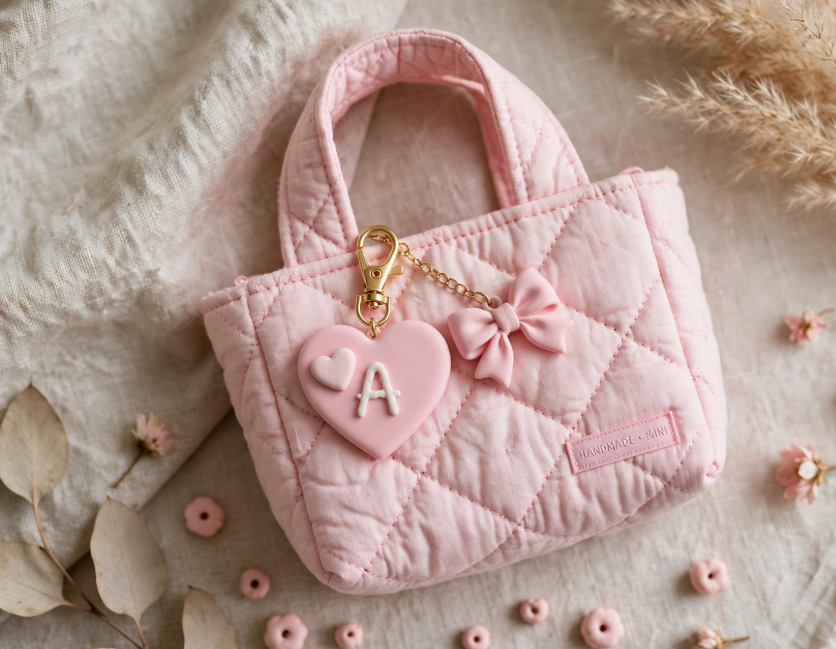
Add a single initial to make a simple heart into a personal keepsake.
Roll the clay flat and cut out a heart shape. Press in a desired alphabet stamp. Or, make a raised letter from a small strip of clay.
Add a tiny hole near the top before baking.
Make it special by using marbled clay or your favorite color combination or two. Or, use two initials for a personalized gift.
4. Rainbow Arch Charm
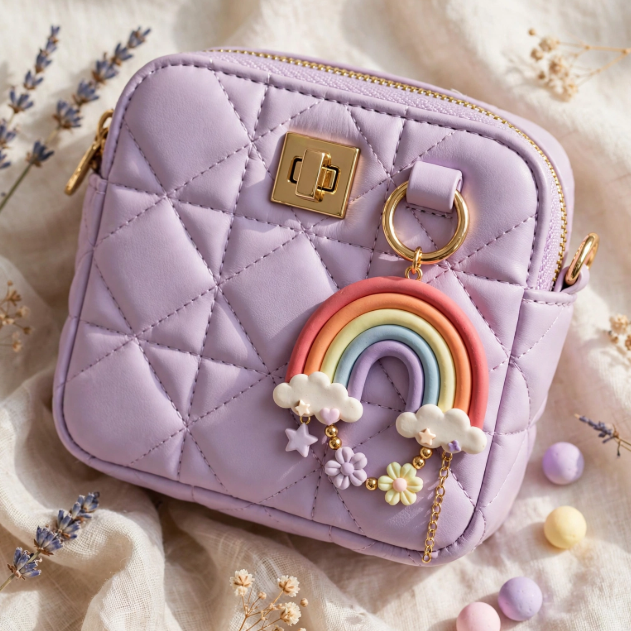
A rainbow charm brings plenty of color without requiring complicated sculpting.
For a Rainbow DIY Clay Bag Charm, roll several thin clay ropes in different colors. Arrange them into curved layers, press them together carefully, and trim the ends into a clean arch before baking.
Make it special: Use muted sage, blush, cream, lavender, and pale blue for a soft palette, or choose bright colors for a playful look.
Beginner tip: Try to keep each clay rope similar in thickness so the finished rainbow looks balanced.
For more beginner-friendly projects, explore 25 Easy Paper Crafts: Simple DIY Ideas for Beginners for creative ideas you can make at home.
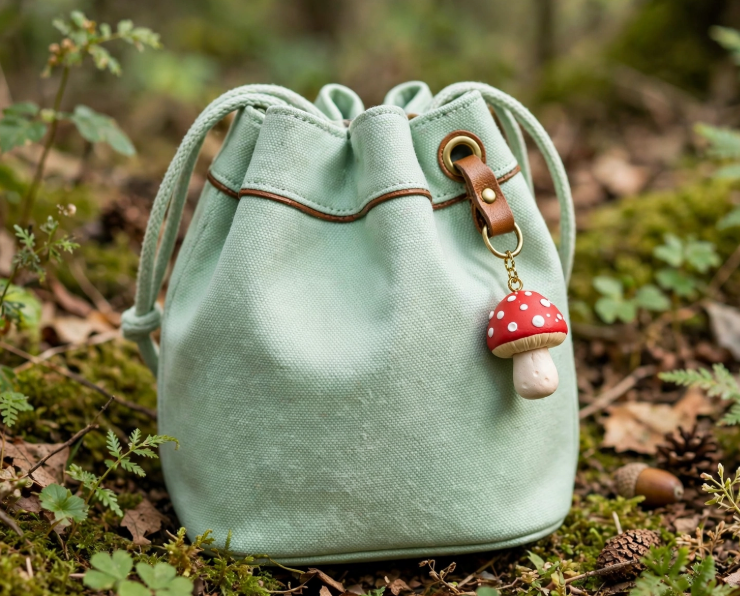
5. Tiny Mushroom DIY Clay Bag Charm
A miniature mushroom adds a woodland-inspired touch to a bag.
Shape a small stem from beige or brown clay and create a rounded cap in your chosen color. Add tiny dots to the cap with a needle tool or small clay pieces.
Make it special: Try red and cream for a classic mushroom look or use earthy brown, tan, and muted green for a more natural palette.
6.Blueberry DIY Clay Bag Charm
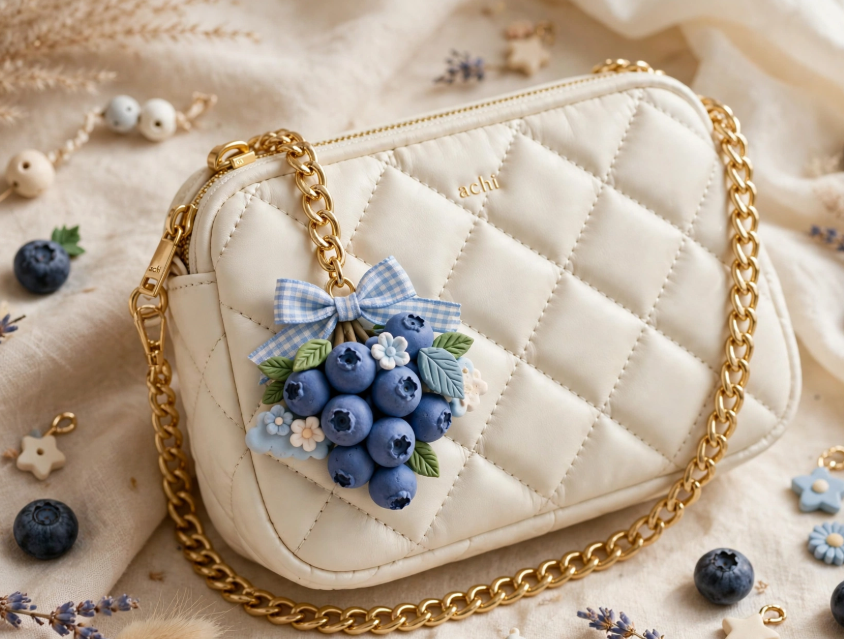
Blueberries are excellent choices if you wish to create a miniature three-dimensional fruit.
Start by rolling the blue clay into small balls.
Use a rounded sculpting tool to make the indention on the top.
You may also choose to attach a small green leaf to make it appear more intricate.
Make it unique: For a Blueberry DIY Clay Bag Charm, make several blueberries in slightly different sizes and connect them to create a cute, natural-looking blueberry cluster.
7. Lemon Charm
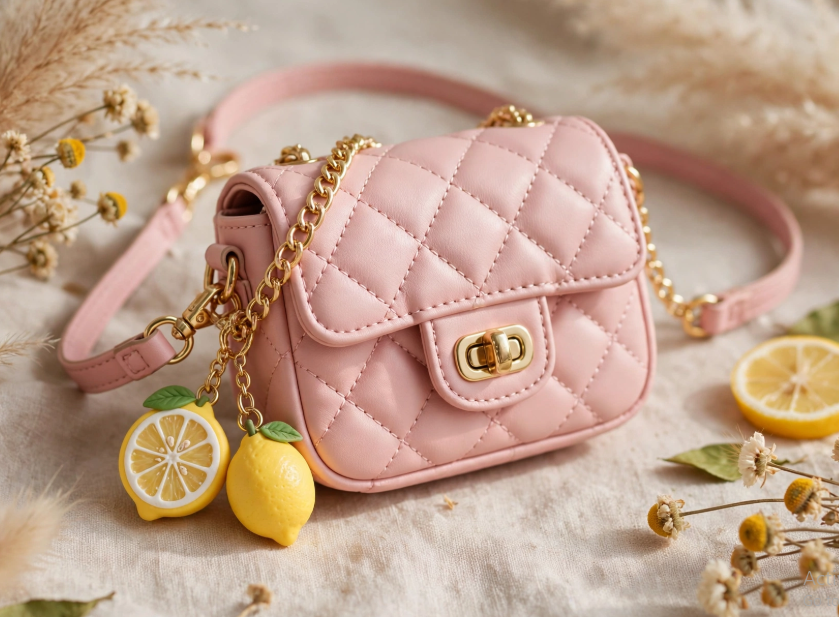
A miniature lemon can be formed using a simple oval.
Roll some yellow clay between your fingers until they are both pointed. Make a small mark with a finer tool.
Add a tiny green leaf on the side.
Make it unique: create a pair of lemons with leaves and attach them with different jump rings
8. Cherry Pair DIY Clay Bag Charm
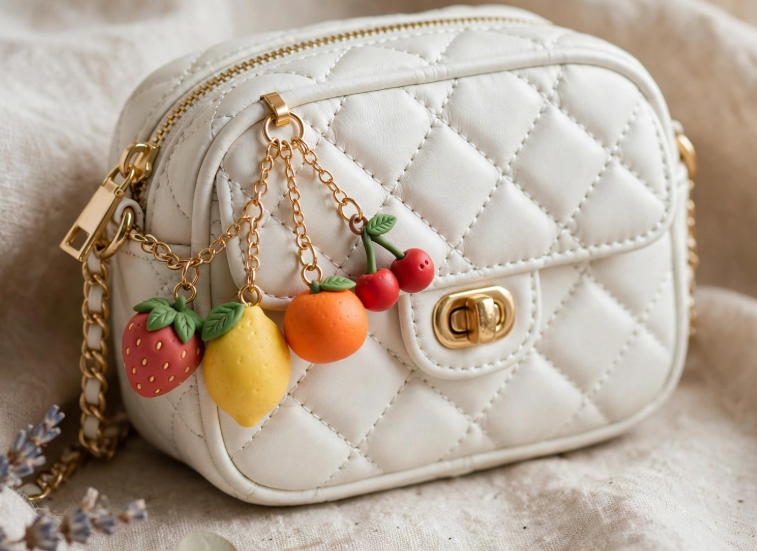
Two tiny cherries connected by a green stem make a charming accessory.
Roll two equal red clay balls and position them together. Add thin green clay stems and a small leaf.
Make it special: Use deep red for a traditional look or experiment with coral, pink, or burgundy.
Practical tip: Keep the individual cherries small so the finished charm doesn’t become unnecessarily bulky.
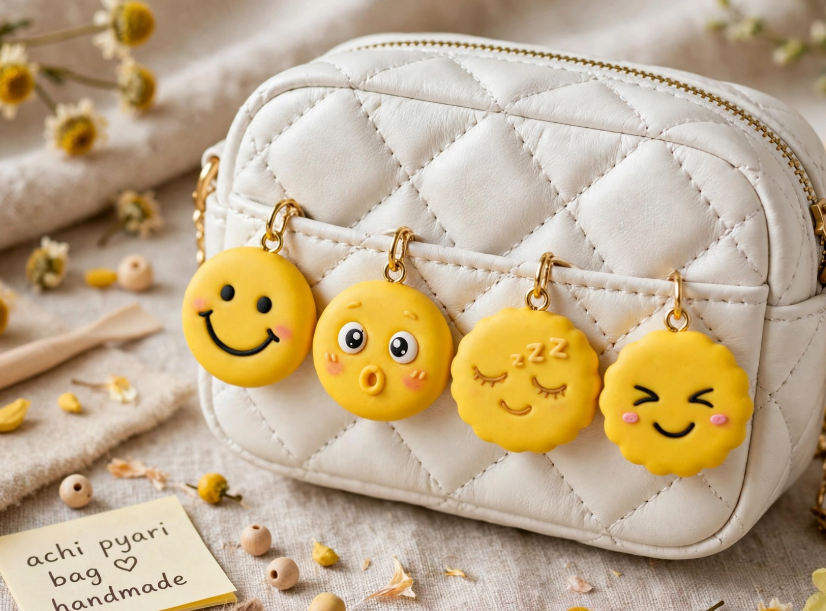
9. Smiley Face Charm
For a cheerful everyday accessory, try a simple smiley face.
For a Smiley Face DIY Clay Bag Charm, roll yellow clay into a smooth disk. Add two tiny eyes and a curved smile using a needle tool or thin pieces of clay, then bake according to the package instructions.
Make it special: Make several expressions—happy, surprised, sleepy, or winking—and turn them into a mini charm collection.
10. Bow Charm
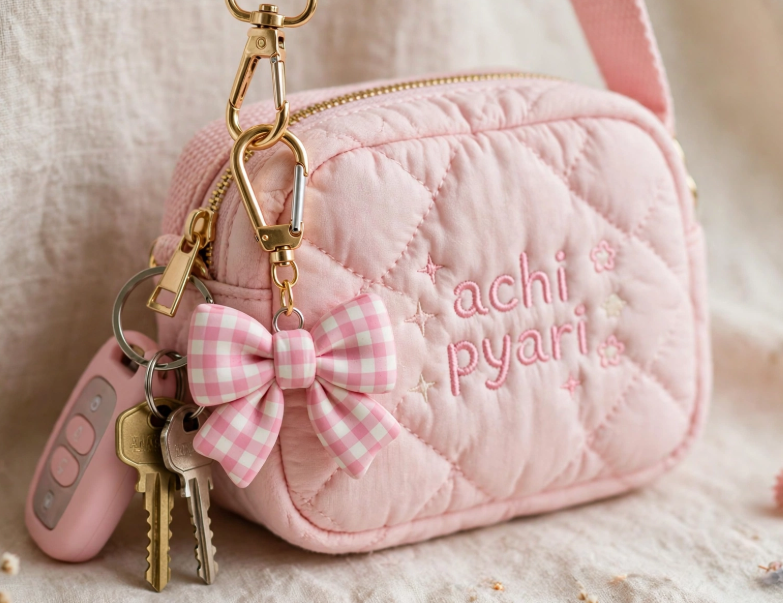
Bows work beautifully with pastel, coquette-inspired, or feminine bag styles.
Create two loops from clay and join them around a small center piece. Smooth the connections without flattening the loops.
Make it special: Add a tiny faux knot in the center or create the bow in gingham-inspired colors using contrasting clay strips.
11. Mini Croissant Charm
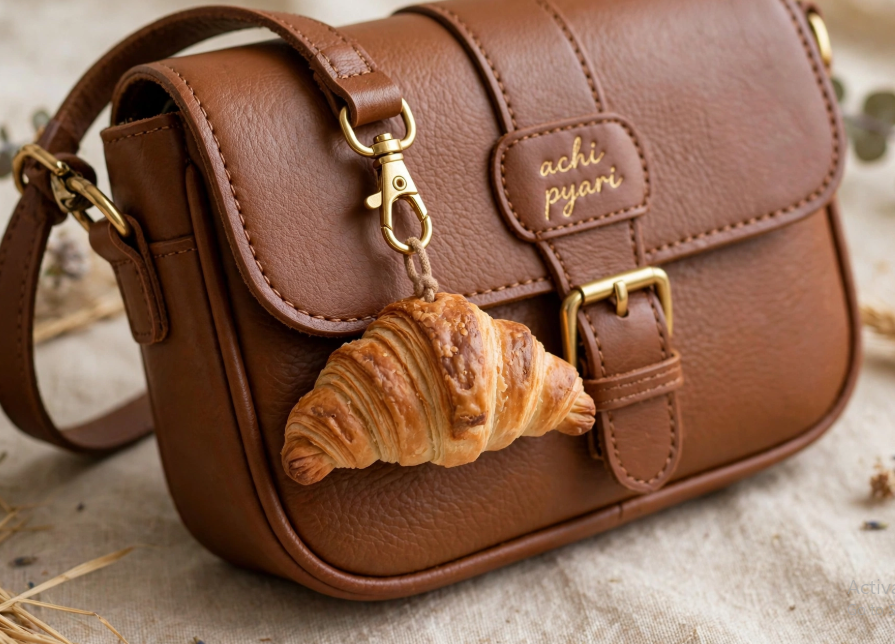
A croissant is a fun choice if you enjoy miniature food crafts.
For a Croissant DIY Clay Bag Charm, roll a thin piece of tan or light-brown clay and cut it into a triangle. Starting at the wide end, roll the triangle toward the pointed end. Curve the two ends slightly, then add shallow lines to suggest the flaky layers.
A small eye pin can be positioned before baking if you want to attach the charm to jewelry hardware.
Make it special: Add very subtle darker shading to the outer curves to suggest a baked finish.
12. Pretzel Charm
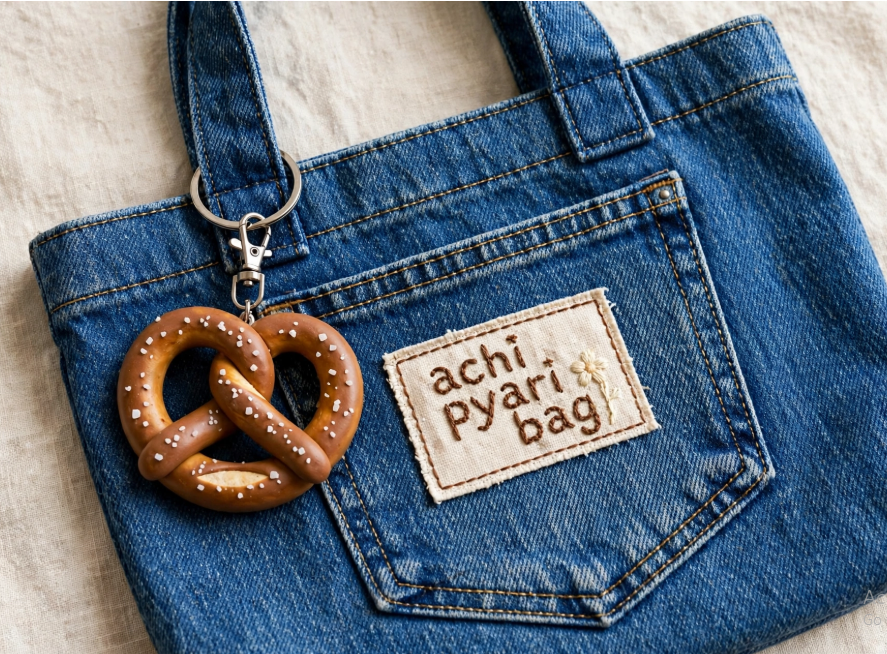
A pretzel can be created from one long clay coil.
For a Pretzel DIY Clay Bag Charm, roll the clay into an even rope, then shape it into the familiar crossed pretzel form. Press the joints together carefully so the shape stays secure and doesn’t separate during baking.
For a playful food detail, add tiny white clay pieces to resemble salt.
Make it special: Use warm brown clay with slightly darker accents along the curves.
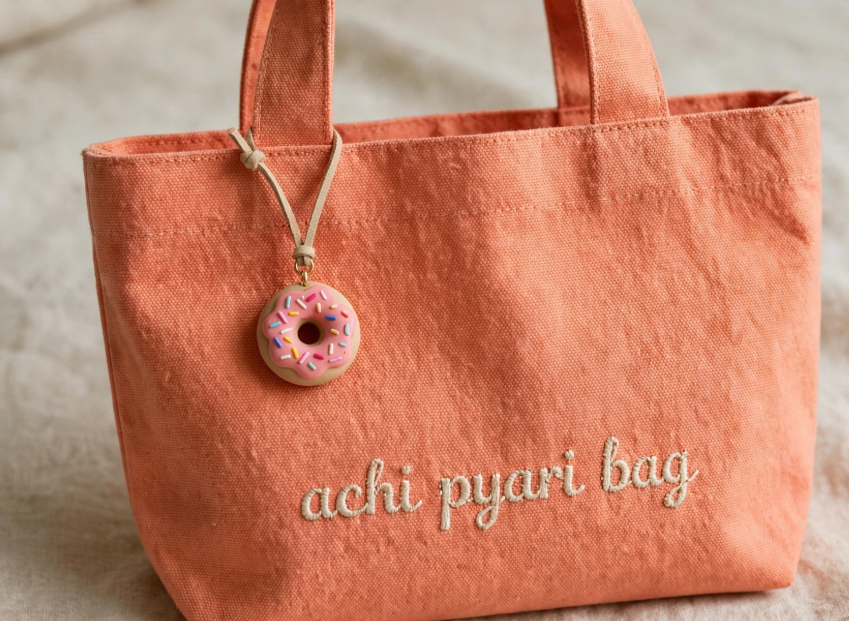
13. Mini Donut Charm
Donuts are ideal for colorful clay projects because you can change the frosting for every charm.
Create a small beige or tan ring, then add a thinner layer of pink, lavender, chocolate-brown, or another color on top.
Finish with tiny clay sprinkles.
Make it special: Create a miniature bakery collection with different frosting colors.
14. Tiny Coffee Cup Charm
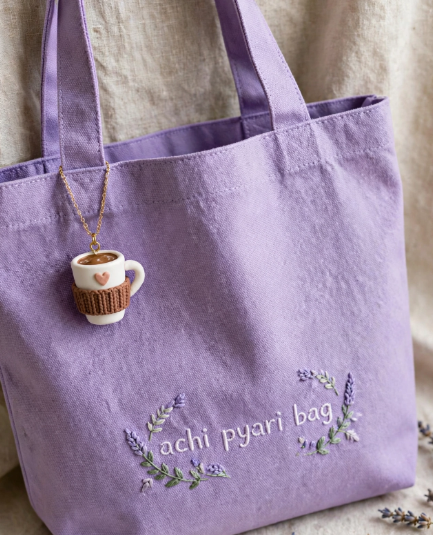
A coffee cup makes a cute charm for anyone who enjoys café-inspired accessories.
Form a tiny cup shape from clay, add a small handle, and create a darker oval or circle at the top to represent the coffee.
You can also add a tiny sleeve using a contrasting clay color.
Make it special: Add a miniature heart on the front for a coffee-shop-inspired detail.
15. Flower Bead Charm
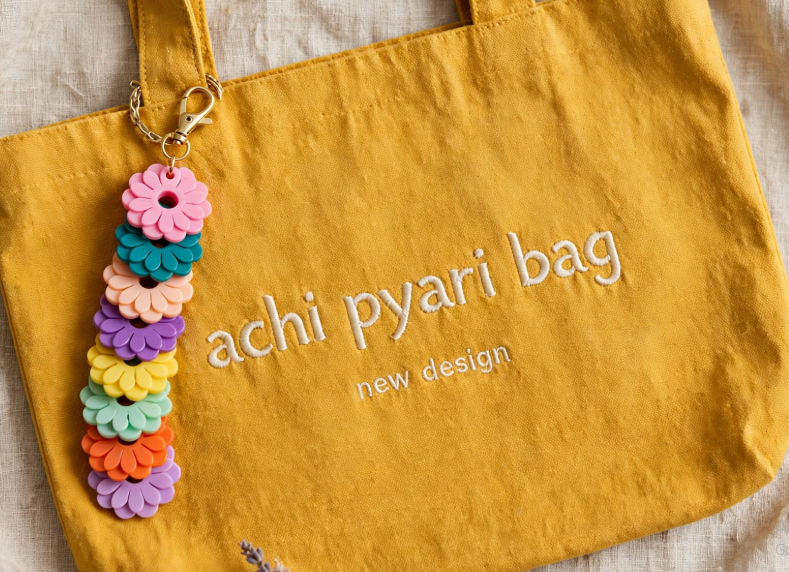
Instead of making one large flower, create a flower-shaped bead with a central opening.
Roll out the clay and cut a simple flower shape. Carefully create a hole through the center before baking.
Once cured, the flower can be combined with ordinary beads, cords, or other clay beads.
Make it special: Combine two flower colors in alternating layers to create a colorful beaded bag charm.
Before baking your DIY clay bag charms, check the manufacturer’s polymer clay baking instructions for the correct temperature and curing time for your specific clay.
16. Star Charm
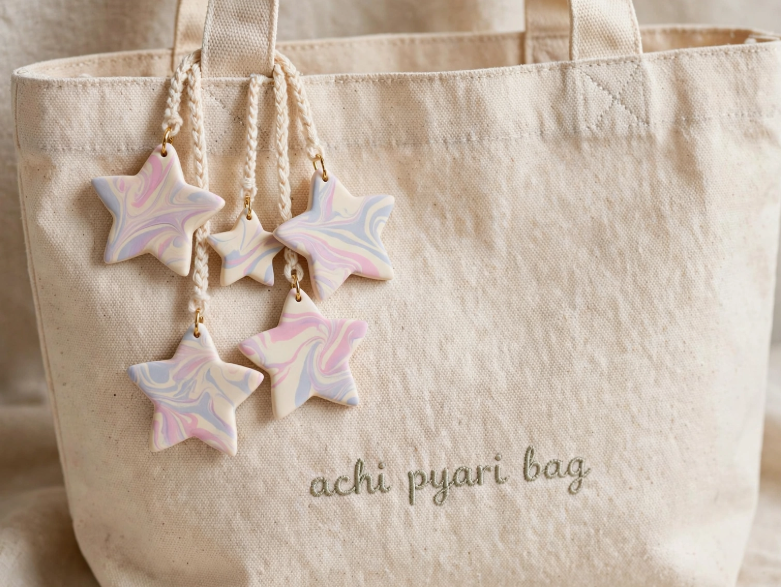
A star is one of the simplest shapes to make and can work with almost any bag style.
Roll the clay flat and use a small star cutter. Smooth the edges with your fingers or a clay tool before adding the attachment hole.
Make it special: Try cream, metallic-look accents, pastel colors, or a marbled clay effect
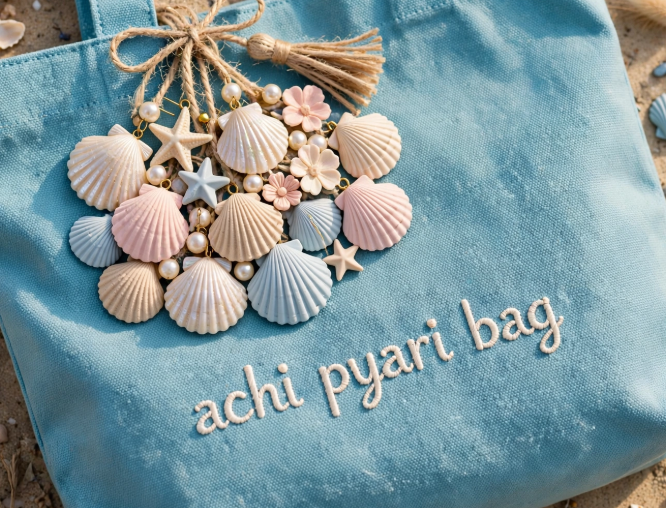
17. Seashell Charm
A seashell is a natural choice for summer totes and beach-inspired accessories.
Shape a small oval or shell silhouette, then use a fine tool to create curved grooves radiating from the center.
Make it special: Use pearl, cream, sand, blush, or pale blue clay.
A small cluster of shells can also work well as a multi-piece charm.
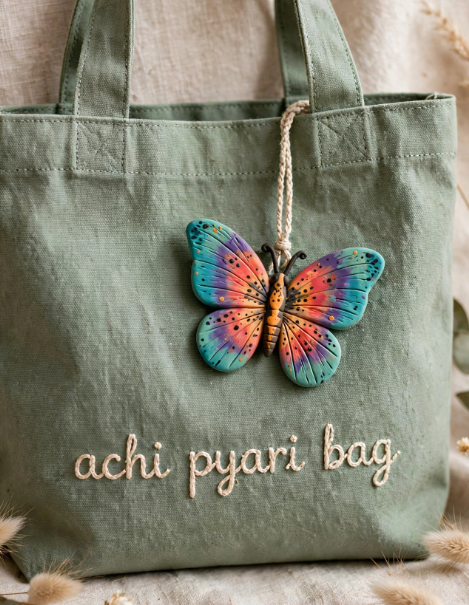
18. Butterfly Charm
A butterfly can be made from two pairs of simple rounded wings.
Cut or shape the wings from clay, join them around a small central body, and add an attachment hole near the top.
Make it special: Use contrasting colors for the upper and lower wings or create a soft gradient effect with two closely related shades.
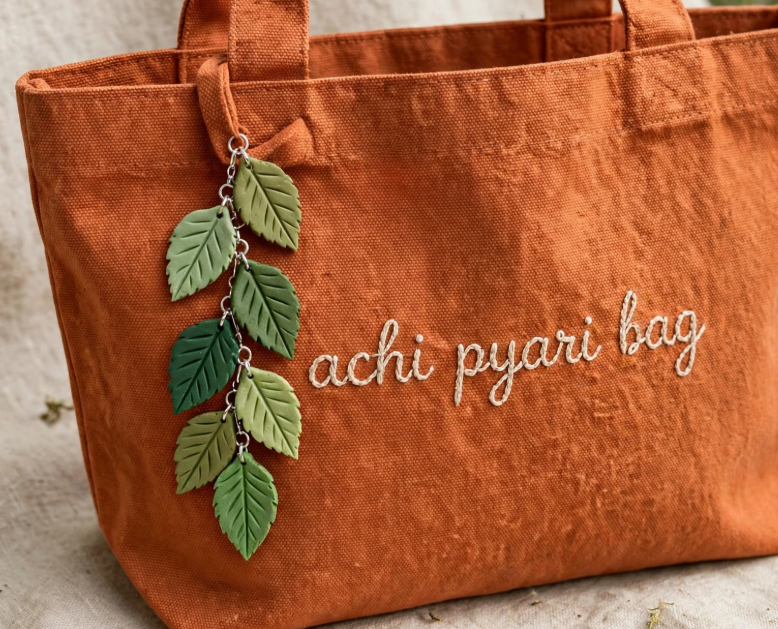
19. Mini Leaf Charm
Leaf shapes are versatile and can be used by themselves or combined with fruit and flower charms.
Roll green clay flat and cut a simple leaf shape. Add a central vein with a needle tool.
Make it special: Create several leaves in different green shades and connect them with small jump rings.
For autumn accessories, swap green for rust, mustard, brown, or muted orange.
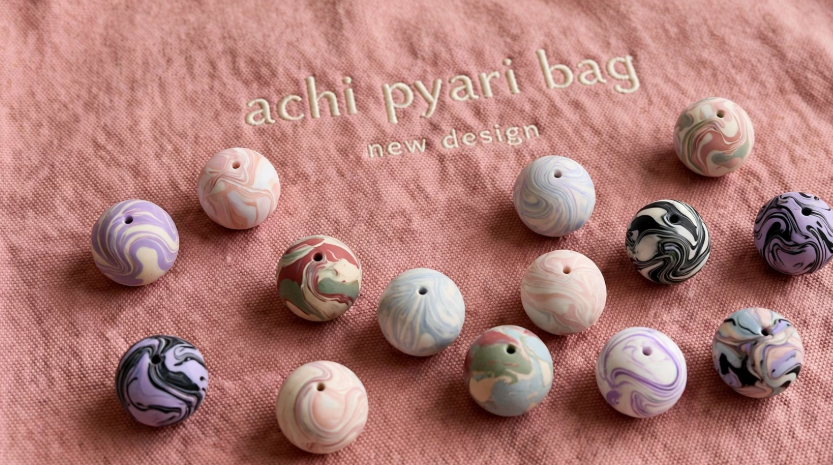
20. Marbled Polymer Clay Bead Charm
If you have leftover clay scraps, turn them into a marbled bead instead of throwing them away.
Choose two or three compatible colors and gently twist them together. Avoid over-mixing, because too much blending can turn the colors muddy.
Roll the mixture into a ball, flatten it slightly if desired, and create a hole through the center.
Make it special: Try combinations such as lavender and cream, blush and red, sage and pale blue, or black and white.
Marbling is also a practical way to use small leftover pieces from other projects.
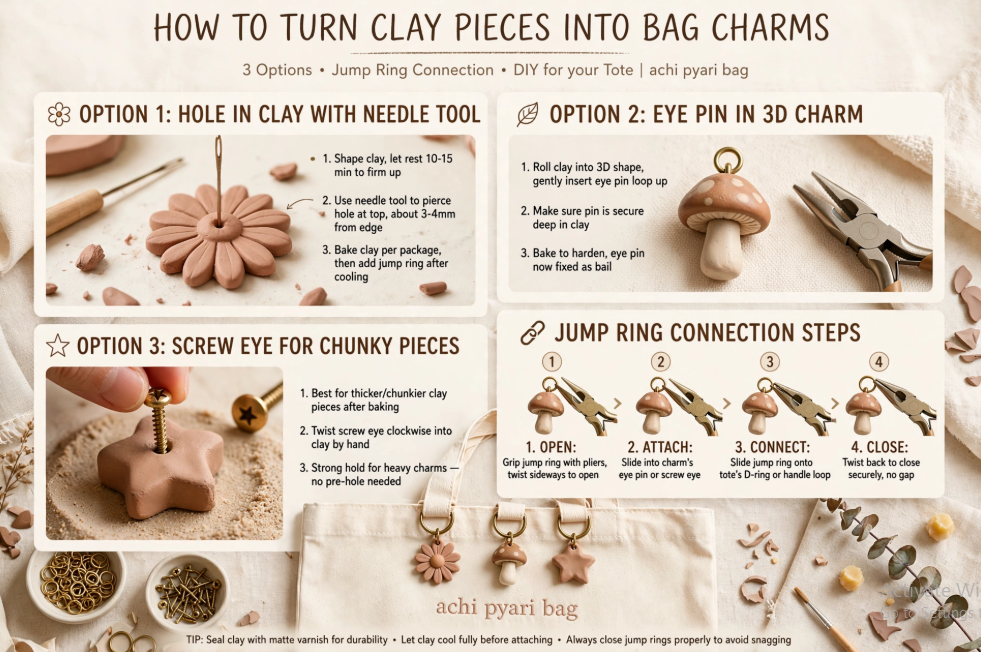
How to Turn Clay Pieces Into Bag Charms
Making the clay shape is only half of the project. You also need a secure way to attach it to your bag.
Option 1: Make a Hole in the Clay
For flat charms, make a small hole near the top before baking.
A needle tool can work for a small opening, while a larger tool may be useful when your hardware requires a wider hole.
The opening should be large enough for the jump ring you plan to use.
Option 2: Add an Eye Pin
For a three-dimensional charm, an eye pin can provide a convenient attachment point.
Position the pin in the clay before baking and make sure enough of the hardware remains accessible afterward.
For heavier or more dimensional pieces, pay extra attention to how deeply the hardware sits in the clay.
Option 3: Use a Screw Eye
A screw eye can be useful for chunky sculpted pieces.
Insert it into the clay before curing when the design allows. If you are relying on adhesive after baking, use an adhesive appropriate for the materials involved and follow its instructions.
Connect the Hardware
After the clay has cooled:
- Open a jump ring carefully from the side.
- Add the clay charm.
- Add your clasp or key ring.
- Close the jump ring securely.
Avoid pulling the jump ring apart sideways because that can distort its shape.
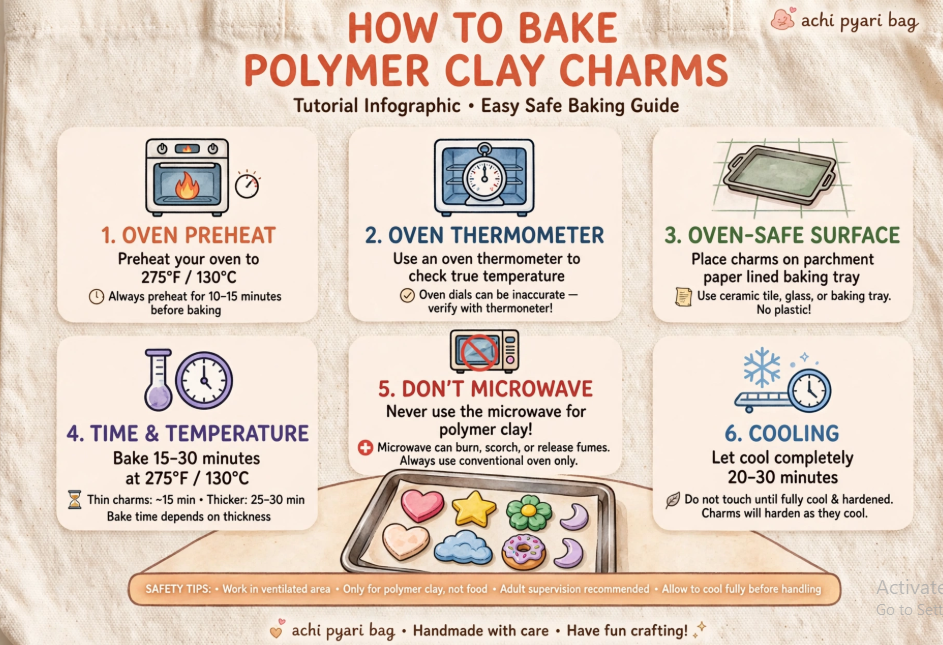
How to Bake Polymer Clay Charms
Baking is one of the most important steps because the charm needs to cure properly.
When making DIY clay bag charms, always start with the instructions on your particular clay package. Polymer clay products can have different recommended temperatures and curing times depending on the formula and thickness, so follow the manufacturer’s guidelines for the best results.
For example, Sculpey lists different curing times for different products, even when some share the same general baking temperature.
A few useful practices include:
- Preheat the oven first.
- Use an oven thermometer if you are unsure about temperature accuracy.
- Bake on an oven-safe surface recommended by the clay manufacturer.
- Follow the package’s time and temperature instructions.
- Don’t microwave polymer clay.
- Allow the finished piece to cool after baking.
Sculpey specifically recommends good ventilation and warns against exceeding the temperature or time specified for the clay.
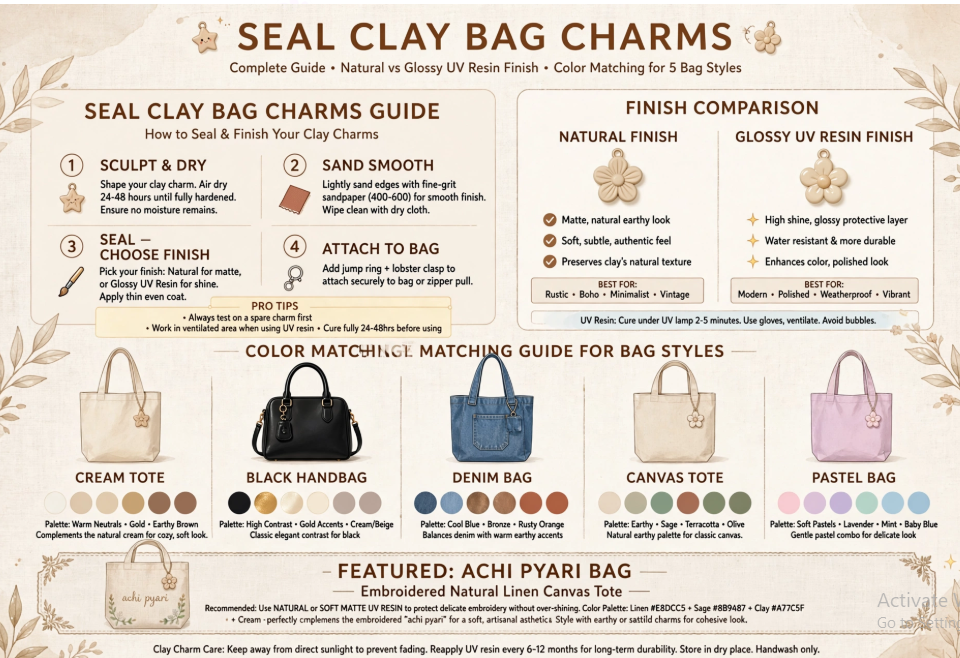
Should You Seal Clay Bag Charms?
Not every polymer clay charm needs a coating.
Once your DIY clay bag charm is fully cured, you can leave it with its natural finish or add paint or a compatible finish if you want to create a different look.
Some crafters also use UV resin to give their DIY clay bag charms a glossy, glass-like surface. If you choose this method, follow the resin manufacturer’s safety guidelines and curing instructions carefully.
For small bag charms, remember that the goal isn’t simply maximum shine. A finish should complement the design and be practical for the way the charm will be used.
How to Choose Colors for Your Bag Charm
One easy way to make a handmade charm look intentional is to borrow colors from the bag itself.
For example:
- Cream tote: blush, brown, sage, and soft yellow
- Black handbag: burgundy, cream, gold-look accents, or bright pink
- Denim bag: white, red, pale blue, and yellow
- Canvas tote: natural brown, green, terracotta, and cream
- Pastel bag: lavender, pink, pale blue, butter yellow, and white
You can also use a three-color palette: one dominant color, one supporting color, and one small accent.
Easy Ways to Personalize Clay Bag Charms
Personalization is where these projects become especially useful as gifts.
Try:
- Initials
- Birth-month-inspired colors
- Favorite foods
- Tiny flowers
- Pets or animal silhouettes
- Zodiac-inspired symbols
- Favorite colors
- Seasonal shapes
- Matching sets for friends
- A miniature version of a favorite object
You don’t have to make an elaborate sculpture. Even a simple heart with an initial can feel personal when the color and details are chosen for a specific person.
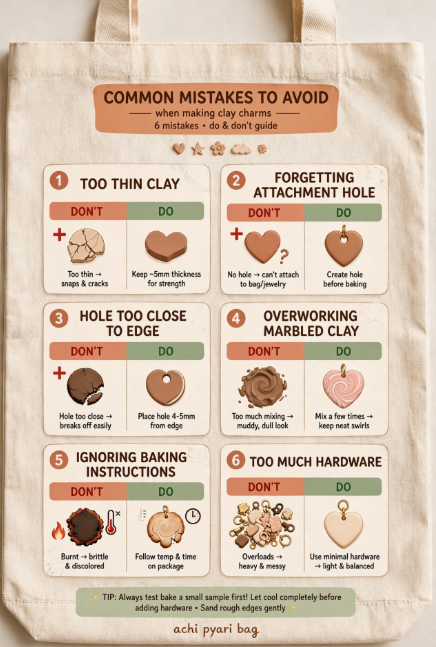
Common Mistakes to Avoid
Making the clay too thin
Very thin clay can be harder to handle and may not be appropriate for an accessory that gets bumped or handled frequently.
Forgetting the attachment hole
If your charm needs a hole, make it before baking. Once polymer clay is cured, creating a clean hole can be much more difficult.
Putting the hole too close to the edge
Leave enough clay around the opening to reduce the chance of the attachment area becoming weak.
Overworking marbled clay
If you keep twisting and kneading multiple colors together, the pattern can disappear.
Ignoring the clay’s baking instructions
Don’t assume every polymer clay product uses the same baking schedule. Follow the package instructions for your specific clay.
Adding too much hardware
A charm with many metal components can become visually busy and unnecessarily heavy. Use only what the design needs.
How to Make a Clay Bag Charm Look More Polished
Small finishing details make a big difference.
Before baking, check your piece from several angles and look for:
- Fingerprints
- Uneven edges
- Cracks
- Loose clay details
- An attachment hole that is too close to an edge
- Uneven thickness
- Dust or lint
Before baking your DIY clay bag charms, smooth away any visible fingerprints for a cleaner finish. Sculpey’s beginner guidance also notes that isopropyl alcohol can be used gently to help remove fingerprints from polymer clay.
A clean surface and well-positioned attachment point can make a simple design look much more finished.
Final Thoughts
Making DIY clay bag charms is a fun way to turn a small amount of polymer clay into a personalized accessory. Start with easy shapes such as hearts, stars, flowers, and rainbows, then experiment with miniature foods, fruit, mushrooms, bows, and sculpted designs as your skills grow.
The easiest way to create a coordinated collection is to repeat a few colors across different designs. A strawberry, flower, bead, and bow can look like they belong together when they share the same palette.
And because the pieces are small, you can experiment without committing to a large project. Make one charm for your favorite tote, build a colorful collection, or create a personal
FAQs
What type of clay is best for bag charms?
Oven-bake polymer clay is a practical choice for many DIY clay bag charms because it remains workable until cured and can be shaped into both flat and three-dimensional designs. Always follow the baking and curing instructions provided for the specific clay you purchase.
How do you make clay bag charms?
Shape polymer clay into your desired design, create an attachment hole or add suitable hardware before curing, bake according to the manufacturer’s instructions, let the piece cool, and attach it to a jump ring, clasp, or key ring.
Do polymer clay charms need to be sealed?
No, sealing is optional for DIY clay bag charms and depends on the look and finish you want. Some crafters leave cured clay uncoated, while others use a compatible glaze or resin to create a different surface appearance.
How do you attach a polymer clay charm to a bag?
After the clay has cured and cooled, connect the charm to a jump ring and then attach the jump ring to a lobster clasp, key ring, or other bag-hardware piece.
Can I make polymer clay beads into bag charms?
Yes. Polymer clay beads can be combined with other beads, cord, jump rings, and hardware to create colorful beaded bag charms.
How thick should clay bag charms be?
There is no single thickness that works for every design. As a practical starting point, avoid making a charm unnecessarily thin, particularly when it will be handled regularly. Follow the clay manufacturer’s guidance for curing thicker pieces.
Can I use leftover polymer clay for bag charms?
Yes. Small leftover pieces are especially useful when making DIY clay bag charms, including marbled beads, tiny leaves, dots, sprinkles, and other decorative details.
Can I make personalized clay bag charms?
Absolutely. Initials, favorite colors, flowers, foods, animals, and simple symbols can all be used to create personalized designs.
Can clay bag charms be used as keychains?
Yes. The same clay pieces can often be assembled with key rings or keychain hardware. Choose an attachment method appropriate for the shape and size of the finished piece.
How do I prevent polymer clay charms from breaking?
Use an appropriate thickness, avoid placing holes too close to edges, make sure attached pieces are well connected, and cure the clay according to its package instructions. Underbaking can result in brittle pieces for some polymer clay products.