

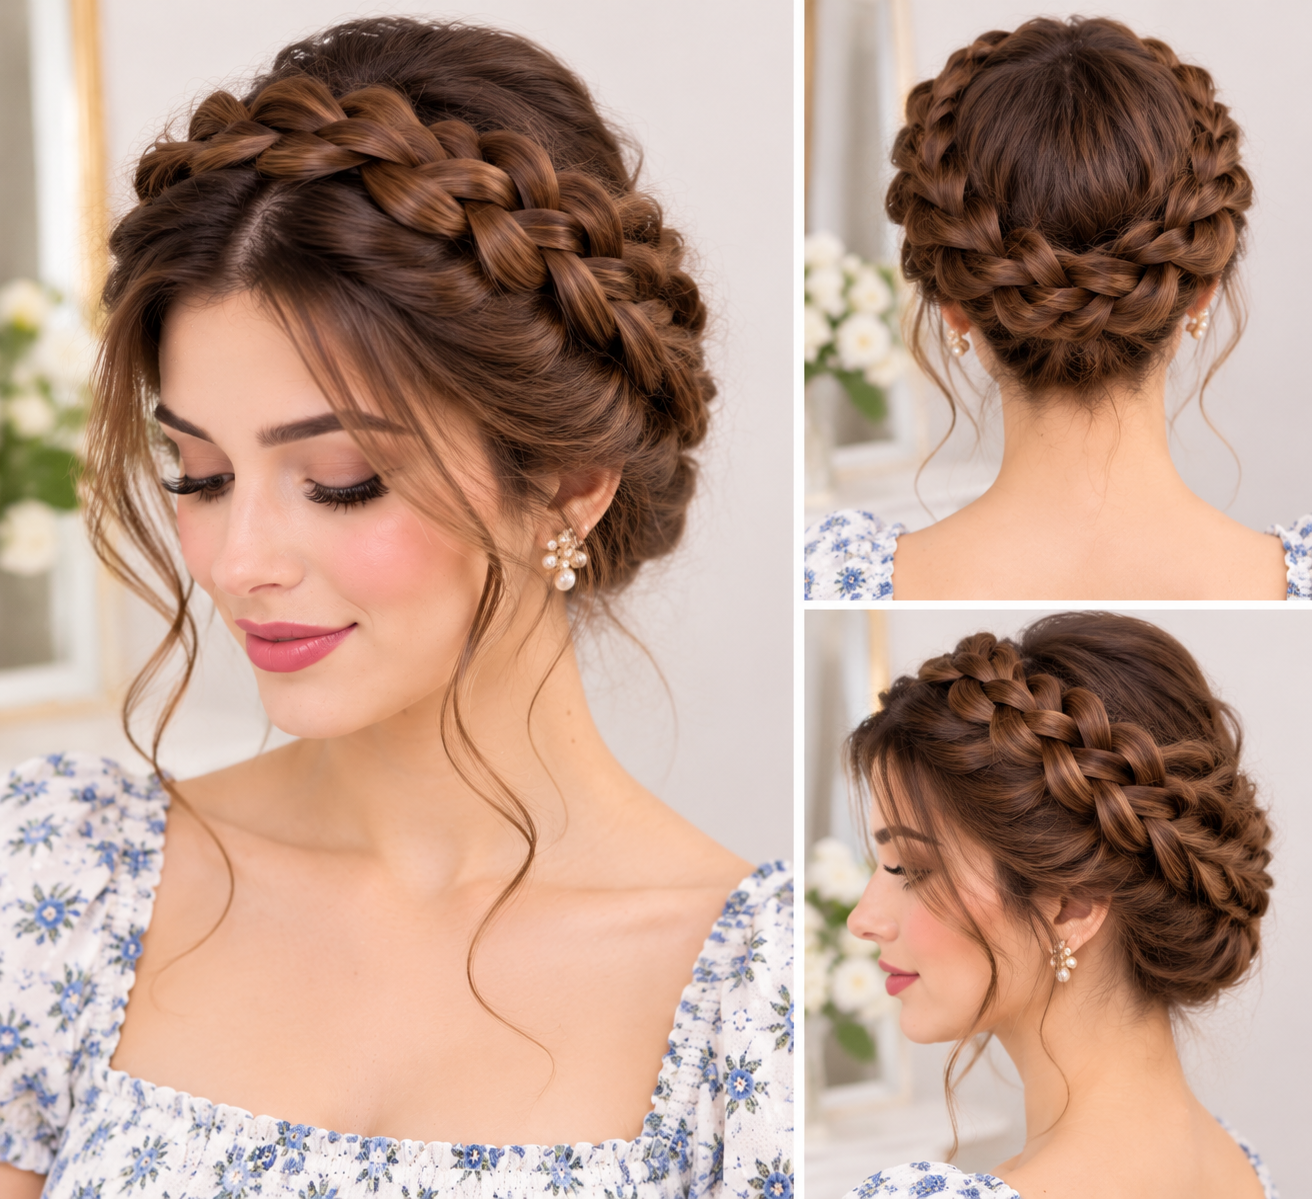
Crown braid hairstyles are a beautiful way to give your hair an elegant look without spending too much time on styling.
Whether you’re heading to work, going to class, meeting friends for coffee, or enjoying a relaxing weekend, crown braid hairstyles can elevate your simple outfits and give you a beautiful, effortlessly polished look.
The best thing is you can wear this style on any occasion.
From classic Dutch braids to soft, messy crowns and romantic half-up styles, crown braid hairstyles offer plenty of beautiful ways to create a relaxed, effortless everyday look.
If you’re new to braiding, start with a simple two-braid milkmaid crown which will give a similar braided wrapped look.
Below I’ve listed 10 beautiful crown braid hairstyle that can be worn every day with styling tips to help you recreate these looks.
For more beautiful everyday hair inspiration, explore our 15 Hairstyles for Medium Hair With Curtain Bangs to discover effortless looks that are both stylish and easy to recreate.
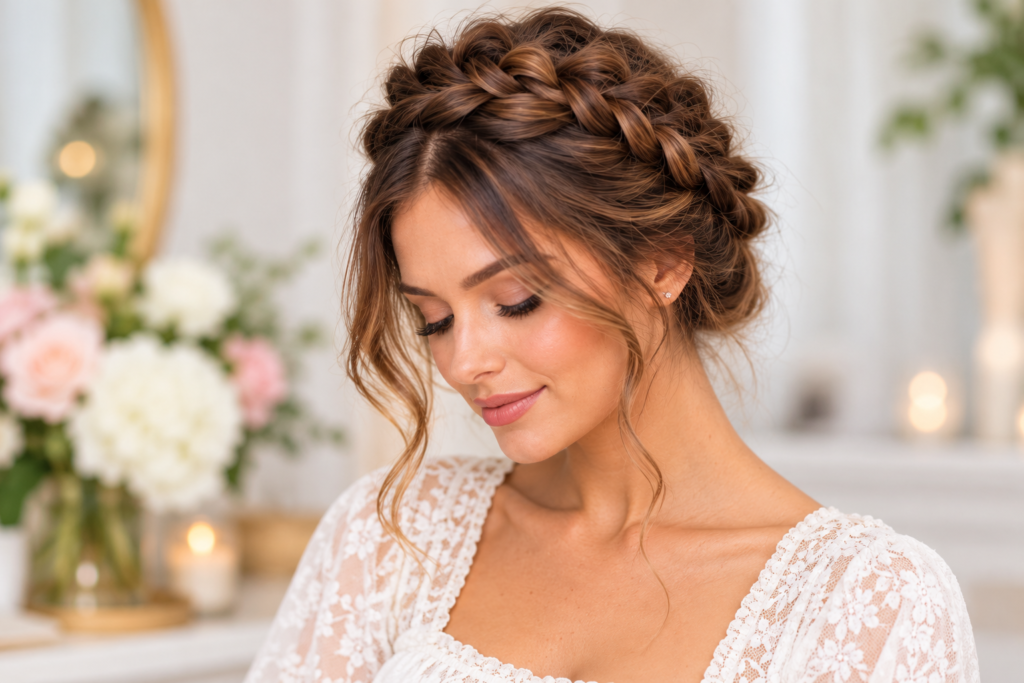
10 Crown Braid Hairstyles for Everyday Wear
1. Classic Dutch Crown Braid
The classic Dutch crown braid is a timeless hairstyle that creates a beautiful woven circle around your head.
Unlike a traditional French braid, a Dutch braid crosses the outer strands underneath the middle section, creating a beautiful raised effect that makes crown braid hairstyles look fuller and more defined.
This creates a detailed and sophisticated look.
Brush your hair through to ensure there are no knots and make sure the side is parted comfortably.
Using a section of hair just above your ear, split the hair into 3 even sections.
Start Dutch braiding by crossing the outer sections over and under the middle. Add in small amounts of hair as you go.
As you braid around the back of your head, follow its natural curve toward the opposite side to create a smooth, rounded shape that makes crown braid hairstyles look beautiful and balanced.
Once you have woven in all the loose hair, braid using a normal 3 strand braid.
Secure with a small elastic and thread under the crown. Use bobby pins to secure.
To create a more relaxed look, gently loosen the outer edges.
Best for: Medium to long hair, workdays, casual outings, and polished everyday hairstyles.
Styling tip: For comfortable everyday crown braid hairstyles, keep the braid slightly loose around your hairline so it stays secure without pulling tightly or causing scalp discomfort.
For more everyday hair inspiration, explore our 10 Simple Hairstyles for Medium Straight Hair to discover easy, stylish looks that are perfect for any occasion.
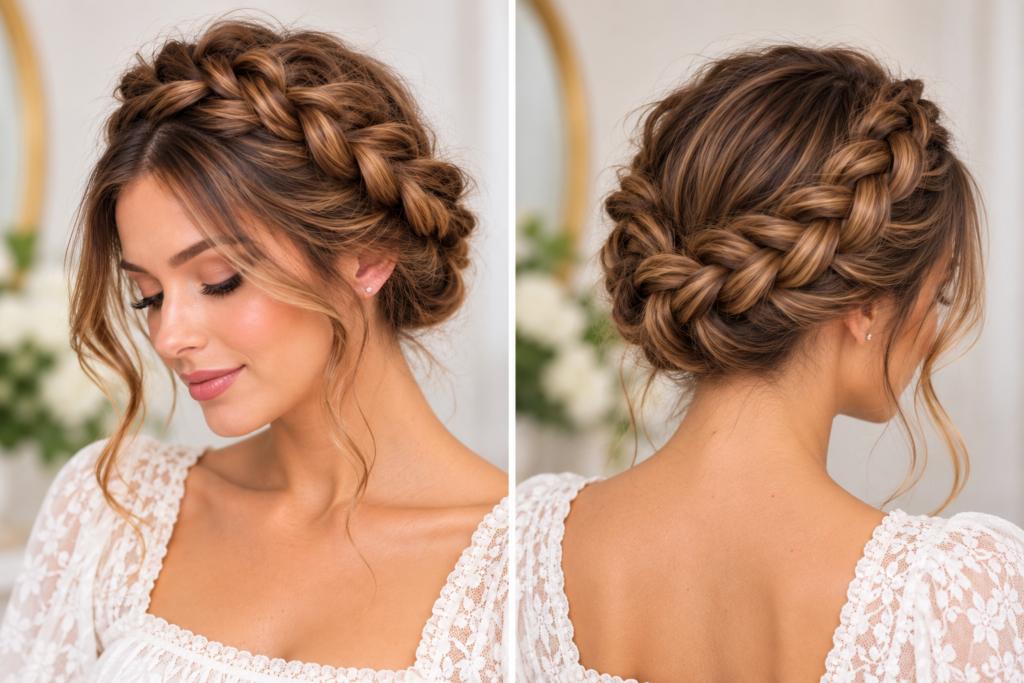
2. Easy Two-Braid Milkmaid Crown
One of the easiest types of crown braid is the two braid milkmaid crown.
Instead of having one long braid all the way around your head, there are two braids that have been wrapped and pinned.
This results in a cute classic style, perfect for wearing with casual dresses, jeans and knitted jumpers.
Create a centre parting going from your forehead to the back of your neck.
Split your hair into two halves. Create a standard 3 strand braid.
Secure with a small elastic band.
Take your first braid and place it at the top of your head like a headband.
Secure the first braid behind the opposite ear with a bobby pin. Then, overlap the second braid slightly to create a beautiful, complete crown, perfect for everyday crown braid hairstyles.
Make sure any elastic bands are hidden and secure any loose bits with extra pins.
This works well if you are just starting out with braiding your own hair.
Best for: Beginners, medium to long hair, school, errands, and relaxed weekends.
Styling tip: Use bobby pins that blend with your hair color for a cleaner finish. Place the pins underneath the braid whenever possible.
If your straight hair is naturally fine, explore our 15 Easy Hairstyles for Thin Hair That Look Fuller for more beautiful styling ideas that add volume and dimension.
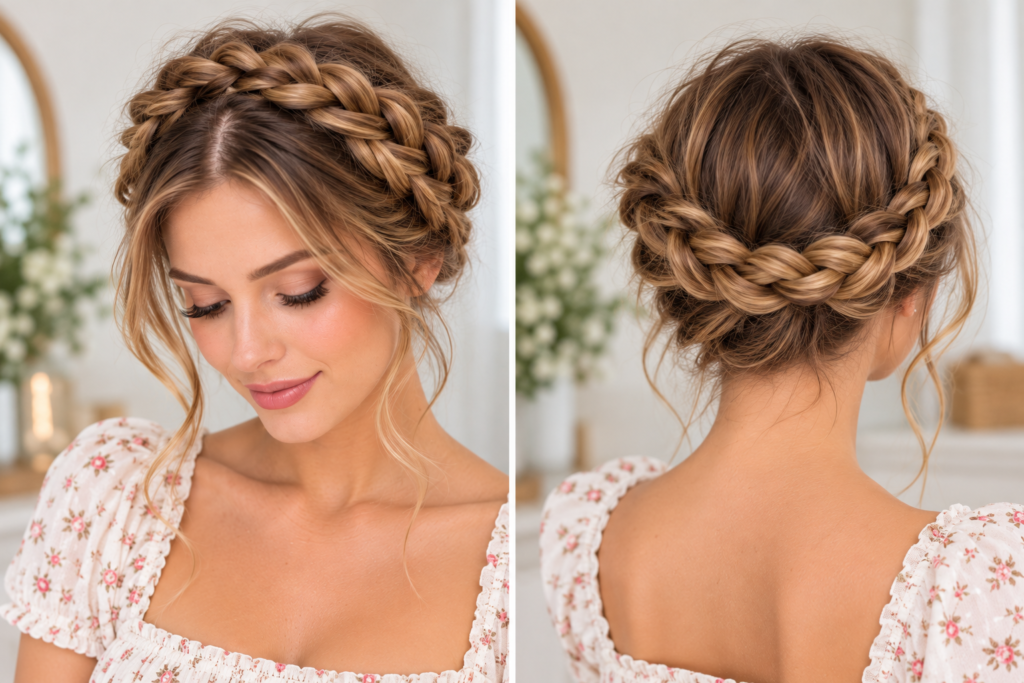
3. Soft Messy Crown Braid
If you’re wanting a more romantic style, a softly messy crown braid will do the trick.
This version uses some nice texture and soft volume to create a less perfect braided circle.
The slight looser look makes this a very pretty style for everyday wear.
Start by creating a slight asymmetrical part.
Braid two loose sections from each side.
Then bring the braids down to the back of your head and wrap them around creating a soft crown.
If you have long hair you can wrap them further around your head.
Once secured, gently separate the outside loops to give a fuller look.
Leave a few face framing pieces loose around your temples if they sit naturally.
To keep it even softer don’t tuck all flyaways in.
Best for: Naturally wavy hair, casual dates, weekend brunches, and relaxed everyday looks.
Styling tip: Create a secure braided foundation before loosening the sections. This helps the hairstyle maintain its shape while still looking effortless.
If you’re looking for adorable hairstyle inspiration for younger girls, explore these 15 Cute and Easy Hairstyles for Little Girls that are perfect for school, parties, and everyday wear.
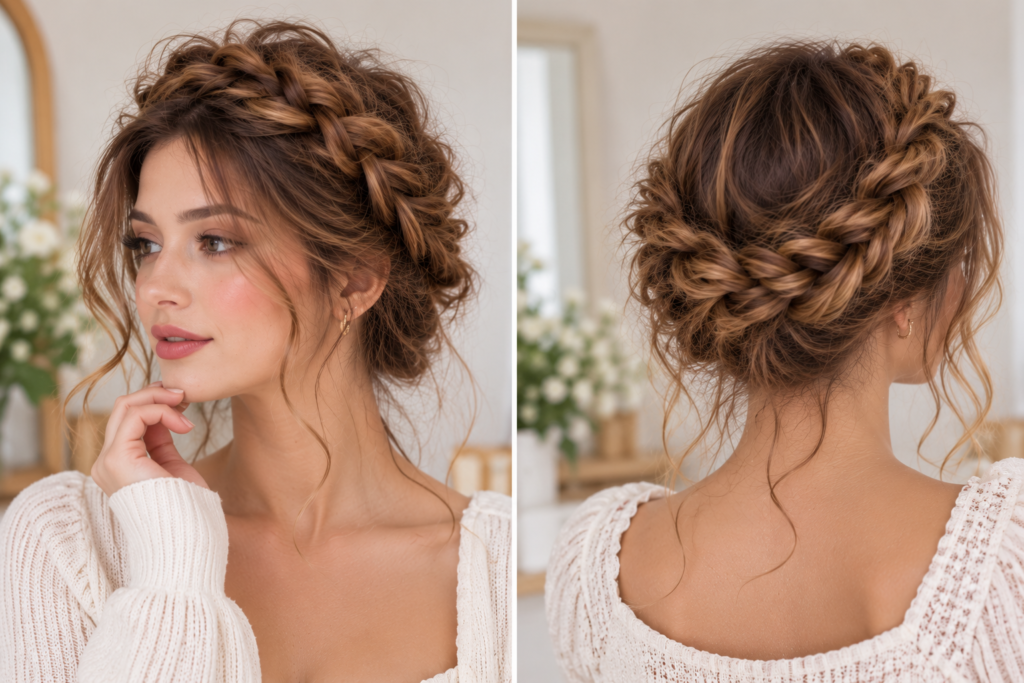
4. Half-Up Crown Braid With Loose Waves
This half up crown braid is a beautiful way to style your long hair.
It is a very delicate braid that creates a nice smooth look.
This is a beautiful choice if you want to try crown braid hairstyles that look more stylish and feminine than a simple half-up ponytail.
Begin by grabbing a small piece of hair from the front of your head.
Braid into a simple 3 strand braid and secure.
Do the same to the other side.
Take both braids and wrap them round the side of the head and tie together at the back just below the crown.
Secure the ends with a small elastic or an X shape of bobby pins.
Leave the rest of your hair loose to hang down your back.
If your hair is naturally wavy or curly then leave it as is. Straight hair also looks beautiful.
Best for: Medium and long hair, college, casual dinners, and everyday feminine hairstyles.
Styling tip: Keep the braids relatively thin so they frame the upper section of your hair without overpowering the loose lengths.
For more inspiration, explore these 15 Easy Braided Hairstyles for Beginners to discover simple and beautiful braided looks.
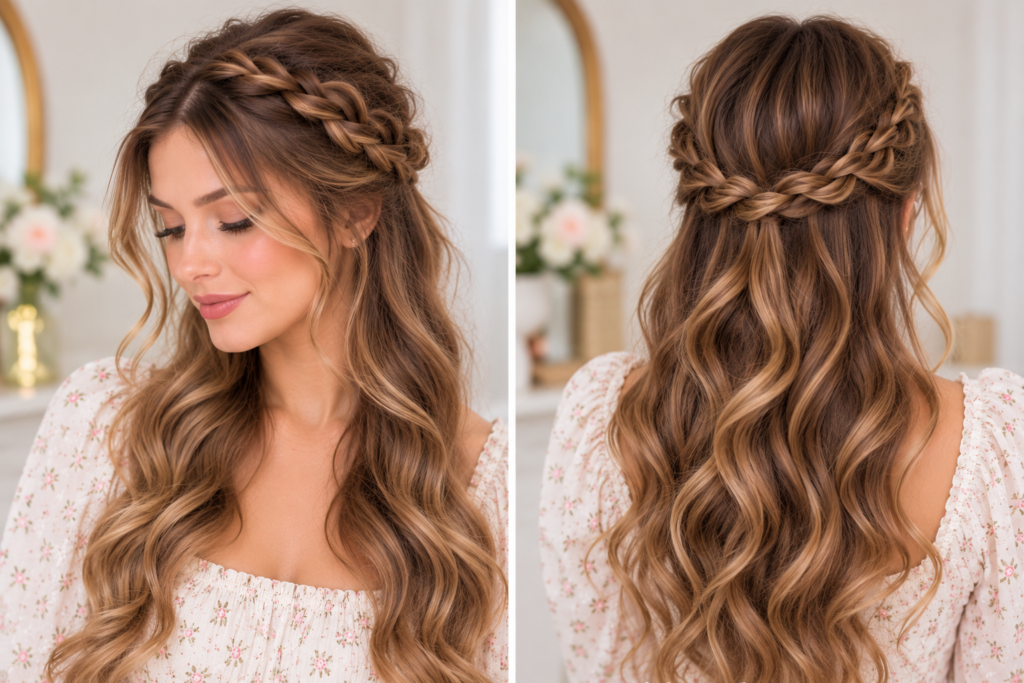
5. Side-Swept Crown Braid
Side swept crown braid
The braid is created on one side starting at a deep side part.
You will then create a braided braid following the front hairline to the other ear.
It creates a subtle braided braid which looks like half a crown.
Create a deep side part.
Grab some hair from the thicker side. Split into 3 sections.
Create either a French or Dutch braid making sure to take in little bits of hair as you go along.
The braid should be close to your hairline but make sure not to pull the strands too tight.
Braid until you reach the other temple/ear and create a short regular braid.
Tuck the end into the loose hair and secure with a small elastic. Secure using bobby pins.
Leave the rest of your hair down or put into a low ponytail.
The uneven braid creates some interest but keeps the hairstyle simple.
Best for: Shorter front layers, medium-length hair, casual office days, and everyday styling.
Styling tip: A slightly off-center braid often looks softer than a perfectly symmetrical design, especially when paired with natural waves.
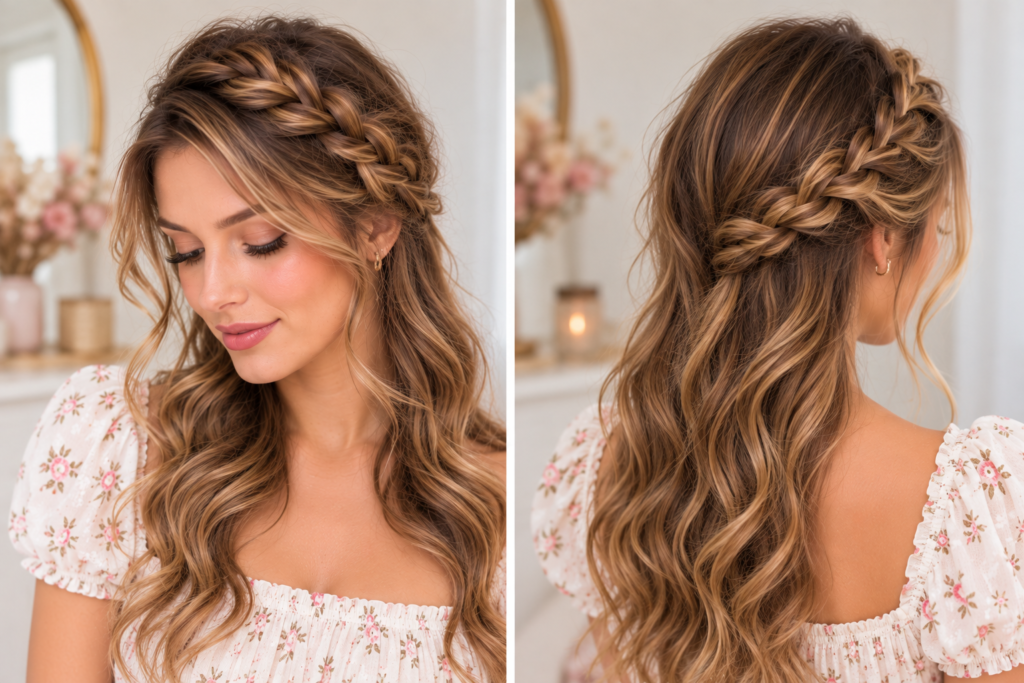
6. Double Dutch Crown Braid
A fabulous choice if you love well structured braided hairstyles!
This hairstyle is created by braiding 2 Dutch braids together to create a crown like look.
The bumps give some texture but also keep most of your hair in place.
Start off by creating a centre parting from your forehead to your nape.
Braid your hair using the Dutch braid technique on either side of your head, starting from the front.
You will need to add little sections of hair throughout the braid.
Once you get to the nape of your hair simply braid the hair into a standard 3 strand braid and tie up the ends.
Lift up the braids and wrap them around the back or top of your head depending on how long your hair is.
Tuck the ends under the opposite braid and secure with bobby pins.
To add more volume gently fluff up the braided sections.
Best for: Medium to long hair, busy workdays, outdoor activities, and practical braided updos.
Styling tip: For beautiful crown braid hairstyles, keep both braids similar in size, but don’t worry about perfect symmetry. Slight variations create a softer, more natural look.

7. Romantic Fishtail Crown Braid
Fishtail crown braids will add a subtle detail to your classic braids.
Instead of having 3 strands, you will have 2 main sections. With a fishtail braid you will create small sections of hair that will cross over from each side.
This will create a detailed weave design which will look amazing on long hair.
To make things simpler for everyday you can start off by separating your hair into 2 sections.
Take one side and gather into a low ponytail. Then separate into 2 equal parts.
Take a small part from the outer section of the first strand and cross over to join with the second strand.
Repeat on the other side. Continue alternating until you get to the end.
Secure with a small elastic. Repeat on the other side.
Place both braids over the top of your head and secure with pins to create a crown.
Gently separate out the fishtail sections.
Although this takes more patience than a traditional crown braid, it will give you a beautiful textured look.
Best for: Long hair, weekend outings, casual celebrations, and romantic everyday hairstyles.
Styling tip: Use small, consistent sections while creating the fishtail pattern. You can loosen the braid afterward without losing its detailed appearance.
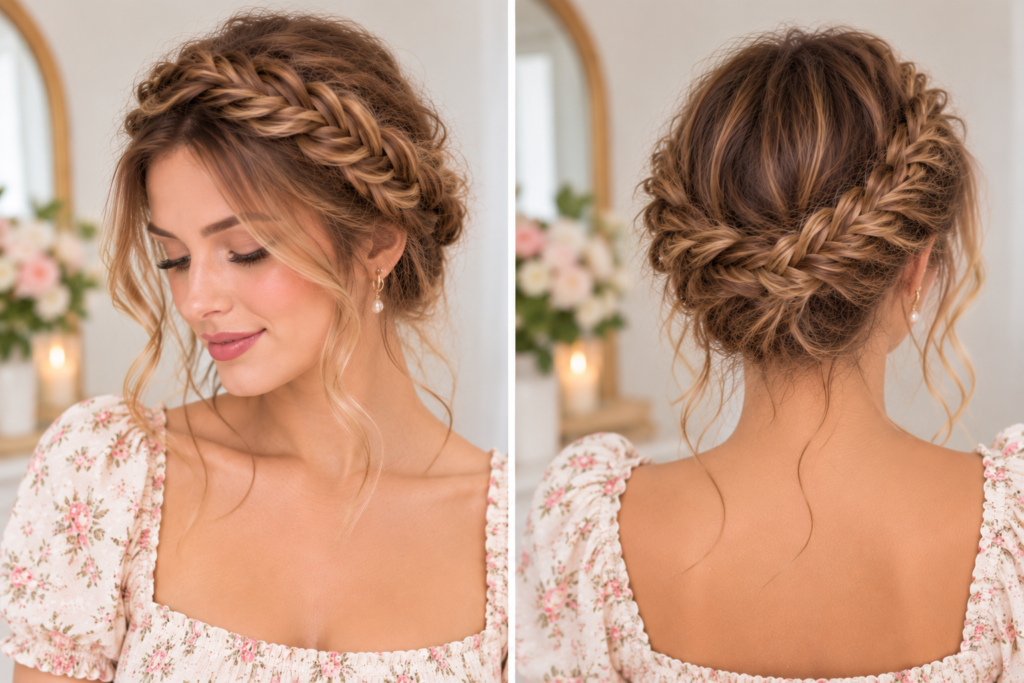
8. Crown Braid With a Low Messy Bun
This hairstyle is the perfect way to merge two beautiful styles together.
The braiding adds some texture to your hair and gives a neat yet low bun.
If you want to keep your hair away from your neck but don’t want to put your hair into a tight ponytail this will be perfect for you.
Start with a side part.
Take some hair from the front section, and create a loose French braid on one side of your head.
Work your way down the back of your head, keeping the braid curved at the top of your ear.
Secure your braid at the nape of your neck.
Gather your remaining hair into a low ponytail, making sure to include the end of the braid.
Twist your hair to create a relaxed bun. Secure with a soft elastic and bobby pins.
Gently unravel your braid slightly and pull through some face framing strands of hair.
This hairstyle has a soft and polished finish thanks to the textured braid and soft bun.
Best for: Medium to long hair, office days, shopping trips, and warm-weather styling.
Styling tip: Keep the bun low and slightly loose to balance the braided detail without creating unnecessary tension around the hairline.
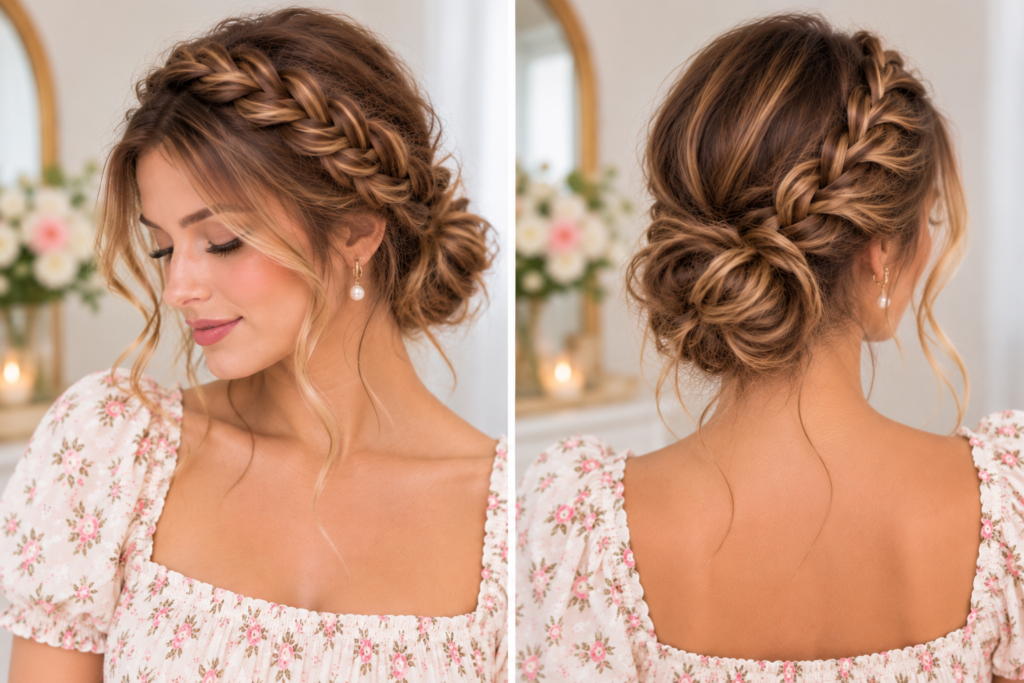
9. Braided Headband Crown for Medium Hair
A braided headband crown is beautiful if you don’t have long hair.
You won’t be braiding all your hair but braiding a piece of hair to give the illusion of a crown.
This is an easy and very versatile choice if you have medium length hair.
Take a section of hair just behind one ear.
Split this into 3 sections. Braid normally keeping towards the ends.
Secure this braid with a small elastic.
Now lift this braid up onto your head so it sits as a headband.
Use a bobby pin to secure the ends behind the opposite ear. This will hide them.
If your braid isn’t long enough, create another braid on the opposite side and cross over the ends.
Leave the rest of your hair loose.
Your hair will look lovely with a subtle braided detail.
Best for: Medium hair, layered haircuts, beginners, and quick everyday hairstyles.
Styling tip: Choose a braid section that is thick enough to be visible but light enough to sit comfortably across your head.

10. Loose Crown Braid for Naturally Curly Hair
This is a lovely way to show off the natural curl in your hair.
As you’re not trying to straighten your hair it will give it some volume and dimension with your natural wave.
It’s quite a relaxed, romantic look that is easy to customise.
Start by brushing your hair through gently.
Apply a little of your usual leave-in conditioning product or styling cream if needed.
Split your hair into two sections at the front.
Braid each section loosely, ensuring that they are not too tight around your temples.
Gather the two braids to the back of your head and secure with a small elastic or bobby pins.
To give more volume to your crown braid larger sections or longer braids can be wrapped around your head.
Leave the rest of your hair to curl naturally.
To make a full crown braid include more hair into your braids if possible depending on the length and type of hair you have.
Best for: Naturally curly hair, textured hairstyles, relaxed weekends, and everyday styling.
Styling tip: Avoid repeatedly pulling or stretching your curls to make the braid perfectly smooth. Letting some natural texture remain visible gives the hairstyle its character.

How to Do an Easy Crown Braid on Yourself
If you’re trying a crown braid for the first time, the two-braid method is a good place to begin.
You don’t need advanced Dutch braiding skills, and the steps are relatively easy to follow with a mirror.
What you’ll need: A brush or wide-tooth comb, two small hair elastics, several bobby pins, and an optional lightweight styling product.
Step-by-step instructions:
- Gently detangle your hair and create a middle part.
- Divide your hair into two equal sections.
- Create a regular three-strand braid on each side, starting low enough for the braids to wrap comfortably over your head.
- Secure both ends with small elastics.
- Lift the first braid across the top of your head and pin it near the opposite ear.
- Bring the second braid across, positioning it beside or slightly behind the first.
- Tuck the ends underneath the braids and secure them with additional pins.
- Gently adjust the braided sections until the crown looks balanced.
For a more casual finish, loosen a few sections slightly and leave natural face-framing strands around your temples.
Remember that the finished crown should feel comfortable. You shouldn’t need to pull your hair tightly to make it stay in place.
How to Make Crown Braids Look Beautiful All Day
The secret to a wearable crown braid isn’t necessarily stronger hairspray or tighter braiding.
Instead, focus on preparation, placement, and a few simple finishing details.
Prepare Your Hair for Braiding
Start with gently detangled hair.
If your hair is naturally smooth and slippery, a small amount of lightweight mousse or texture spray may help provide grip.
For curly or coily hair, follow your normal moisture and detangling routine rather than adding unnecessary drying products.
You don’t need to wait several days after washing your hair to create a braid.
Secure the Braids With Hidden Pins
Secure the ends with small elastic bands.
Insert bobby pins under the braided sections to secure into nearby strands.
If you have thick hair, using large hairpins may be more supportive.
Use a second mirror to check that the ends are tucked at the back of your hairstyle.
Create Volume Without Excessive Tension
If your crown braid looks too narrow, gently pull outward on the outer loops after securing the style.
This technique, often called pancaking, can make a braid appear wider.
Work gradually so you don’t accidentally loosen the entire hairstyle.
For fine hair, widening the braid can create a fuller-looking result without relying on heavy extensions.
Keep the Hairline Comfortable
Avoid pulling tightly around your forehead, temples, or ears.
The American Academy of Dermatology’s guidance on hairstyles that pull explains that repeated tension from tight hairstyles can contribute to hair loss.
If your scalp hurts, loosen or remove the braid rather than trying to tolerate the discomfort.
Choose Accessories That Suit Everyday Wear
You don’t need elaborate decorations to make a crown braid look pretty.
A small satin ribbon, delicate barrette, or simple hair clip can add personality without making the hairstyle feel overly formal.
For work or school, understated accessories usually complement the braided shape beautifully.
Common Crown Braid Mistakes to Avoid
Even a simple braided crown can become frustrating if the sections are uneven or the finished style feels uncomfortable.
One common mistake is starting the braid without considering where it needs to end. Before braiding, imagine the shape you want to create and check whether your hair has enough length to reach that position.
Another mistake is using too much styling product. Heavy creams, excessive hairspray, and multiple layers of texturizing products can make hair difficult to handle.
Short layers can also slip out of a crown braid. Instead of pulling them tighter, use a small pin or leave the shortest pieces loose.
Finally, avoid trying to make every section perfectly identical. Crown braids often look especially pretty when they have a little natural softness and movement.
Conclusion
Crown braid hairstyles are a lovely way to add something special to your everyday routine without relying on complicated styling.
Whether you prefer a classic Dutch crown, an easy milkmaid braid, a romantic fishtail, or a relaxed half-up variation, there’s a braided look for different hair lengths, textures, and occasions.
If you’re just beginning, try the two-braid milkmaid crown or braided headband first. Once you’re comfortable with those techniques, experiment with Dutch braids and more detailed woven styles.
The goal is to find a hairstyle that looks beautiful, feels comfortable, and fits naturally into your day.
Frequently Asked Questions
Yes, crown braids can be worn regularly if they are comfortable and don’t create excessive tension. However, it’s a good idea to alternate hairstyles rather than repeatedly pulling the same areas of your hair tightly.
The two-braid milkmaid crown is one of the easiest options. Simply create two regular braids, lift them over your head, and secure them with bobby pins.
Yes, depending on your hair length and layers. A partial crown or braided headband is generally more practical for shorter hair than a complete wraparound braid.
The terms are often used interchangeably. Both describe a braid that creates a crown-like shape around the head. Some tutorials use halo braid for a continuous wraparound braid and crown braid more broadly.
Start with manageable, detangled hair, secure the braid ends with small elastics, and anchor the wrapped sections with well-placed bobby pins. Use a lightweight styling product only if your hair needs extra grip.
Yes. A half-up crown, small braided headband, or gently widened milkmaid braid can look beautiful on fine or thin hair. Avoid heavy accessories and excessive tension, especially if your hair is fragile.