
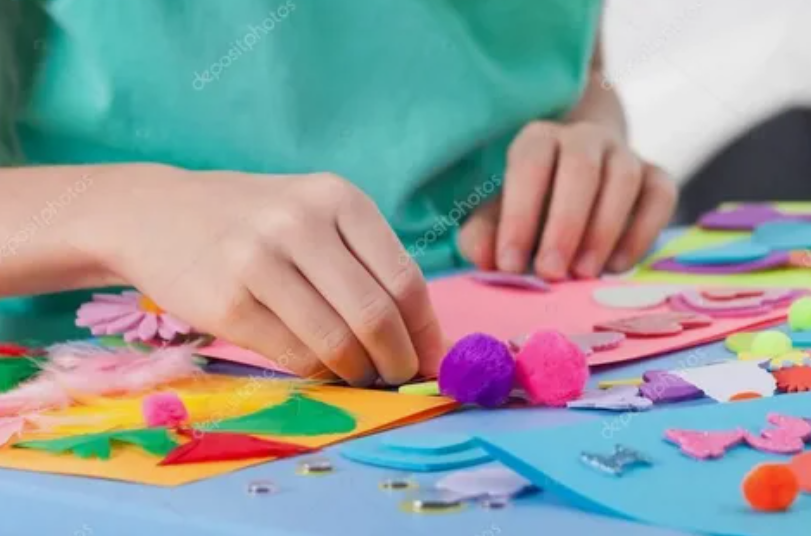

Decorating a blank wall doesn’t have to be expensive or complicated. With these DIY paper wall decor ideas, a few sheets of colorful paper, scissors, and some creativity, you can transform an ordinary wall into something beautiful and personal.
These DIY paper wall decor ideas are perfect for adding texture, color, and personality to bedrooms, living rooms, home offices, and even small apartments. From oversized paper flowers and delicate butterflies to modern geometric designs, there is something for almost every decorating style.
The best part? Many of these projects use inexpensive craft supplies or paper you already have at home.
Whether you prefer minimalist wall art, soft floral decorations, or playful handmade designs, these 15 DIY paper wall decor ideas will help you decorate your walls beautifully without spending a fortune.
If you’re new to crafting, explore our Textile Crafts and Paper Crafts: A Complete Guide for Beginners to learn simple techniques and discover more creative DIY projects.

Essential Supplies for DIY Paper Wall Decor
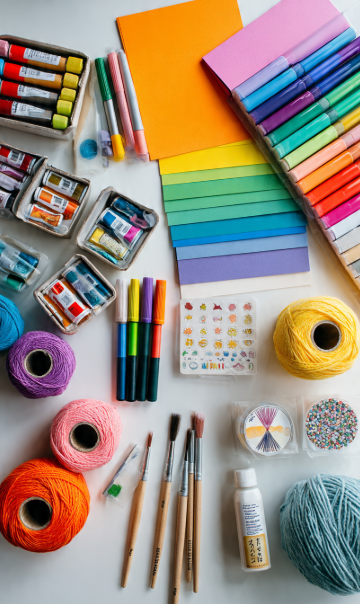
Before starting your project, gather a few basic crafting materials. You won’t need every item for every design, but having the essentials ready will make the process easier.
- Colored cardstock: Ideal for sturdy flowers, butterflies, geometric shapes, and layered artwork.
- Tissue and crepe paper: Great for soft, oversized blooms and delicate decorations.
- Scrapbook paper: Adds patterns and texture to framed artwork and decorative shapes.
- Scissors and craft knife: Useful for simple and detailed cutting.
- Craft glue and double-sided tape: Help secure paper layers together.
- Ruler and pencil: Make measuring and planning easier.
- Foam adhesive squares: Add dimension to layered artwork.
- Frames, string, or lightweight backing boards: Provide different ways to display finished projects.
For beginners, cardstock, scissors, and a glue stick are enough to create several attractive decorations.
1. Oversized 3D Paper Flowers: Beautiful DIY Paper Wall Decor Ideas
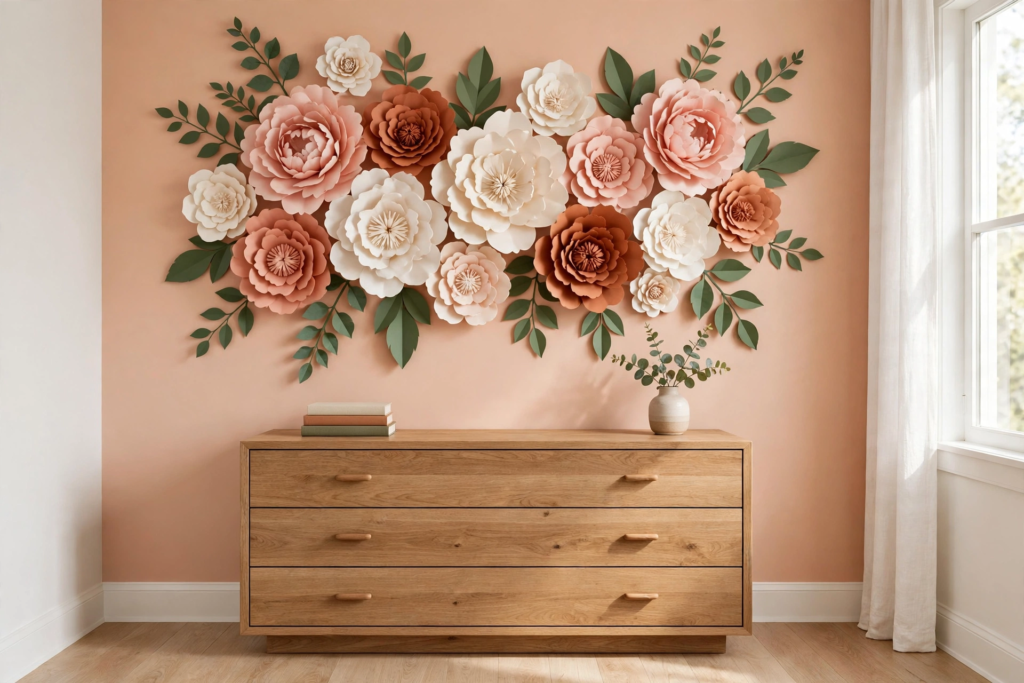
Oversized paper flowers are one of the prettiest ways to transform an empty wall into a soft, eye-catching focal point.
These handmade blooms create dimension and texture without needing expensive floral arrangements or permanent wall treatments. They look especially lovely above a dresser, beside a vanity, or on an accent wall.
You can choose romantic blush pink and ivory flowers for a feminine bedroom, or try terracotta, cream, and muted peach for a warmer, more modern appearance.
Materials needed: Colored cardstock, scissors, pencil, craft glue, and circular cardstock backing pieces.
How to make it:
- Draw and cut several large petal shapes from cardstock.
- Gently curl the outer edges of each petal using your fingers or a smooth pencil.
- Cut a small slit at the base of each petal and overlap the edges slightly to create a curved shape.
- Glue the petals around a circular cardstock base, beginning with the largest pieces.
- Add smaller petals toward the center until the flower looks full.
- Let the glue dry completely before displaying the finished flowers.
Best for: Bedrooms, nurseries, craft rooms, and decorative photo backdrops.
Styling tip: Arrange three large flowers with a few smaller blooms rather than covering the entire wall. This creates a balanced design that feels decorative without becoming overwhelming.
For more creative and budget-friendly projects, explore our Easy Paper Crafts ideas to make beautiful handmade decorations at home.
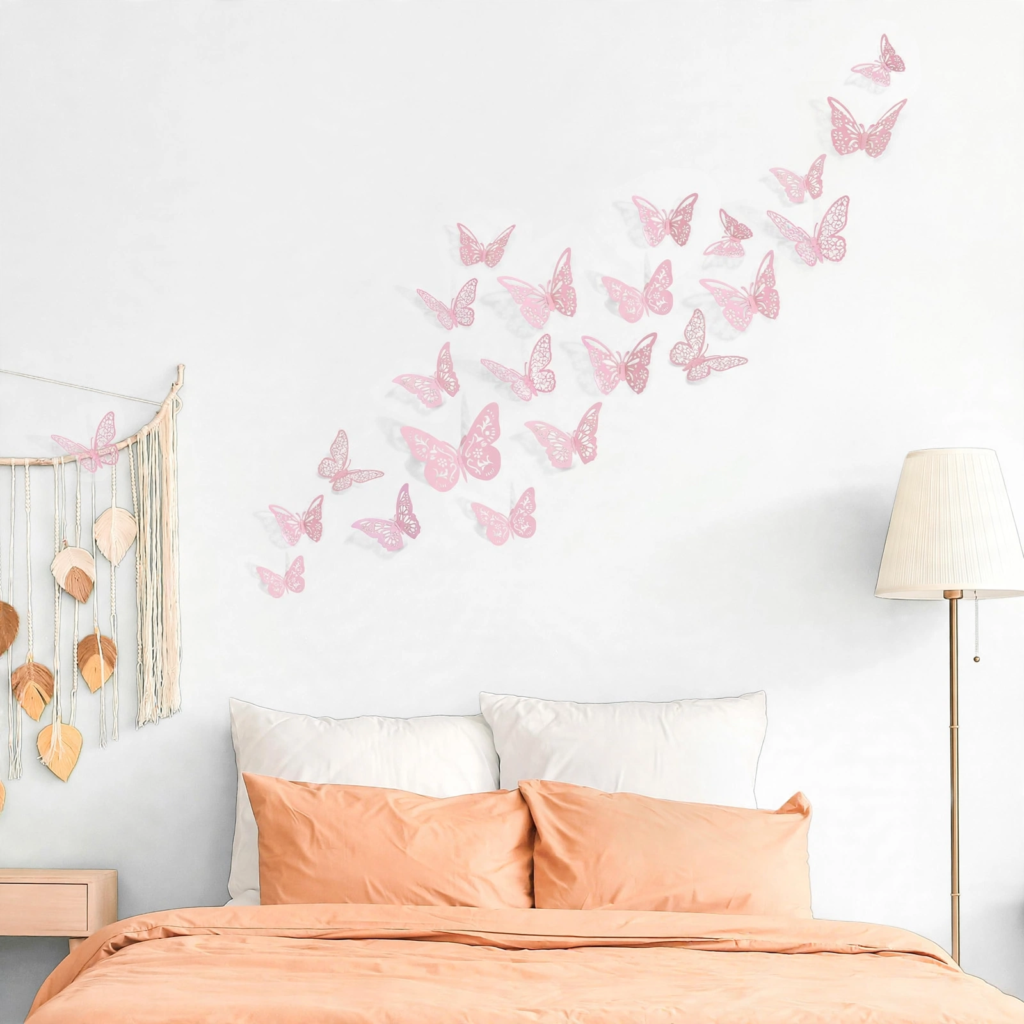
2.Delicate Paper Butterflies: Cute DIY Paper Wall Decor Ideas
Paper butterflies are a charming way to make a plain wall feel playful, light, and full of movement.
Instead of arranging paper butterflies in straight rows, create a flowing pattern that makes them look like they’re gently flying across the wall.
This design works beautifully in a teenage girl’s bedroom, a nursery, or a small reading corner.
For a softer look, choose white, pale lavender, blush pink, and champagne-colored cardstock.
Materials needed: Colored cardstock, butterfly template, scissors, pencil, and suitable removable mounting material.
How to make it:
- Draw or print butterfly outlines in three different sizes.
- Trace the designs onto your chosen cardstock.
- Carefully cut out each butterfly.
- Fold the wings upward along the center to create a three-dimensional appearance.
- Arrange the butterflies on a table before deciding on your final wall layout.
- Attach them using a wall-safe mounting method suitable for the surface.
Best for: Kids’ bedrooms, nurseries, reading corners, and feminine bedroom decor.
Styling tip: Begin with larger butterflies near the bottom of your arrangement and gradually introduce smaller ones toward the top. The changing sizes help create a natural sense of movement.
3. Modern Geometric Paper Wall Art: Creative DIY Paper Wall Decor Ideas
If you love clean lines and contemporary interiors, geometric paper wall art is a stylish alternative to traditional paintings.
These DIY paper wall decor ideas turn simple shapes like triangles, diamonds, hexagons, and overlapping circles into beautiful geometric wall art when thoughtfully arranged together.
The secret is choosing a limited color palette and repeating shapes to create a cohesive composition.
For example, beige, charcoal, and muted gold can create an elegant modern look, while sage green, cream, and dusty blue feel softer and more relaxed.
Materials needed: Heavy cardstock, ruler, pencil, scissors, foam adhesive squares, and a backing board or frame.
How to make it:
- Choose two or three complementary paper colors.
- Draw geometric shapes using a ruler.
- Cut the shapes carefully, keeping the edges neat.
- Arrange the pieces on a backing board until you find a balanced pattern.
- Attach some shapes flat and raise others using foam adhesive squares.
- Display the completed artwork in a frame or mount the backing board securely.
Best for: Living rooms, home offices, hallways, and minimalist bedrooms.
Styling tip: Leave small gaps between some shapes to introduce negative space. This keeps the artwork from looking too crowded and gives the geometric pattern a more polished finish.

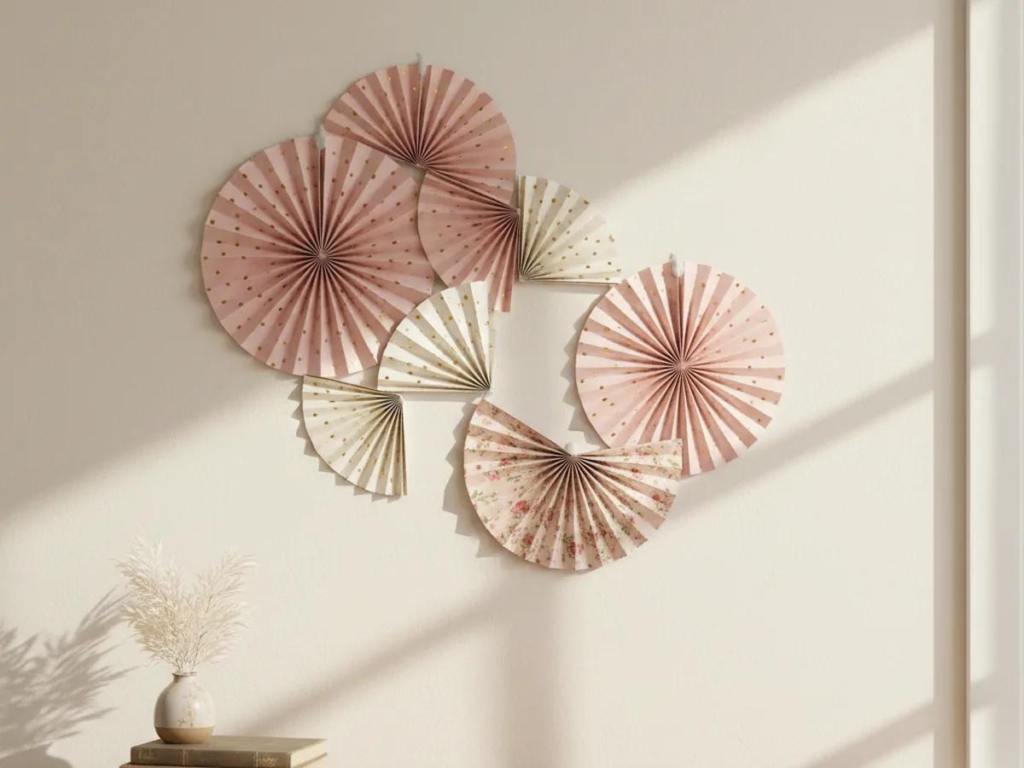
4. Colorful Paper Fan Wall Display: Easy DIY Paper Wall Decor Ideas
Paper fans are an easy way to add texture and visual interest to a wall without requiring advanced crafting skills.
Their folded surfaces create beautiful shadows, making them look more detailed than ordinary flat paper decorations.
You can create a playful display with bright colors or keep things sophisticated with cream, taupe, and muted terracotta.
A collection of paper fans in different sizes can also become an attractive focal point above a desk or console table.
Materials needed: Colored craft paper, ruler, scissors, glue, and lightweight cardstock circles.
How to make it:
- Cut two matching rectangular pieces of paper.
- Fold each rectangle back and forth in an accordion pattern.
- Fold each accordion strip in half.
- Glue the inner edges together to form two semicircular fans.
- Join the two semicircles to create one complete rosette.
- Attach a small cardstock circle to the back to reinforce the center.
Best for: Bedrooms, playrooms, craft spaces, and party accent walls.
Styling tip: Combine five or seven fans in different sizes. Overlap a few of them slightly to make the arrangement feel layered and intentional.
5. Botanical Paper Leaf Branch Wall Art
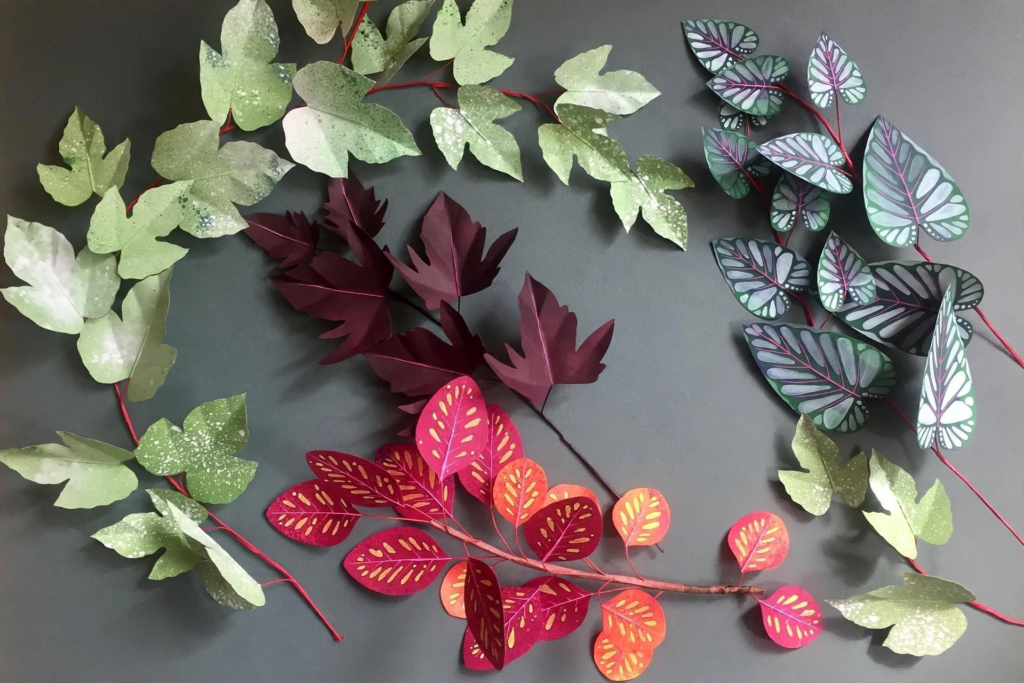
Nature-inspired decorations can make a room feel calmer and more welcoming, even when you don’t have space for real indoor plants.
Paper leaf branch art is especially appealing because it combines simple crafting techniques with an elegant botanical appearance.
Instead of using bright artificial-looking colors, choose sage green, olive, eucalyptus, and muted brown paper for a natural finish.
This project works well in rooms decorated with wood furniture, woven baskets, and warm neutral fabrics.
Materials needed: Green cardstock, pencil, scissors, craft glue, thin paper strips for stems, and a backing board.
How to make it:
- Draw several leaf shapes in different lengths.
- Cut them from two or three shades of green cardstock.
- Fold each leaf gently along its center to create a subtle vein.
- Cut narrow brown or green paper strips for the stems.
- Arrange the stems into a branching pattern on a backing board.
- Glue the leaves along the branches, alternating their directions.
Best for: Living rooms, entryways, home offices, and nature-inspired bedrooms.
Styling tip: Mount the finished design on cream-colored backing paper and place it inside a simple wood frame. The neutral background allows the green leaves to stand out beautifully.
6. Framed Scrapbook Paper Collage
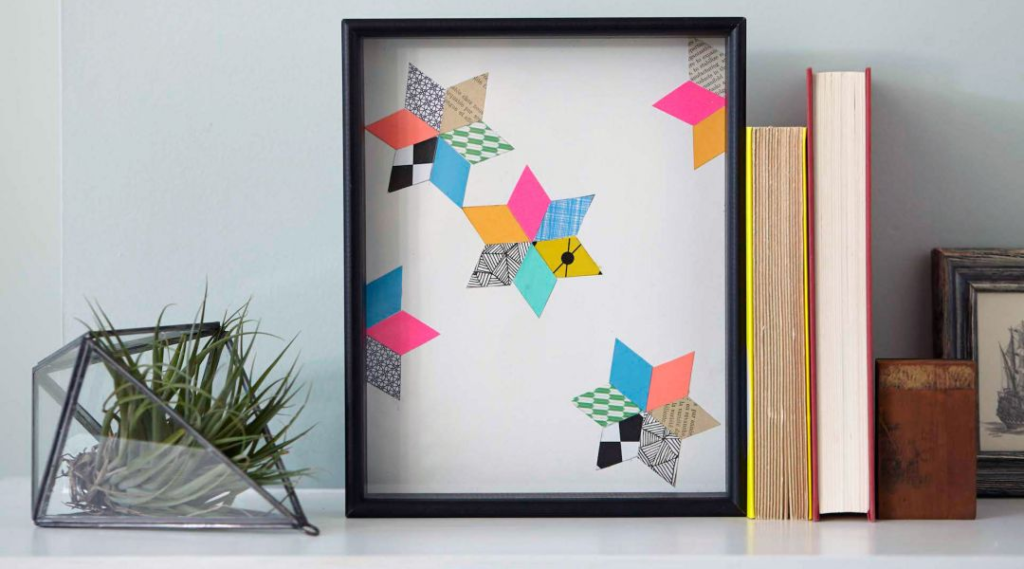
A framed paper collage is perfect when you want personalized artwork without needing painting or drawing skills.
You can combine scrapbook paper, wrapping paper, leftover craft sheets, and decorative prints to create a piece that matches your home’s color scheme.
The finished artwork can look surprisingly sophisticated when you use a restrained selection of colors and patterns.
Try pairing striped paper with floral prints, or combine textured neutral paper with simple abstract shapes.
Materials needed: Scrapbook paper, wrapping paper scraps, scissors, glue stick, cardstock backing, and a picture frame.
How to make it:
- Choose four or five paper patterns that share similar colors.
- Cut the paper into rectangles, arches, circles, or organic shapes.
- Arrange the pieces on a sheet of cardstock.
- Overlap some pieces while leaving space around others.
- Glue the shapes in place once you are happy with the composition.
- Place the finished collage inside a frame.
Best for: Living rooms, gallery walls, hallways, and home offices.
Styling tip:Create two or three coordinating paper collages using the same color palette but different arrangements. Display them together to create a beautiful, budget-friendly gallery wall that feels stylish and thoughtfully designed.
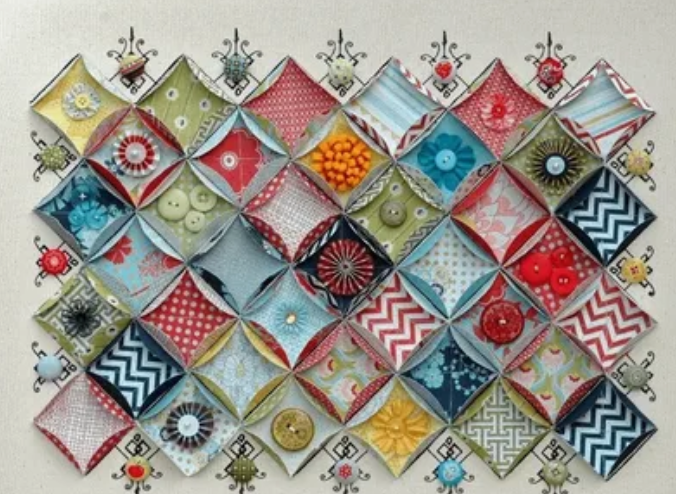
7. Folded Origami Paper Wall Tiles
Origami-inspired wall tiles are a creative way to add dimension to a plain wall using nothing more than folded paper.
Unlike flat artwork, these folded designs catch light differently throughout the day, creating subtle shadows and interesting patterns.
You can make a series of identical folded squares or experiment with different geometric folds to create a textured display.
For a modern appearance, use white, cream, or several shades of the same color.
Materials needed: Square origami paper or lightweight cardstock, ruler, bone folder or blunt scoring tool, and a backing board.
How to make it:
- Cut your paper into equal-sized squares.
- Fold each square diagonally in both directions, then unfold it.
- Bring two opposite corners gently toward the center to form raised triangular flaps.
- Repeat the same fold on every square.
- Arrange the folded squares into a neat grid.
- Secure the flat undersides to a backing board without flattening the raised sections.
Best for: Modern living rooms, bedrooms, study areas, and creative workspaces.
Styling tip: Arrange the tiles in an ombré pattern, beginning with darker shades at the bottom and gradually transitioning to lighter colors at the top.

8. Decorative Paper Chain Wall Hanging
Paper chains aren’t just for children’s parties. With the right colors and arrangement, they can become stylish handmade wall hangings.
A paper chain wall hanging adds beautiful texture and gentle movement to your space, making it a creative and budget-friendly alternative to traditional fabric or macramé wall decor.
For a bohemian-inspired look, use warm earthy shades such as rust, cream, mustard, and dusty pink.
You can also experiment with different chain lengths to create a cascading design.
Materials needed: Colored craft paper, scissors, glue stick, wooden dowel, and string.
How to make it:
- Cut several paper strips of equal width and length.
- Form the first strip into a loop and glue the ends together.
- Thread another strip through the first loop and secure it.
- Continue connecting loops until you have a chain.
- Make several chains in different lengths.
- Attach the chains to a lightweight wooden dowel and hang the dowel securely.
Best for: Dorm rooms, craft rooms, bedrooms, and casual living spaces.
Styling tip: Arrange the chains from shortest to longest and back to shortest, creating a soft V-shaped silhouette that feels balanced and decorative.

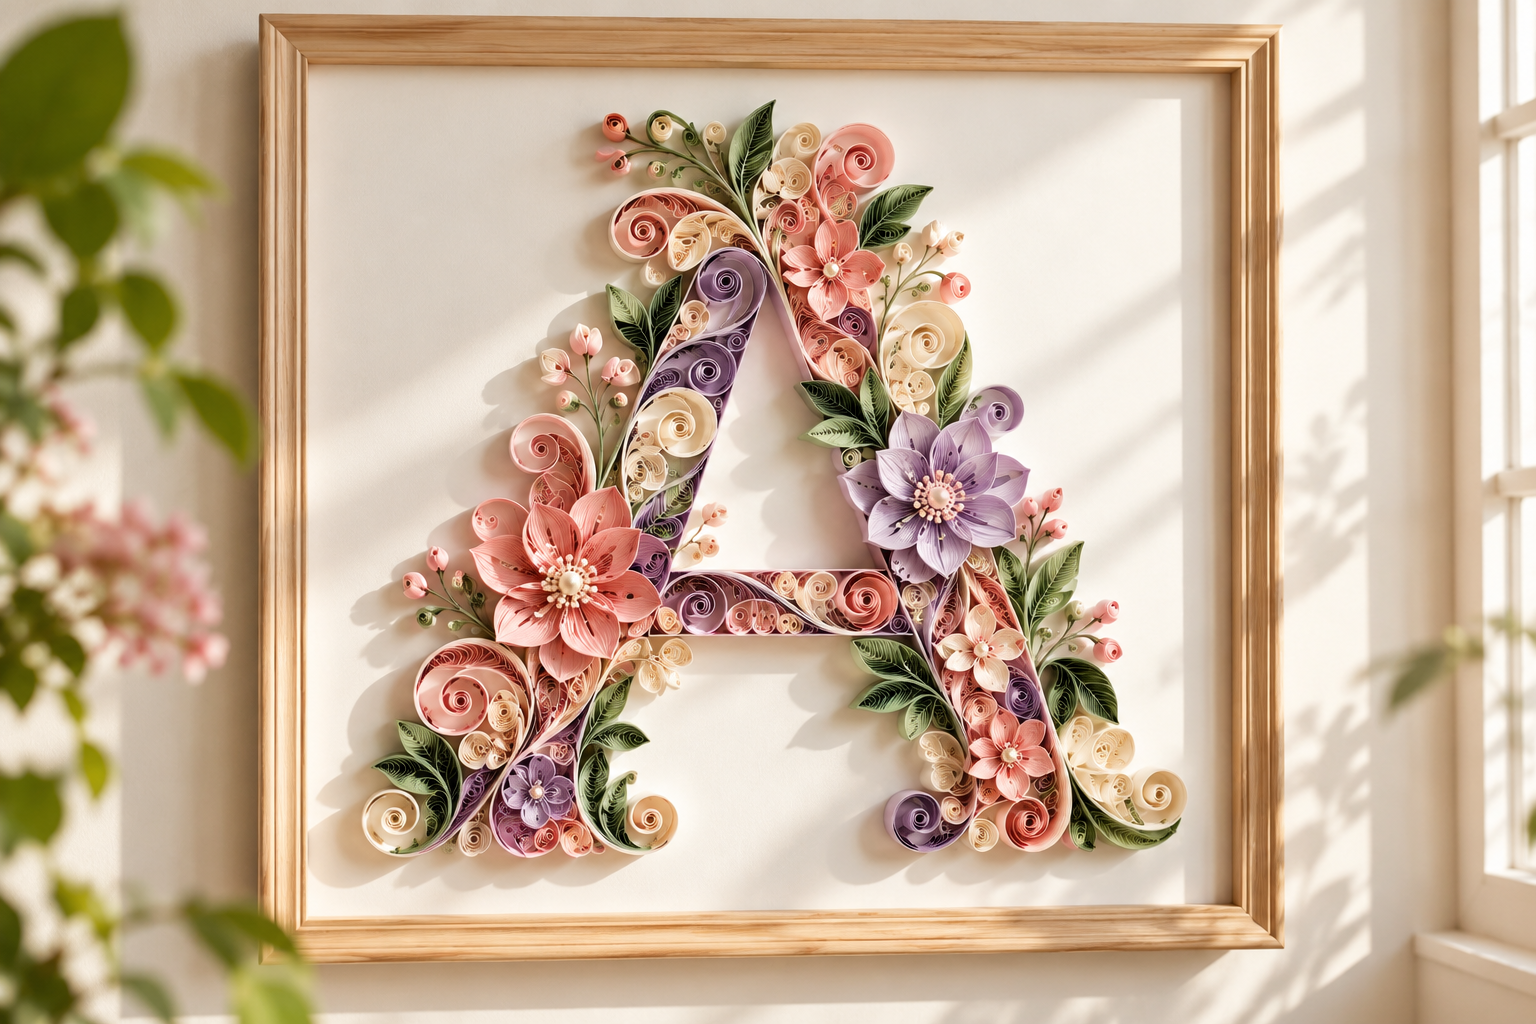
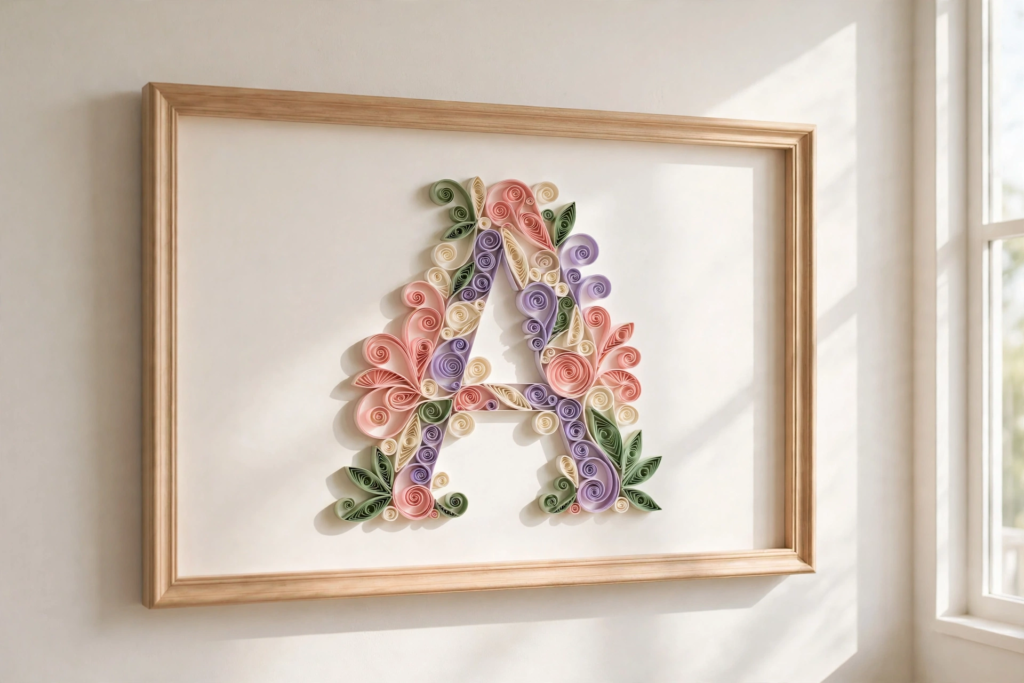
9. Personalized Quilled Paper Monogram Art
Personalized wall decorations can make a bedroom, nursery, or home office feel more meaningful.
A quilled paper monogram is a beautiful way to display an initial using colorful paper strips arranged into delicate curls, loops, and swirls.
Although paper quilling looks intricate, you can begin with a few simple shapes and gradually build your design.
For a soft romantic style, choose blush pink, lavender, ivory, and sage green.
Materials needed: Paper quilling strips, cardstock backing, pencil, craft glue, and a quilling tool or toothpick.
How to make it:
- Draw a large letter on a piece of cardstock.
- Cut a narrow paper strip and glue it upright along the letter outline.
- Roll additional paper strips into loose coils using a quilling tool.
- Gently pinch some coils into teardrop or leaf shapes.
- Arrange the shapes inside the letter outline.
- Glue each piece in place and allow everything to dry completely.
Best for: Bedrooms, nurseries, personalized gifts, and home offices.
Styling tip: Use a shadow box frame rather than a regular shallow frame. The extra depth protects the raised paper shapes without pressing them flat.
10. Layered Paper Mountain Landscape Art
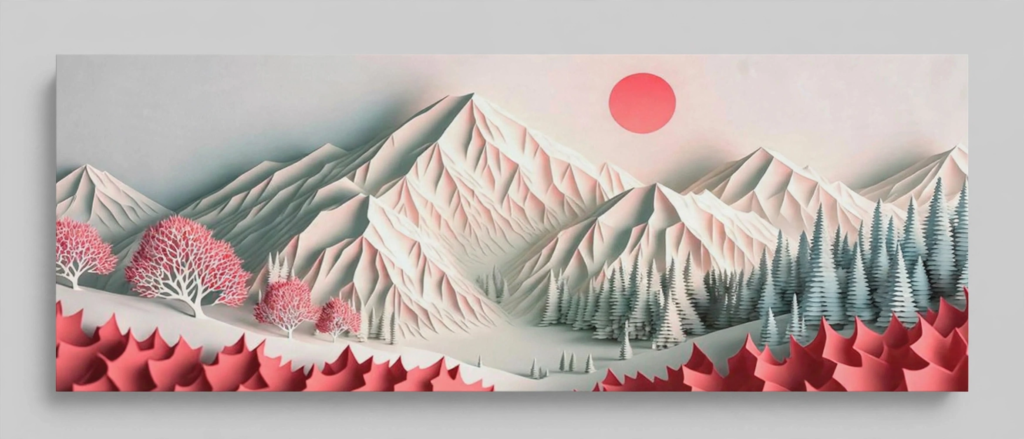
Layered paper landscapes are a wonderful choice if you prefer peaceful, nature-inspired artwork.
By stacking paper shapes in different colors, you can create the illusion of mountains, rolling hills, valleys, or a distant sunset.
The technique is simple, but the overlapping layers give the finished artwork a beautiful sense of depth.
Choose dusty blue, sage green, beige, and soft gray to create a peaceful mountain landscape, or combine peach and terracotta tones for a warm, desert-inspired paper wall art design.
Materials needed: Colored cardstock, scissors, pencil, foam adhesive squares, backing board, and a deep frame.
How to make it:
- Cut a large rectangle of cardstock for the background.
- Draw several overlapping mountain or hill shapes.
- Cut each landscape layer from a different paper color.
- Arrange the lightest or most distant mountains near the top.
- Position darker or larger shapes toward the foreground.
- Attach the layers using foam adhesive squares to create depth.
Best for: Bedrooms, living rooms, reading nooks, and home offices.
Styling tip: Add a simple paper sun or moon behind the mountains to create a focal point without making the composition too busy.
11. Handmade Paper Star Wall Decorations
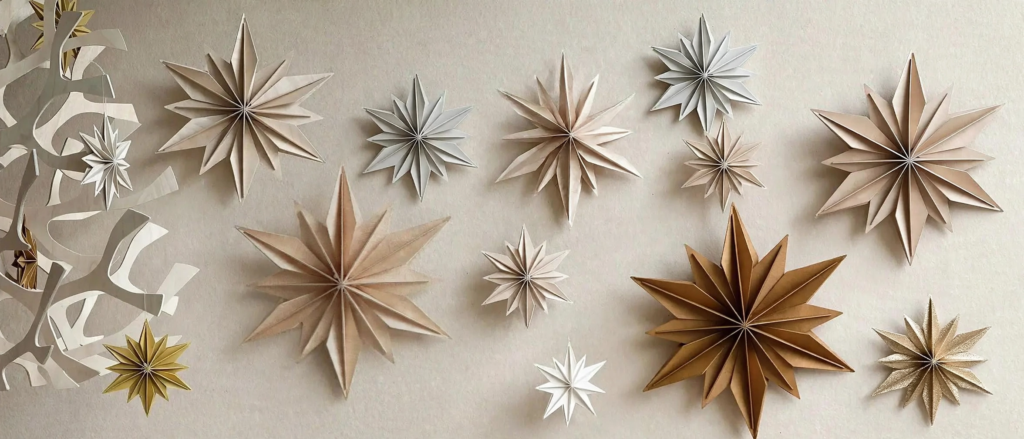
Paper stars are a versatile decoration that can look whimsical, elegant, or festive depending on the colors you choose.
While they are popular during the holidays, stars can also be used year-round in bedrooms, reading corners, and celestial-themed spaces.
Cream, champagne, and muted gold stars create a sophisticated appearance, while colorful stars bring a cheerful touch to children’s rooms.
Materials needed: Colored cardstock, star template, scissors, ruler, scoring tool, and craft glue.
How to make it:
- Draw or trace a five-pointed star onto cardstock.
- Cut out the shape carefully.
- Lightly score lines from each point toward the center.
- Fold along the scored lines, alternating mountain and valley folds to create raised points.
- Adjust the folds until the star holds its dimensional shape.
- Attach it to a backing board or hang it using a suitable lightweight mounting method.
Best for: Bedrooms, nurseries, reading corners, and seasonal displays.
Styling tip: Combine a few larger stars with several smaller ones rather than using identical sizes. This creates a more natural celestial arrangement.
12. Rolled Paper Wall Sculpture
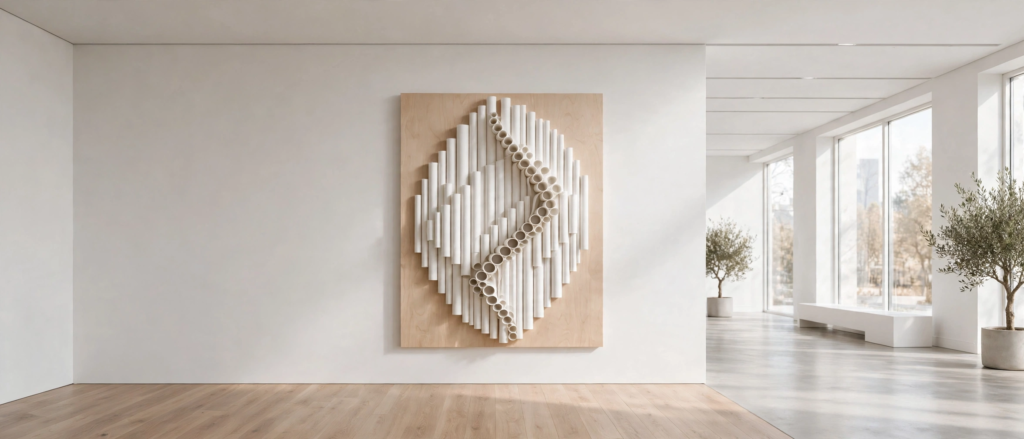
Rolled paper wall art is an interesting way to turn ordinary paper strips into a textured decorative sculpture.
Instead of cutting flat shapes, this project uses rolled paper cylinders arranged into a repeating pattern.
The result feels modern and sculptural, especially when displayed in a single color.
White-on-white designs can look particularly striking because the shadows emphasize the paper’s texture.
Materials needed: Heavy craft paper, scissors, pencil or thin dowel, craft glue, and a sturdy backing board.
How to make it:
- Cut craft paper into strips of equal width.
- Wrap each strip around a pencil or thin dowel to create a tube.
- Glue the overlapping edge and remove the pencil.
- Make enough tubes to fill your chosen design.
- Arrange the tubes vertically, horizontally, or in a circular pattern.
- Glue the tubes to a backing board and allow the artwork to dry flat.
Best for: Modern living rooms, hallways, home offices, and minimalist interiors.
Styling tip: Use paper tubes in slightly different lengths to create a subtle wave pattern. Keeping everything in one color helps the texture become the main feature.
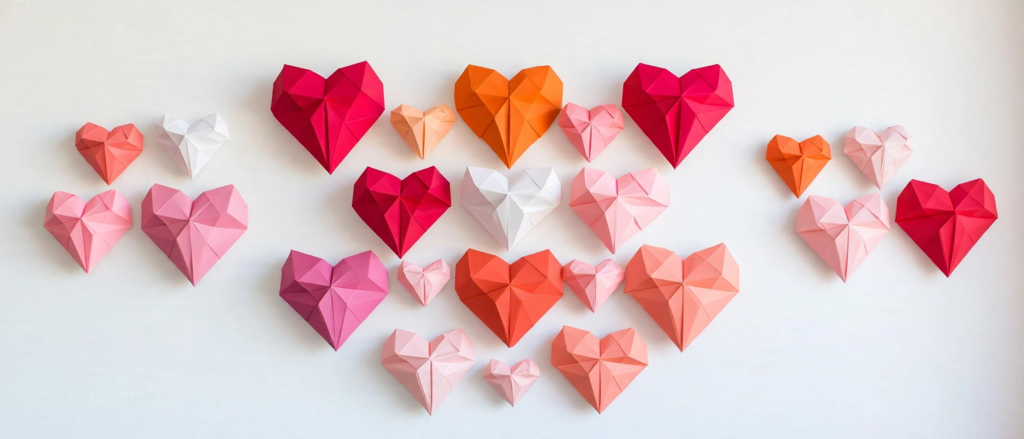
13. Romantic 3D Paper Heart Wall Art
Paper hearts are a sweet and inexpensive way to add a personal touch to a bedroom or cozy corner.
Although they are often associated with Valentine’s Day, a subtle arrangement of paper hearts can work beautifully throughout the year.
For a more mature look, avoid overly bright colors and choose soft pink, dusty rose, mauve, or burgundy.
You can arrange the hearts into a larger heart shape, create a vertical cascading display, or frame a collection of smaller hearts.
Materials needed: Colored cardstock, heart template, scissors, craft glue, and backing paper.
How to make it:
- Draw several heart shapes in different sizes.
- Cut the hearts from colored cardstock.
- Fold each heart gently down the center.
- Cut a short slit at the top center of each heart and overlap the edges slightly to create dimension.
- Secure the overlapping sections with glue.
- Arrange the finished hearts on backing paper or a lightweight display board.
Best for: Bedrooms, romantic gallery walls, and handmade gift displays.
Styling tip: Use one large heart surrounded by smaller hearts in coordinating shades. Leave enough empty space around the arrangement to keep it elegant.
14. Seasonal Paper Wreath Wall Decor
A handmade paper wreath is an easy way to decorate an entryway, kitchen, or living room wall without buying seasonal accessories.
Unlike traditional wreaths made with fresh greenery, paper wreaths can be customized with almost any color or shape.
Use green leaves and cream flowers for spring, warm orange and burgundy for fall, or white and gold for winter.
You can even create a neutral botanical wreath that stays on display throughout the year.
Materials needed: Colored cardstock, scissors, pencil, glue, and a sturdy cardboard wreath base.
How to make it:
- Cut a ring shape from sturdy cardboard.
- Draw and cut several leaf shapes from cardstock.
- Fold the leaves slightly along the center to add dimension.
- Glue the leaves around the cardboard ring, overlapping them as you go.
- Add smaller paper flowers or decorative accents between the leaves.
- Let the wreath dry completely before attaching a hanging loop to the back.
Best for: Entryways, kitchens, living rooms, and seasonal wall displays.
Styling tip: Use three shades of green for a more realistic botanical appearance. Adding a few cream-colored flowers can make the wreath feel softer and more elegant.

15. Recycled Paper Roll Floral Wall Art
Recycled paper roll art is an affordable craft that turns everyday cardboard tubes into surprisingly attractive wall decorations.
The natural curved shape of each cardboard roll makes it easy to create petals, leaves, and repeating floral patterns.
This project is also a creative way to reuse materials that might otherwise be discarded.
For a modern appearance, paint the finished artwork in matte black, warm white, or a soft metallic shade.
Materials needed: Clean cardboard paper rolls, scissors, craft glue, acrylic paint if desired, and a lightweight backing board.
How to make it:
- Flatten each cardboard roll gently.
- Cut the roll into narrow rings of equal width.
- Pinch the rings into pointed oval shapes.
- Arrange five or six pieces together to form a flower.
- Glue the edges of the pieces together and allow them to dry.
- Connect several flowers into a larger pattern, then attach them to a backing board for display.
Best for: Craft rooms, living rooms, hallways, and budget-friendly home decorating projects.
Styling tip: Create one large floral arrangement instead of scattering small flowers across the wall. A unified design often looks more intentional and makes a stronger visual statement.

How to Hang Paper Wall Decor Without Damaging Your Walls
Paper decorations are usually lightweight, but choosing the right hanging method is important, especially if you live in a rental home.
For framed projects, use picture-hanging products rated for the frame’s weight and compatible with the wall surface. For small paper shapes, consider a separate lightweight backing board so you don’t have to attach every piece directly to the wall.
Always test mounting materials on an inconspicuous area when appropriate, and follow the manufacturer’s directions. Removable adhesive products aren’t guaranteed to be damage-free on every surface.
You can also check Command’s official hanging guidance for information about compatible surfaces, weight limits, and proper removal.
For delicate paper decorations, avoid placing them near damp areas, direct heat, or locations where they will be brushed against frequently.
Common Mistakes to Avoid When Making Paper Wall Decorations
Even simple paper crafts can look untidy if a few important details are overlooked.
Using paper that is too thin: Lightweight paper can curl or lose its shape when used for large structural designs. Choose sturdy cardstock for projects that need to hold their form.
Combining too many colors: A large mixture of unrelated shades can make wall decor feel cluttered. Start with two or three coordinating colors.
Using excessive glue: Too much liquid glue can wrinkle thin paper and leave visible marks. Apply small amounts and allow the pieces to dry.
Skipping the layout stage: Before mounting your decorations, arrange everything on a table or floor to check spacing and balance.
Making every decoration the same size: Mixing small, medium, and large elements usually creates a more interesting composition.
Ignoring the room’s existing style: Choose colors and shapes that complement your furniture, bedding, rugs, and other decorative accessories.
Conclusion
Creating beautiful wall decorations doesn’t have to be expensive or complicated. With simple materials and a little creativity, you can transform plain paper into artwork that adds warmth, texture, and personality to your home.
From oversized flowers and delicate butterflies to geometric patterns and recycled paper sculptures, these 15 DIY paper wall decor ideas offer plenty of inspiration for every room.
Start with one project that matches your space, experiment with a few coordinating colors, and enjoy making something unique for your home.
Frequently Asked Questions
Paper butterflies, simple framed collages, paper hearts, and accordion-folded fans are some of the easiest options. They require basic materials and don’t involve complicated techniques.
Cardstock is a versatile choice for most projects because it holds its shape better than ordinary printer paper. Tissue paper works well for soft flowers, while origami paper is useful for folding projects.
Reuse wrapping paper, scrapbook scraps, old magazines, and clean cardboard rolls. Create several coordinating pieces from materials you already own instead of buying new decorative artwork.
Yes. All 15 projects in this guide can be made using scissors, basic measuring tools, and simple templates. A cutting machine is optional rather than essential.
Choose a cohesive color palette, use clean cuts, create balanced arrangements, and consider framing your finished artwork. Simple designs with thoughtful spacing often look more polished than crowded displays.
Yes, especially when displayed in lightweight frames or mounted using products compatible with your wall surface. Always follow mounting and removal instructions, since some adhesives can damage paint or wallpaper.
Use a suitable paper weight, apply glue sparingly, and let finished pieces dry flat when the design allows. Avoid placing paper art in humid areas or prolonged direct sunlight.
Paper is generally better suited to dry spaces. In humid bathrooms, it may absorb moisture, warp, or develop damage over time. Framed and appropriately protected artwork may be more practical, but condensation remains a concern.