

It’s not necessary to use gel polish, a UV lamp, or a pro nail-art kit to give your nails a pretty manicure at home. Simple nail designs like dots, French tips, stripes, tiny flowers, swirls, and color blocking are great to use with regular polish.
The difficulty is that with regular nail polish normal designs will harden as you work, whereas gel nail art doesn’t. Have thin layers, use only a little polish and work on one simple element at a time.
Here are 15 easy nail polish designs that are perfect for beginners – some of which are great for short nails.
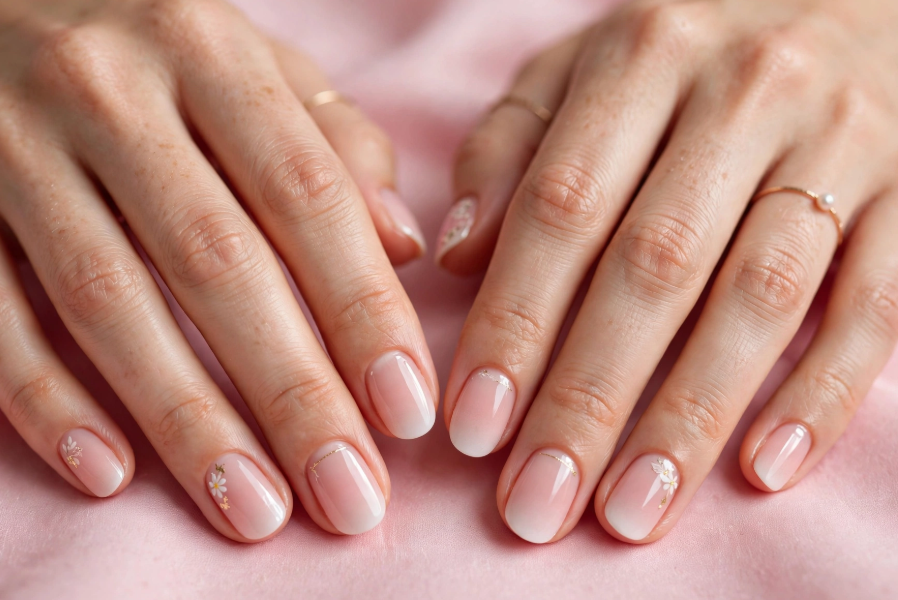
Can You Do Nail Art With Regular Polish?
Yes. French tips, dots, stripes, flowers, ombre, swirls, marble nail designs, and simple nail accents are some of the many nail art designs that can be achieved with nail polish.
The most significant aspect of the difference is working time. The designs only harden as a result of evaporation, and usually have less time to play with it before it gets sticky. This is one of the most common difficulties with the use of a regular polish that nail-art communities talk about.
No, that doesn’t imply a complex set-up. In fact some of the easiest designs call for nothing more than a bobby pin, toothpick, small brush, makeup sponge or striping tape.
If you want more simple ideas, check out our guide to [Nail Art Without Tools: 20 Easy Designs] for creative looks you can try at home.

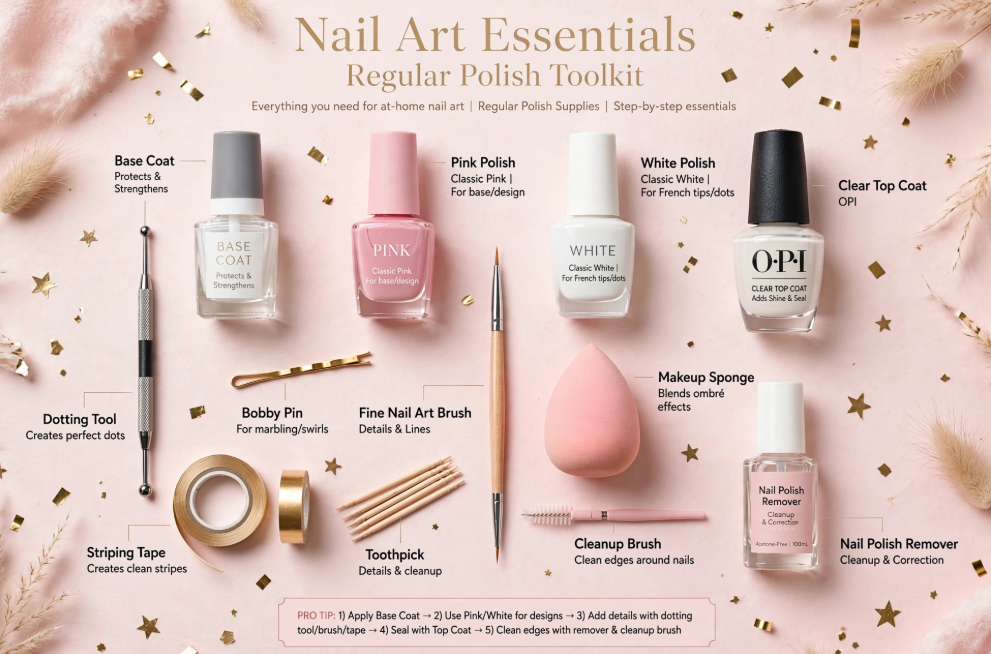
What You Need for Nail Art With Regular Polish
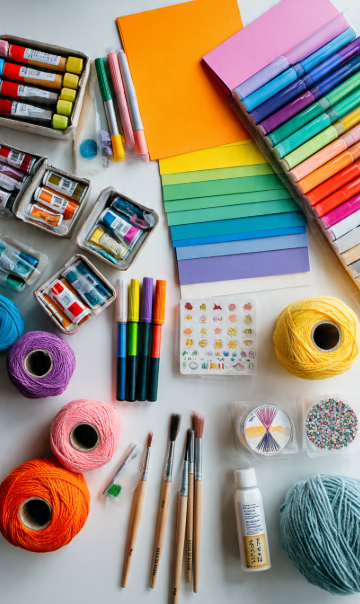
You can start with a very small collection:
- Base coat
- Two or more regular nail-polish colors
- Clear top coat
- Dotting tool or bobby pin
- Fine nail-art brush
- Makeup sponge
- Striping tape
- Toothpick for tiny details
- Small cleanup brush and nail-polish remover
A base coat gives you a prepared surface, while a top coat is used as the final sealing layer. OPI, for example, describes its regular-lacquer top coat as the final step used to seal color and extend wear.
You do not need every tool on this list. Start with the tools that match the designs you actually want to make.
15 Easy Nail Art With Regular Polish Designs
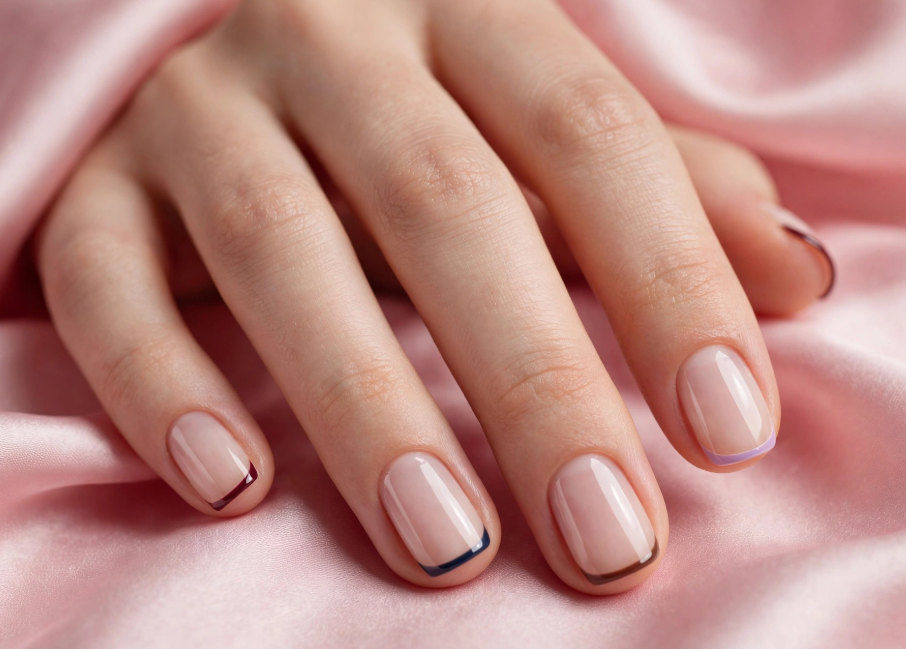
1. Micro-French Nail Art With Regular Polish
One of the simplest methods to make a plain manicure appear polished without painting the entire nail in artwork is to have a micro-French manicure.
Lightly apply a sheer nude/ pink or milky base. After the polish has dried, apply it to the edge with a fine brush or with the polish brush and make a very fine line across the edge.
Make the line very narrow for short nails.
Try: nude base with white, burgundy, navy, chocolate brown, or pastel tips.
Micro-French continues to be a stand out nail design for 2026, especially with short and shaped nails. Vogue and Allure both tout the simplicity and versatility of the style.
For more beginner-friendly ideas, explore our guide to [Nail Art for Beginners: 20 Easy Designs You Can Do at Home] for simple looks you can recreate yourself.
2. Classic Polka Dot Nail Art With Regular Polish
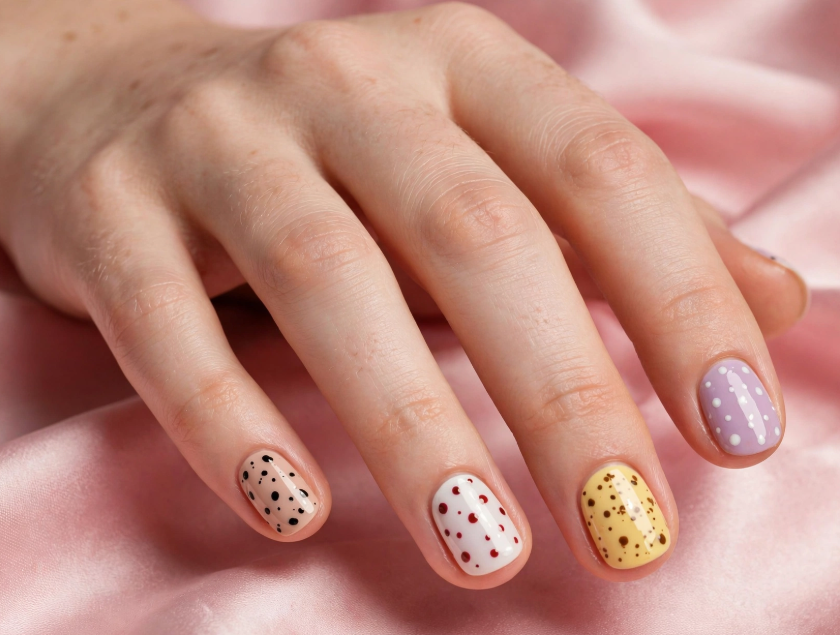
One of the easiest to start with is the polka dot design, as the dots don’t need to be “perfectly” repeated.
Apply base color and allow to dry. Apply a little bit of your second polish to nail-art or foil. Take the dotting tool or bobby pin or the rounded end of a toothpick and apply the polish to it, then draw small dots around the nail.
To give a cleaner appearance, fill only three to five spaces in each nail, instead of filling all.
Easy combinations:
- Nude + black
- White + red
- Pale pink + burgundy
- Butter yellow + brown
- Lavender + white
Polka dots are also appearing in updated French-tip variations during 2026, making them an easy way to connect a classic technique with a current look.
Choosing the right nail shape can make your manicure look more balanced, so explore our guide to [Nail Shapes Explained: Which Shape Is Best for Your Hands?] to find a style that suits you.
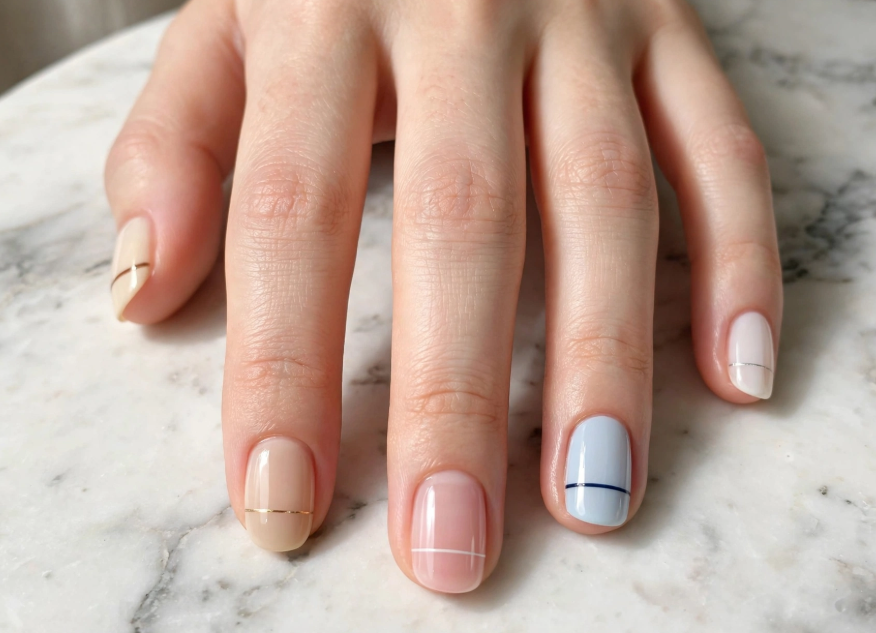
3.Minimalist Stripe Nail Art With Regular Polish
Thin lines can create an elegant manicure without requiring complicated painting.
Start with a solid base. Use a fine nail-art brush or thin striping tape to create one vertical, horizontal, or diagonal line.
One line on each nail is often enough.
For an understated manicure, try:
- Cream + brown
- Nude + gold
- Sheer pink + white
- Pale blue + navy
- Milky white + silver
If you’re new to freehand lines, tape can give you a cleaner edge.
4.Negative-Space Half-Moon Nail Art With Regular Polish
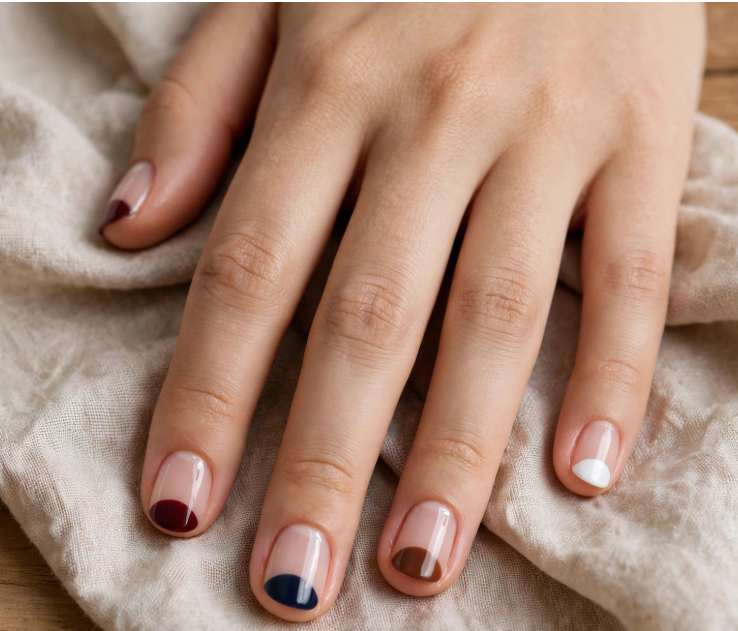
This design doesn’t hide the natural nail, so it gives you more leeway if, for some reason, your painting isn’t perfectly symmetrical. With the base color, apply it and let it dry.
Near the cuticle, put a small curved guide, and then paint the rest of the area with a contrasting color. You can also go the other way and color in a small colored half moon near the nail cuticle and leave the rest of the nail as a sheer.
Best suited for short, rounded, squoval and medium length nails..
If you love a modern metallic finish, explore our guide to [25 Chrome Nail Ideas for Short Nails] for stylish inspiration that works beautifully on shorter nails.
5. Two-Color Color-Block Nail Art With Regular Polish
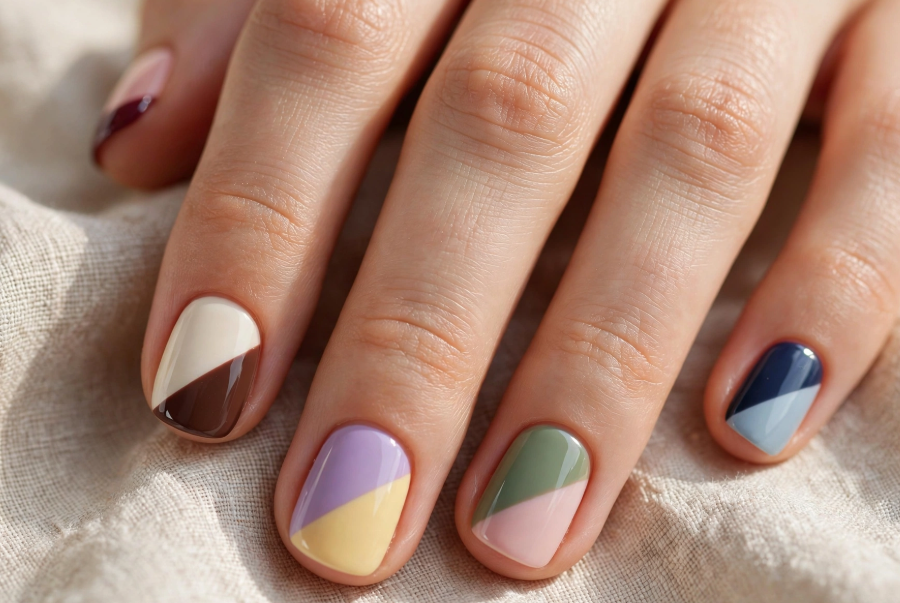
Color blocking certainly seems more complicated than it is. Select two colors that are contrasted or coordinate. Paint one side or section of the nail with the first shade. When dry, tape off the next part and fill it with your other colour. Good combinations include:
- Blush + burgundy
- Cream + chocolate
- Lavender + butter yellow
- Sage + pale pink
- Navy + soft blue
Keep the number of sections small. Two blocks usually look cleaner than trying to divide a short nail into too many pieces.
For a rich, sophisticated manicure, explore our guide to [25 Burgundy Nail Designs for Fall 2026] for elegant seasonal nail inspiration.
6. Simple Swirl Nails
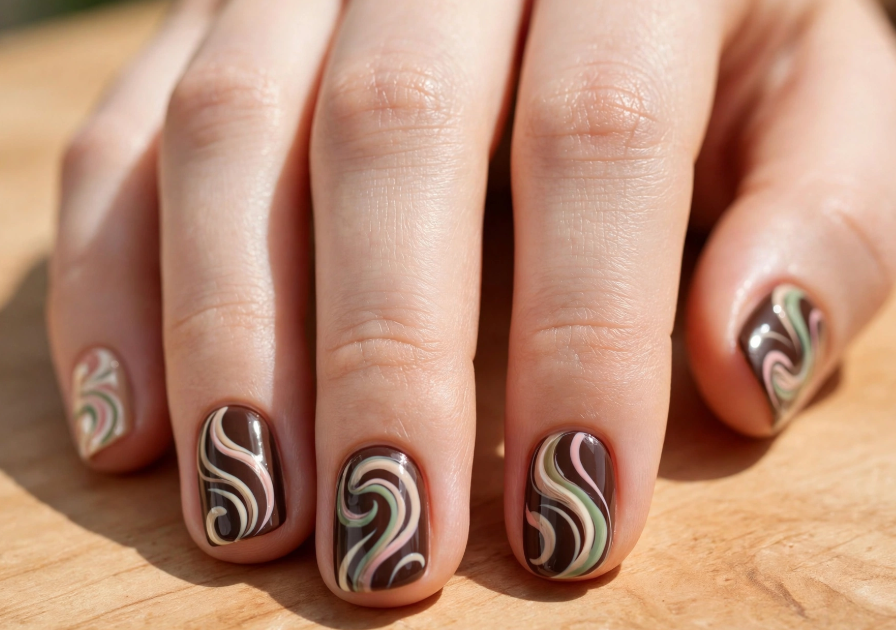
Swirls are a good choice if you want something more artistic, but you don’t want to paint a detailed picture. Start with a neutral base.
Once it’s dry draw one loose curved line with a fine brush. Avoid trying to get the swirl to look the same on all nails. Just a bit of variation can make the pedicure seem like it’s been done on purpose. Apply polish to brush for regular use and do not drag a large amount of polish across nail.
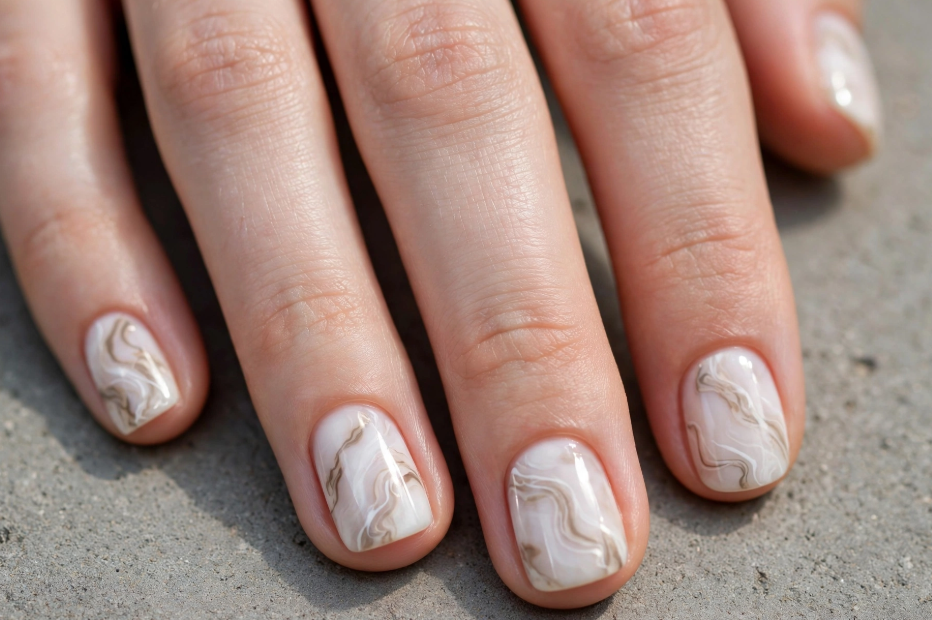
7. Easy Marble Nails
Use 2 or 3 polish shades to form a basic design in the style of a marbles. Add base color; let dry. Squeeze in some specks of contrasting color. If they can be used, gently push a toothpick through them, making irregular veins. Movement should be light. Excessive application of the polish may result in a dulling effect. For a softer marble look, try:
milky white + beige + taupe
If it’s a more dramatic event, though:
black + white + silver
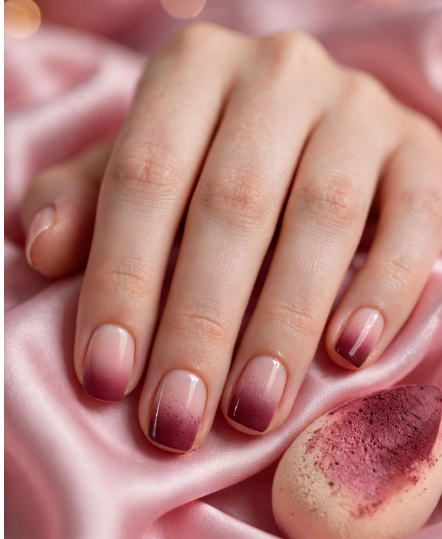
8. Sponge Ombre
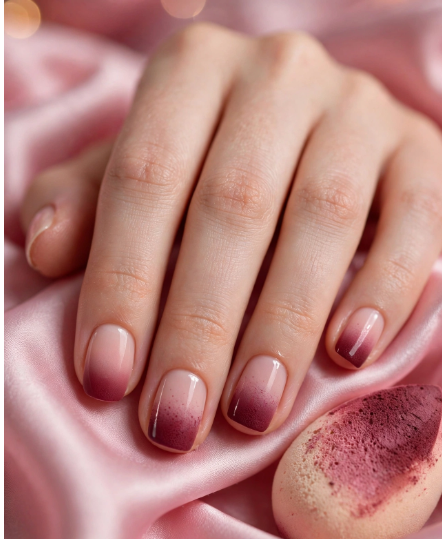
One of the most useful designs is Ombre for when you don’t need perfectly straight lines, only a soft finish. Use the lightest base color first. Put two coordinating shades next to each other on a small makeup sponge. Dab the sponge over the nail.
Apply color slowly, not too heavy. Afterwards, wash clean the skin around the nail, and then apply the top coat onc.
9. Tiny Daisy Nails
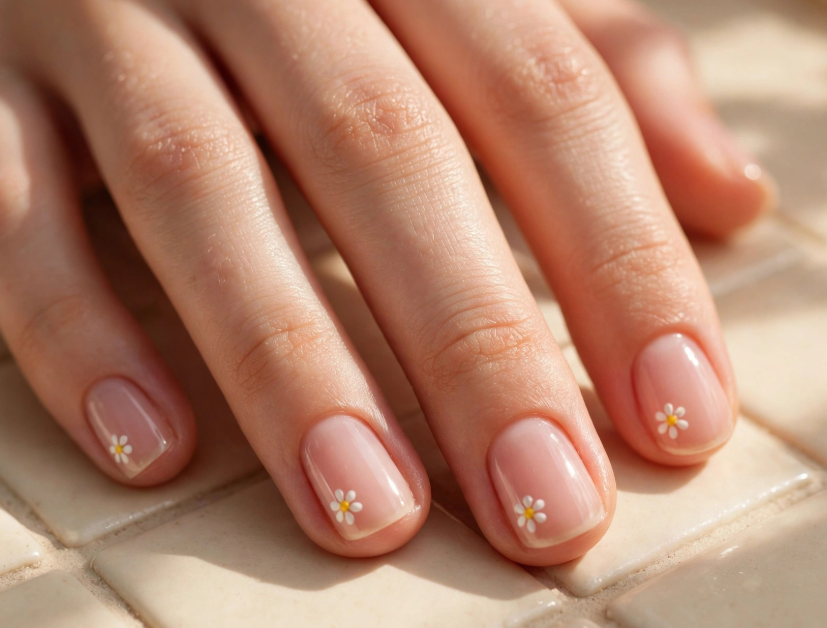
A small flower can make any simple manicure look playfully simple, without being overly elaborate to be able to paint. Use sheer pink, nude or light yellow base. Add 5 small dots around a contrasting center.
For example:
- White petals + yellow center
- Pink petals + white center
- Lavender petals + yellow center
Put the flower on one accent nail if you want an especially easy design.
10. Minimal Heart Accents
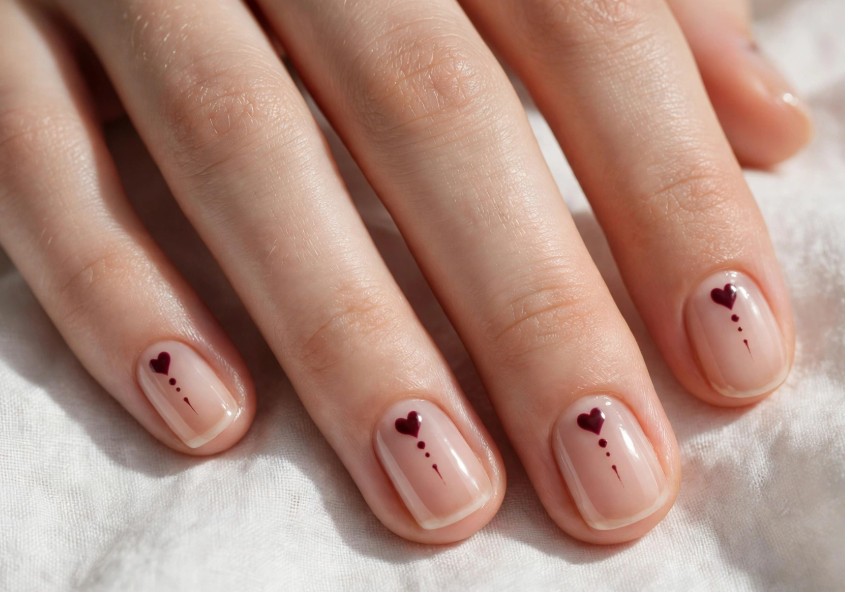
It’s easier to draw tiny hearts if you make both of them first, instead of trying to draw the whole shape.
Put two little dots next to each other. Pull lower parts to a point with a fine brush or toothpick. It can be sufficient to have one small heart at the cuticle.
If you want to go more upmarket then wear sheer nude bottoms and burgundy, deep red or chocolate brown hearts.
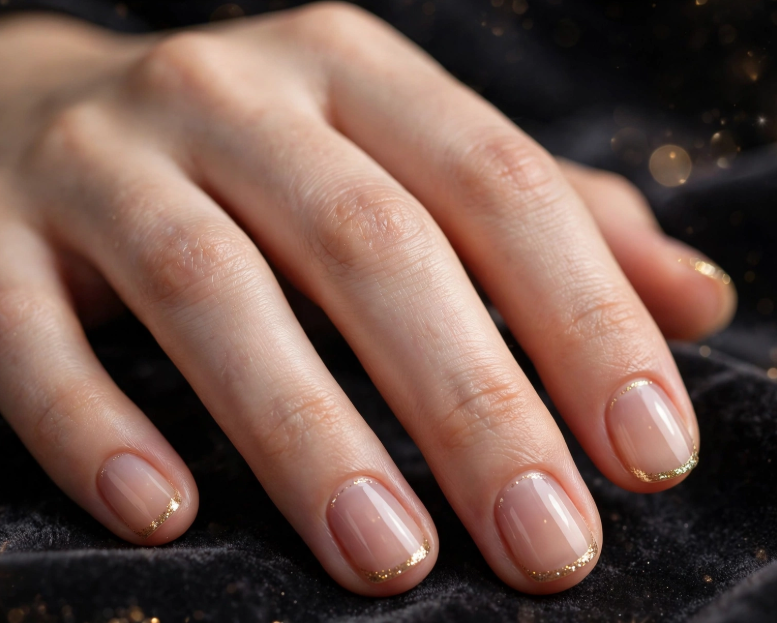
11. Glitter French Tips
If you prefer sparkle but don’t want it all over your nails, then apply it just to the tips. Use a sheer or nude base. Once dry, paint a thin French tip with glitter polish.
A fine brush will work best if you want to put many glitter beads on an individual bead, and if you want a softer gradient, you can quickly apply glitter to the tip with a light sponge.
This design choice is great if you’re looking for a festive look but don’t have a ton of time for elaborate art.
12. Pastel Skittle Nails
In a Skittle manicure, the colors are applied to individual nails but in a consistent fashion.
No special nail-art tool is required.
Select 4-5 related colours, e.g.
- Blush pink
- Lavender
- Mint
- Baby blue
- Soft yellow
Apply one color to each nail and finish with a glossy top coat.
For regular polish, this is one of the easiest choices because there is no freehand artwork to smudge.

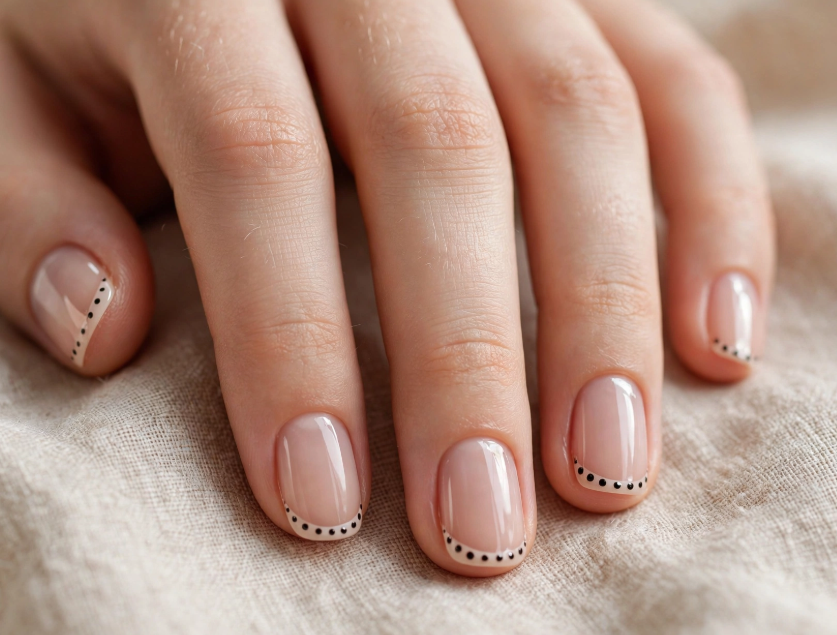
13. Polka-Dot French Tips
Join together two easy methods: French tips and dots. Use a sheer base and then build up from there. Do not make a solid French tip, but use dots along the free edge.
One color can be used for a more sophisticated look, or two colors used to achieve a more playful effect.
Overall, this style reflects the current trend in 2026 which is to revitalize traditional French manicures with a touch of playfulness.
14. Mini Checker Accent
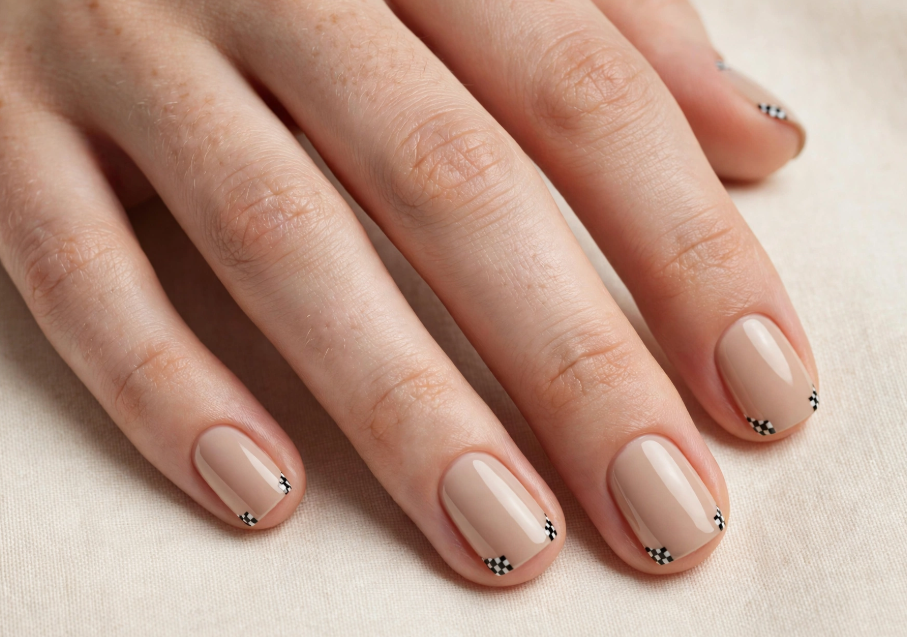
It is not necessary to fill in all the nails with a checkerboard. Fill in most nails with a simple solid color and leave one nail to accent with a small checker pattern.
Make a small 2×2 or 3×3 checker area at one corner of the nail. Use of the striping tape can be helpful in creating straight lines and the squares can be filled in with a fine brush.
If short nails, then make the checker pattern small so as not to visually crope.
15. Metallic Line Accent
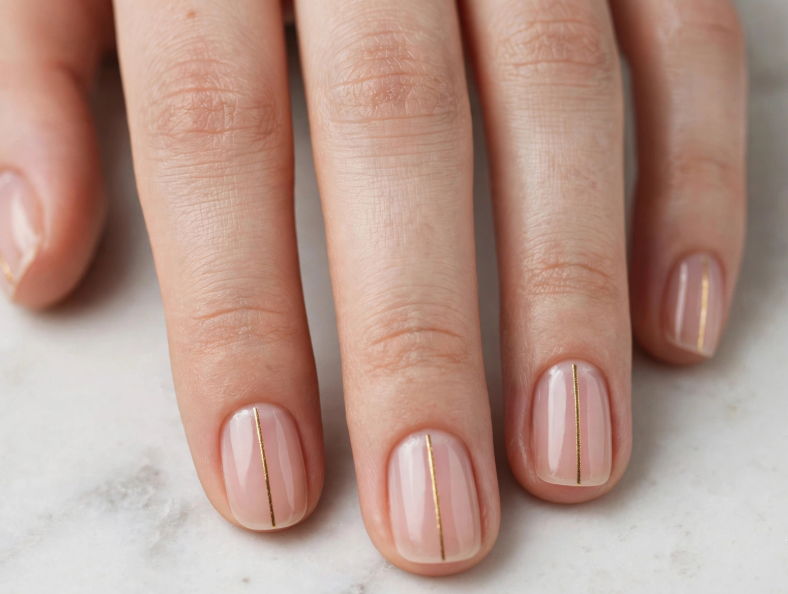
A single metallic line is an easy way to make a basic manicure feel more finished.
Start with a nude, sheer pink, cream, or muted color. Once dry, add one thin gold or silver line vertically, diagonally, or across the tip.
You can use metallic nail polish with a fine brush or striping tape.
The key is restraint: one deliberate accent usually looks cleaner than several competing lines.
For a subtle, modern manicure, try ultra-thin French tips inspired by the minimalist micro-French trend highlighted by Vogue. Vogue: Micro-French Nail Trend.
How to Make Regular Polish Easier to Use for Nail Art
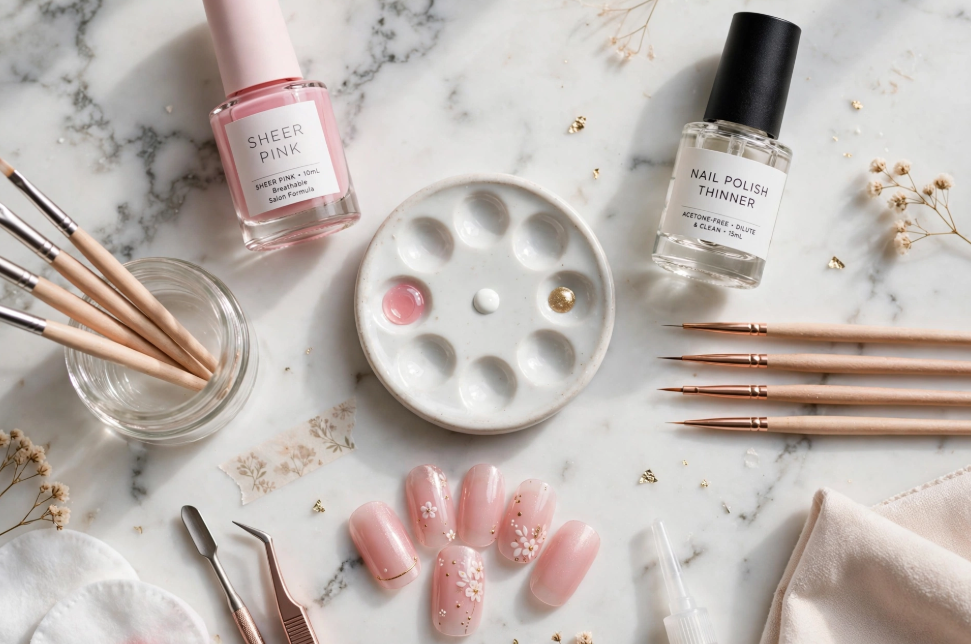
Regular polish can become thick or tacky while sitting on a palette. That’s why working in small batches is useful.
Use only a little polish
Instead of putting a large puddle on a palette, start with a tiny amount. Add more when necessary.
Work on one detail at a time
Don’t paint all the dots, lines, and flowers at once. Finish one layer and allow it to settle before adding another.
Keep your brush clean
A brush carrying partially dried polish can drag through a fresh design and create uneven lines.
Use thinner for thickened polish
If a regular polish has become thick, a nail-polish thinner formulated for lacquer can be useful. Community nail-art discussions commonly recommend thinner for maintaining workable consistency.
Do not automatically substitute acetone for nail-polish thinner; they are not interchangeable products.
How to Prevent Regular-Polish Nail Art From Smudging
The biggest mistake is rushing the top coat.
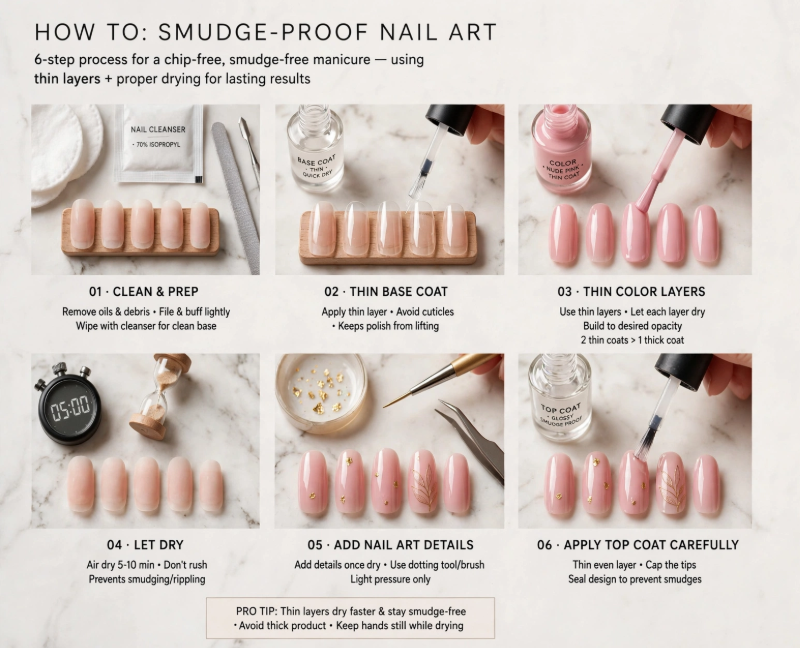
Use this basic sequence:
- Prep clean nails.
- Apply a thin base coat.
- Add thin color layers.
- Allow the base color to dry sufficiently.
- Add your nail art.
- Give the artwork time to settle.
- Apply top coat carefully.
A top coat can help seal and protect a regular-lacquer manicure, but dragging a brush aggressively over wet artwork can smear your design. OPI recommends top coat as the final sealing step for regular lacquer.
Nail Art With Regular Polish for Short Nails
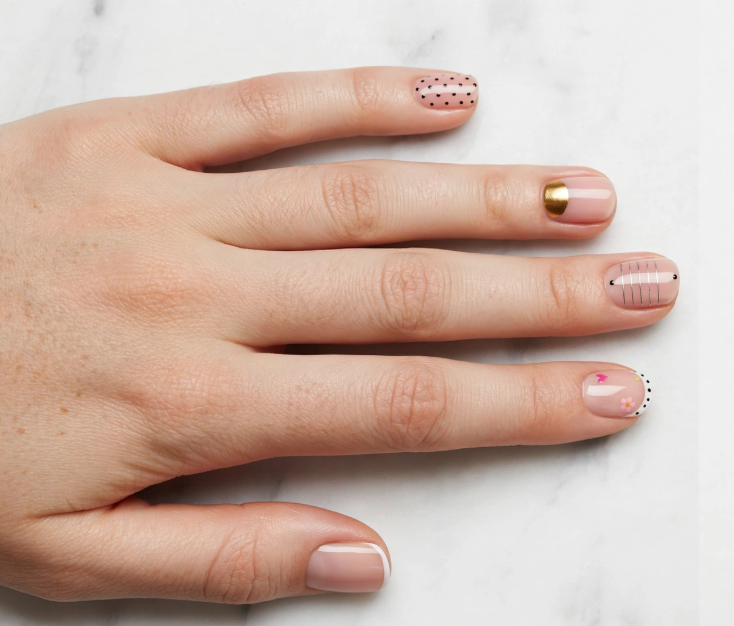
Short nails don’t need elaborate artwork to look interesting.
The easiest options include:
- Micro-French tips
- Tiny dots
- Half moons
- One-dot accents
- Small hearts
- Thin vertical lines
- Minimal flowers
- Metallic accents
- Polka-dot French tips
Current 2026 nail coverage continues to emphasize micro-French, small motifs, and minimalist designs for short natural nails.
A useful rule is to give each nail one main visual idea rather than trying to fit several details onto a small surface.
Common Mistakes to Avoid
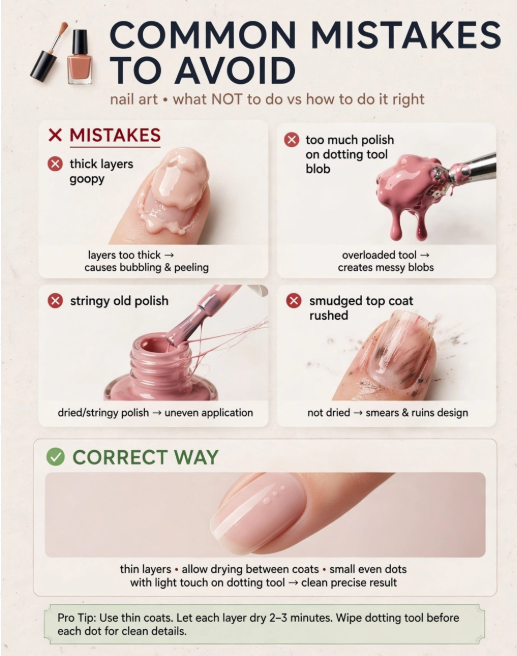
Applying thick layers
Thick polish takes longer to settle and can make detailed work harder.
Using too much polish on the dotting tool
A large blob can spread into an uneven circle. Start small and reload as needed.
Working with old, stringy polish
Thickened polish is harder to control. If appropriate, use a proper nail-polish thinner according to its directions.
Adding details before the base is ready
If the base moves underneath your artwork, dots and lines can sink into it.
Rushing the top coat
Give the design enough time to settle before sealing it.
Choosing an overly complicated first design
Start with dots, stripes, micro-French tips, or a simple color-blocked design before attempting intricate artwork.
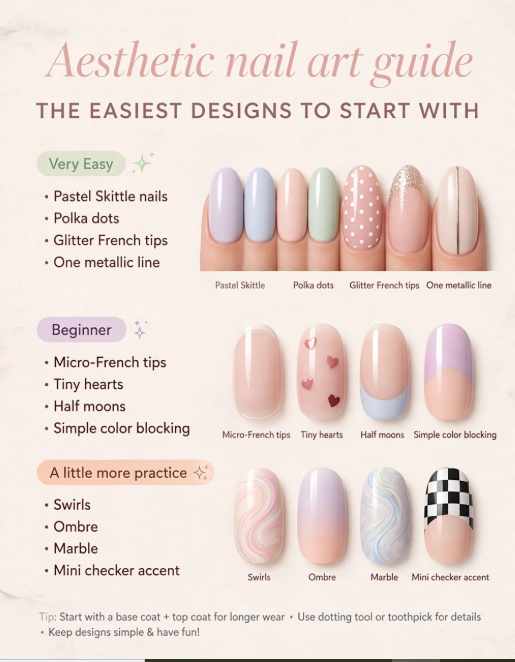
The Easiest Designs to Start With
If you’re completely new to nail art with regular polish, start in this order:
Very easy:
- Pastel Skittle nails
- Polka dots
- Glitter French tips
- One metallic line
Beginner:
5. Micro-French tips
6. Tiny hearts
7. Half moons
8. Simple color blocking
A little more practice:
9. Swirls
10. Ombre
11. Marble
12. Mini checker accent
The goal isn’t perfect symmetry. The goal is choosing a technique that gives you enough control to finish the manicure neatly.
Final Thoughts
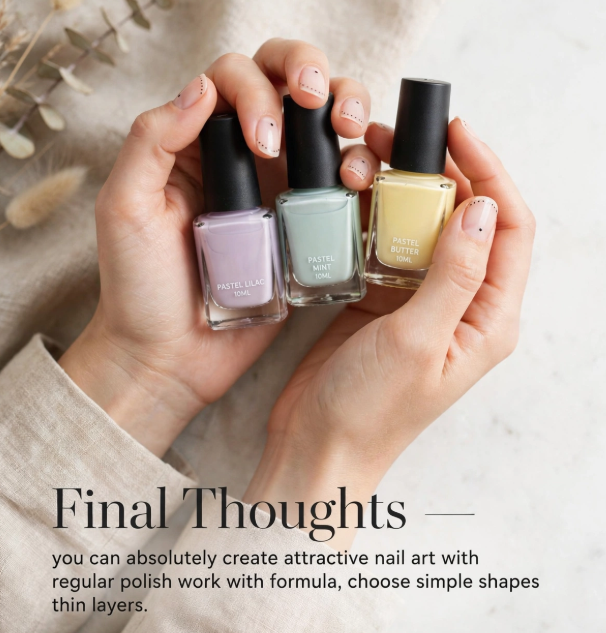
You can absolutely create attractive nail art with regular polish. The trick is to work with the formula rather than against it.
Choose designs made from simple shapes, use small amounts of polish, keep your layers thin, and give each stage enough time to settle. Start with dots, micro-French tips, stripes, glitter, or tiny accents before moving into marble, ombre, or more detailed patterns.
And if you’re working with short nails, don’t feel limited. Current nail-art trends continue to show that small, deliberate details can make short natural nails look polished and modern.
FAQs
Can I do nail art with regular polish?
Yes. Regular nail polish can be used for dots, French tips, stripes, swirls, flowers, color blocking, ombre, marble effects, and other simple designs. The main difference is that regular polish dries as you work, so you need to work efficiently and avoid repeatedly manipulating drying polish.
What are the top 10 nail designs?
Popular and beginner-friendly choices include French tips, micro-French tips, polka dots, ombre, color blocking, swirls, negative-space designs, glitter tips, floral accents, and minimalist line art.
What are the 5 basic nail designs?
Five excellent starting points are French tips, polka dots, simple stripes, glitter tips, and color blocking. They rely on basic shapes rather than complicated freehand artwork.
What are some trendy, simple nail designs for 2026?
Micro-French tips, playful French variations, polka-dot details, short minimalist designs, and updated classic manicures are prominent in 2026 nail coverage.
Is regular polish easier than gel for nail art?
Not necessarily. Regular polish is accessible because it does not require a curing lamp, but it dries while you work. Gel can remain workable until cured, which changes how detailed nail art is created. For someone specifically avoiding gel, regular polish can still handle many simple designs effectively.
What can I use instead of a dotting tool?
A bobby pin, toothpick, or another small rounded tool can work for simple dots. The important part is controlling how much polish you pick up.
How do I keep regular nail polish from drying while doing nail art?
Work with very small amounts of polish, reload your brush or dotting tool frequently, and avoid leaving a large amount exposed to air. If the polish becomes thick, a suitable nail-polish thinner can help restore workable consistency.
What nail art looks best on short nails?
Micro-French tips, tiny dots, small hearts, half moons, thin lines, minimal flowers, and small accent designs work particularly well. Current 2026 nail coverage also highlights minimalist designs for short natural nails.