

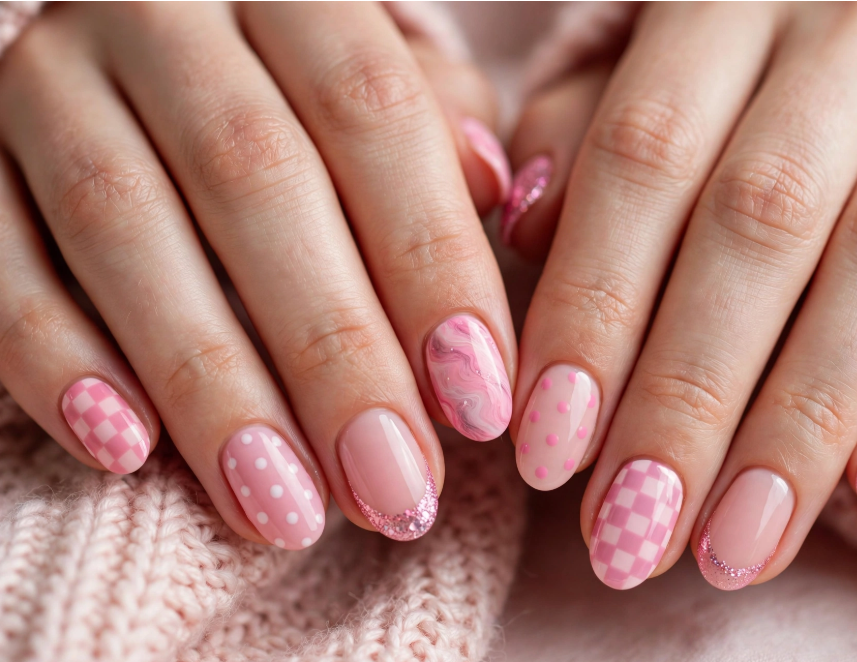
Beginners don’t need to make it too complicated or use professional tools to create nail art. Simple designs can be created at home using a few nail polish colors, a toothpick, bobby pin, thin brush or makeup sponge. Whether you dip in polka dots, add French tips, or decorate with tiny flowers, hearts, glitter or swirls, these nail art ideas are simple enough for anyone to do and give you the opportunity to practice your technique and build your confidence.
A pretty manicure at home can be done without a special case of tools and does not require any advanced nail-art skills. Nail art designs that are easy to do will consist of dots, lines, curves, blocks of colour and minor accessories, if you’re new to nail art.
A bobby pin can be used as a simple dotting device, and a thin brush or toothpick can be used for fine dotting. Other tapes and makeup sponges are helpful for designs that require a sharper edge or smooth blending of colors. Nail art tutorials for beginners from Sally Beauty and OPI also suggest to use simple nail art designs like dots, French tips and simple patterns.
Below is a list of 20 ideas that will aide you in practicing without it seeming overwhelming. Some are very plain and others have flowers, fruit, glitter, and tiny decorations.
Before choosing your next manicure, explore Nail Shapes Explained: Which Shape Is Best for Your Hands? to find a shape that complements your natural nails and overall look.
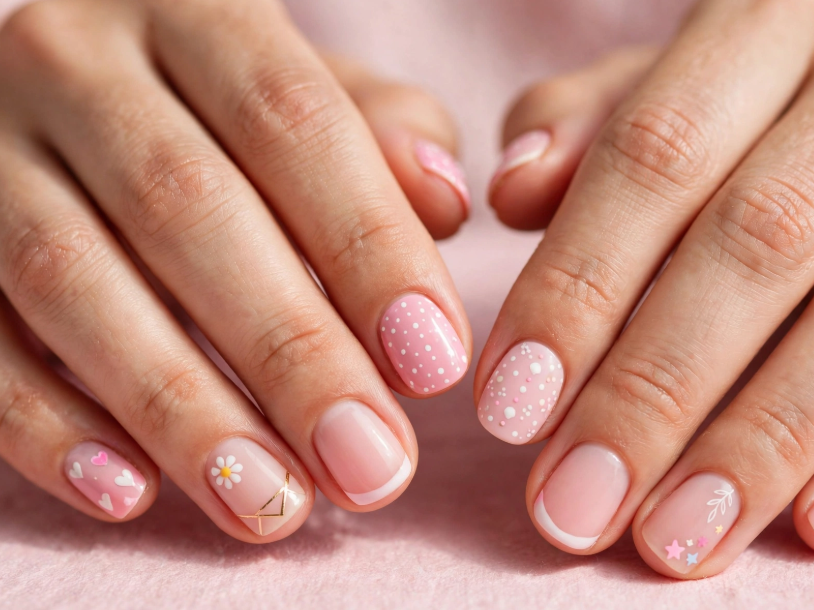
What You Need for Beginner Nail Art
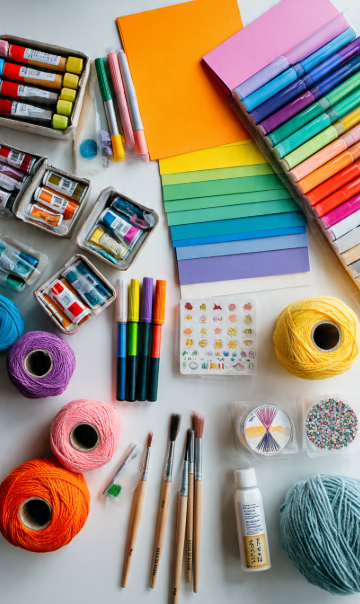
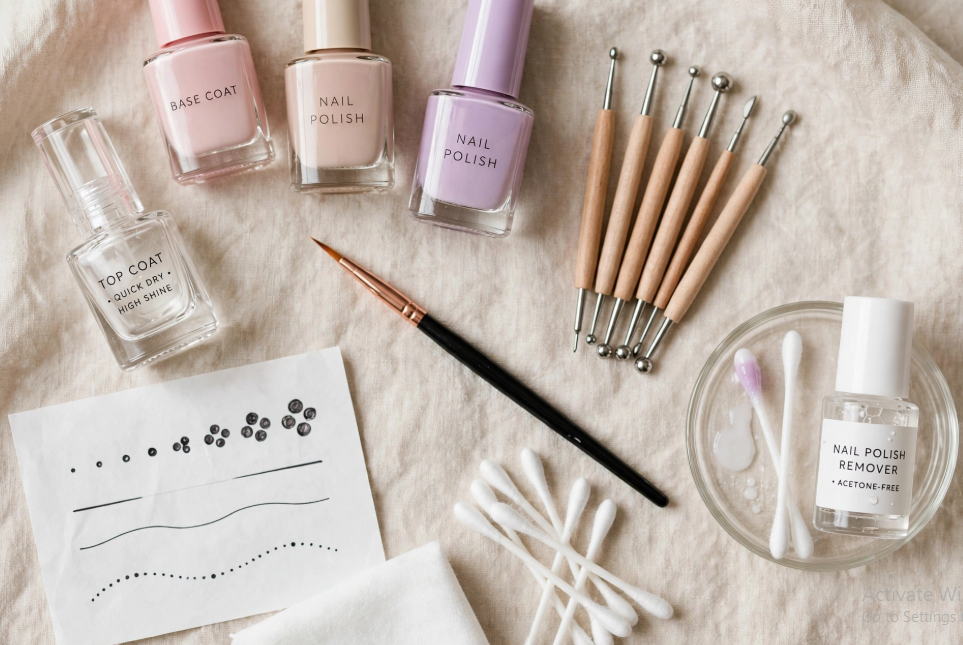
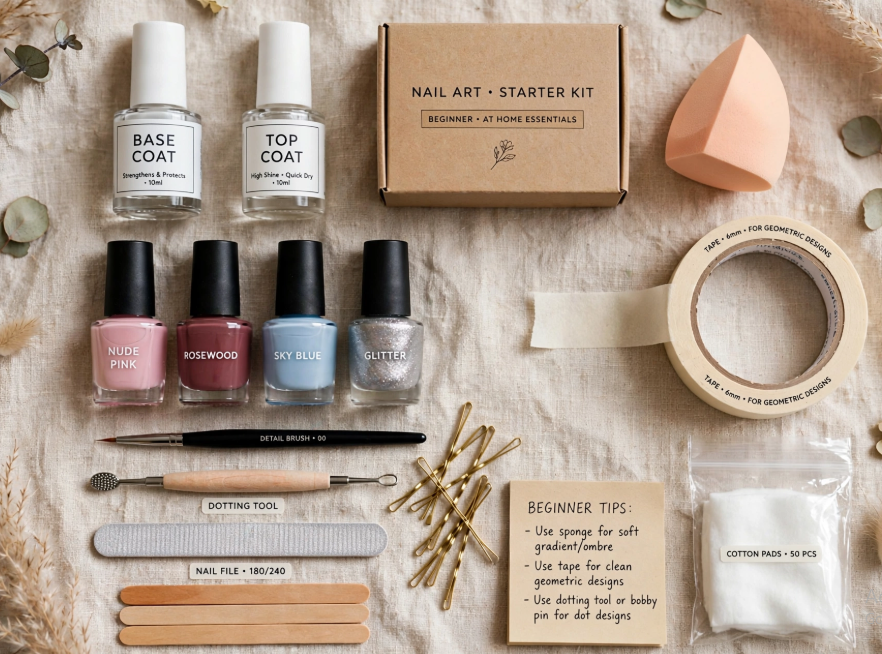
Before choosing your design, gather a few basic supplies:
- Base coat
- Two or more nail polish colors
- Top coat
- Toothpick or bobby pin
- Thin nail-art brush, if available
- Small makeup sponge
- Nail tape or regular thin tape
- Nail stickers or small embellishments
- Cotton swabs for cleanup
You don’t need every item on this list. Many simple designs can be created with polish and one basic tool.
For example, polka dots can be made with a dotting tool or bobby pin, while gradients can be created with a small sponge.
How to Make Nail Art Easier for Beginners
Use clean, dry nails, and apply a base coat before you do your design. Use light coats of polish and dry them sufficiently before applying another coat.
If you are not confident about the use of your nondominant hand, do the design on paper first. These are good exercises to use simple dots, lines, curves and little flowers. It’s not necessary to decorate each nail. A single or two accent nails can add a lot of detail to a simple manicure, but won’t require the design to be repeated 10 times.
Let’s now move onto the designs.
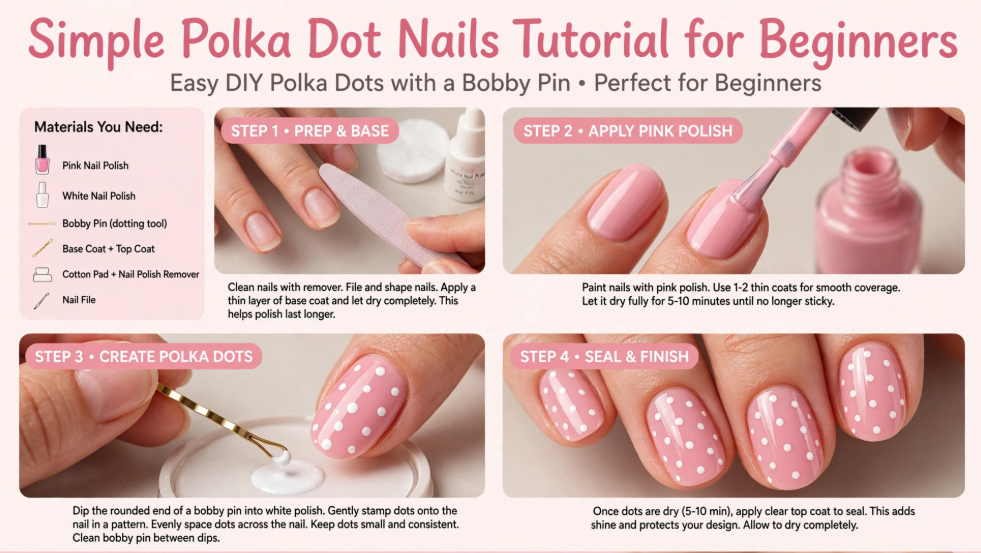
1. Simple Polka Dot Nails
For beginners, polka dots are one of the simplest nail art designs to get started with. Color nails with base color; allow to dry.
Dip the rounded end of a bobby pin or a dotting tool into a contrasting polish.
Press it carefully on the nail and pull up along the nail. Experiment with the use of evenly spaced dots, the random placement of dots, or a large dot close to the cuticle. Finally, for a very easy combination to make, have white dots over a dark background or black dots over a light background.
If you love a shiny, modern manicure, check out these 25 Chrome Nail Ideas for Short Nails for stylish inspiration.
2. Tiny Daisy Flowers
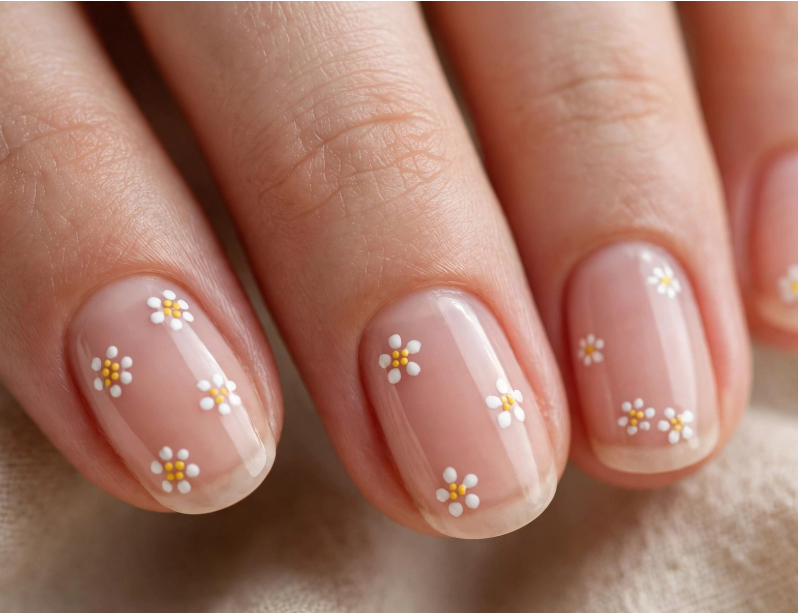
Small flowers look detailed, but you can make all but the most intricate parts out of dots. Draw a few small circles, which will be the petals. Use a contrasting dot to make the center of the flower. Each nail could get one little flower or flowers may be used only for the accent nails.
This is one of the most approachable ways to move from basic dots into more decorative beginner nail art.
3. Easy French Tips
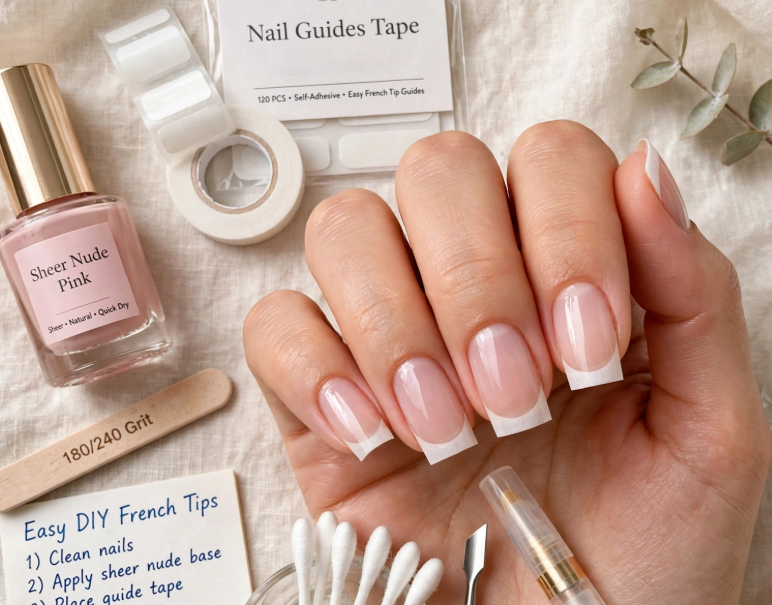
French tips are a classic choice that can be a simplified version for home manicures. Base with sheer, nude, or light pink color. After it dries, coat the free edge of the nail with a thin line of white polish.
Don’t be concerned if the curve is not ‘perfect’ on the first attempt. Nail guides or tape can also be utilized to help develop a cleaner edge. When comfortable with white tips, try pink, blue, red or pastel colors.
For a rich, seasonal manicure, explore these 25 Burgundy Nail Designs for Fall 2026 for elegant ideas that bring deep, warm color to your fall look.
4. Glitter Tips
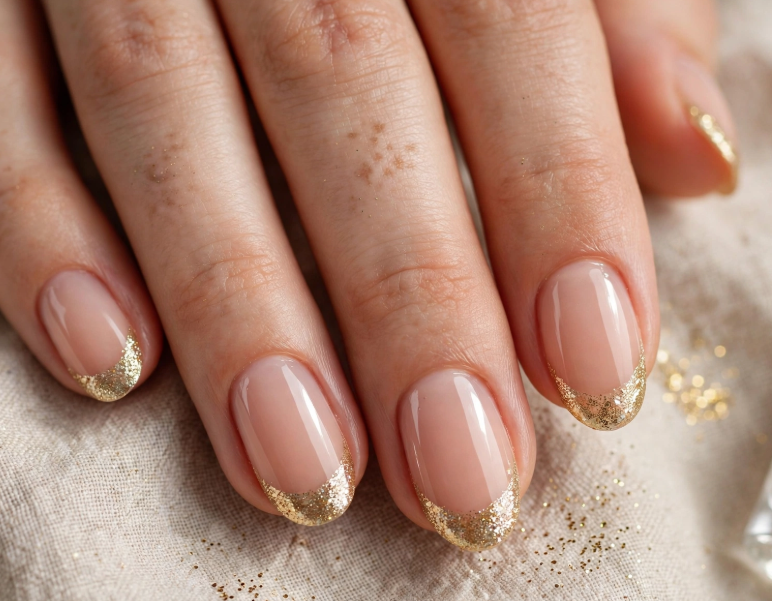
Looking for something that looks special, but requires little painting? Add glitter just to the tips of your nails. Glitter polish can be used directly or cosmetic glitter applied while the polish is still tacky, according to the instructions. A clear top coat is good for sealing the design. You can easily add a glimmer to a regular French manicure in this way.
5. Pastel Mismatched Nails
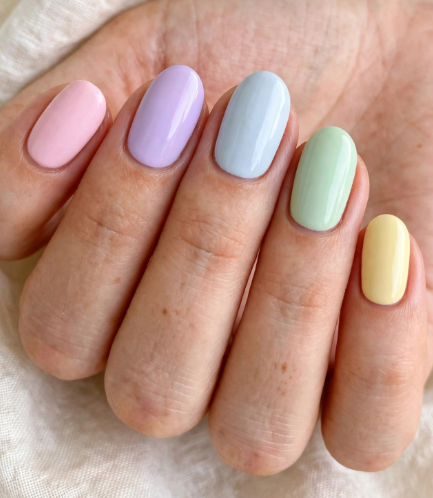
Instead of choosing one color, paint each nail in a different pastel shade.
Try combinations such as:
- Soft pink
- Lavender
- Pale blue
- Mint
- Cream
- Soft yellow
Keep the shades within a similar intensity so the manicure looks coordinated rather than random.
This design is especially useful for beginners because there is no detailed pattern to paint.
6. Color-Block Nails
Another beginner-friendly technique is colour blocking, as it is made with basic parts of colour.
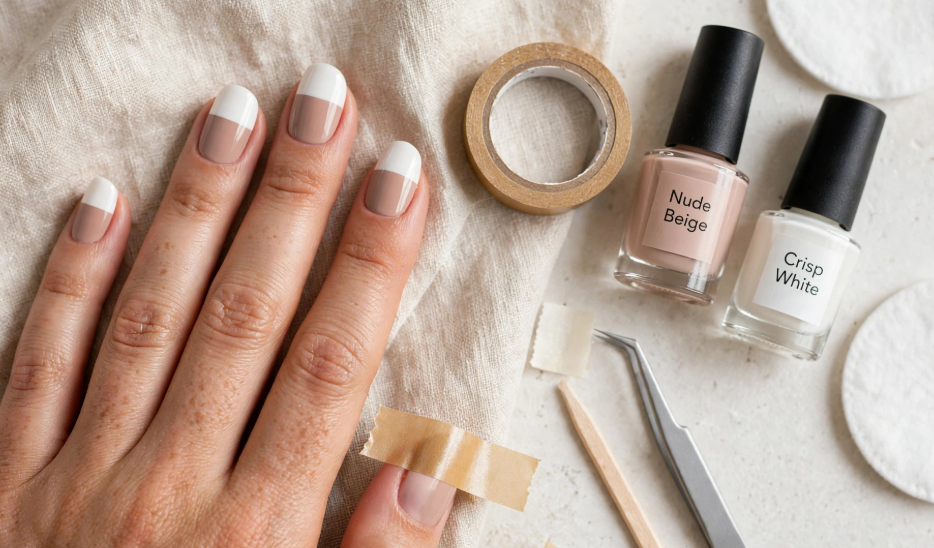
Choose a bottom color. When it dries thoroughly, thin tape partway through the nail. Shade another color in the exposed area and slowly peel off the tape. Use two contrasting colors or use a variety of colors in the same color family.
To add a modern touch, show some of the original nail between the coloured parts.
Looking for more seasonal inspiration? Explore these 35 Fall Nail Ideas for 2026 for stylish manicure ideas perfect for the autumn season.
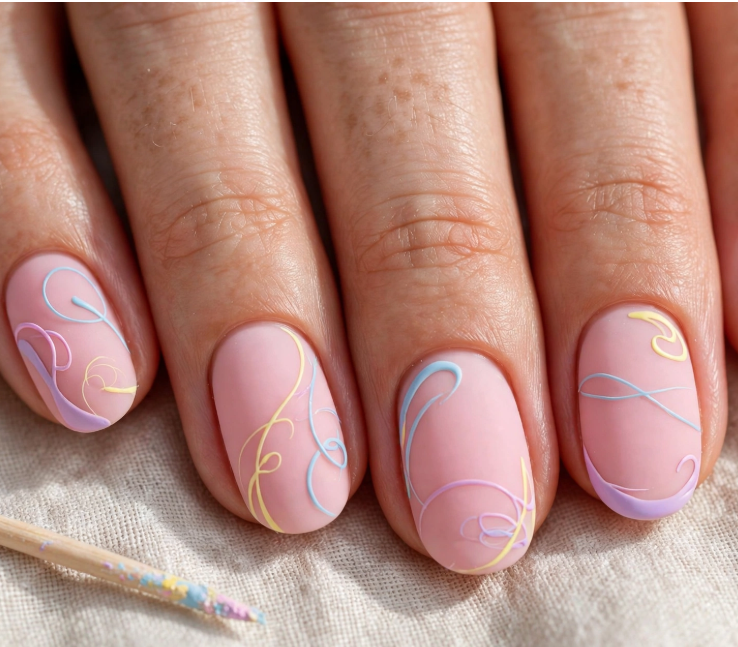
7. Simple Swirl Nails
While swirls can be daunting, they don’t have to be symmetrical. Select 2-3 colors that go together. With a thin nail-art brush or toothpick make curved lines across the nail.
The simplest way to do this is to keep the lines thin and to leave space between them. Try out the curves on paper before on nails. The more familiar you are with the motion, the more natural your swirls will be!
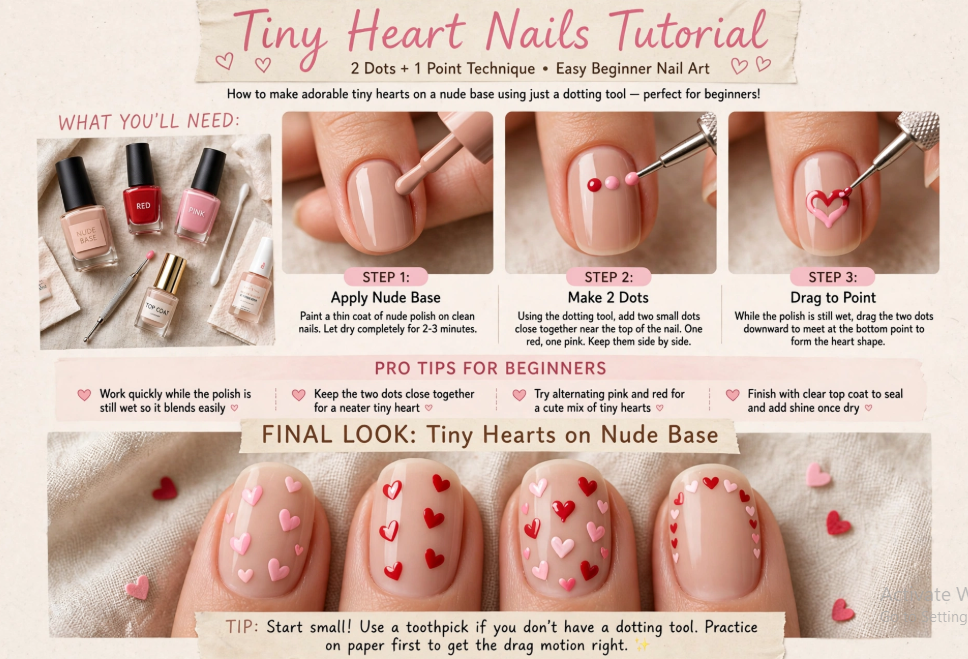
8. Tiny Heart Nails
It’s actually very easy to make hearts when you divide them up into 2 dots and 1 point. Near the top of the heart place the two small dots together.
Next, push the polish from each of the dots down to a central point. Make little hearts to give a fine appearance. Red, pink, burgundy, white or even pastels contrasting colors can be used. For a fun twist, tiny hearts can be put on the ends as well.
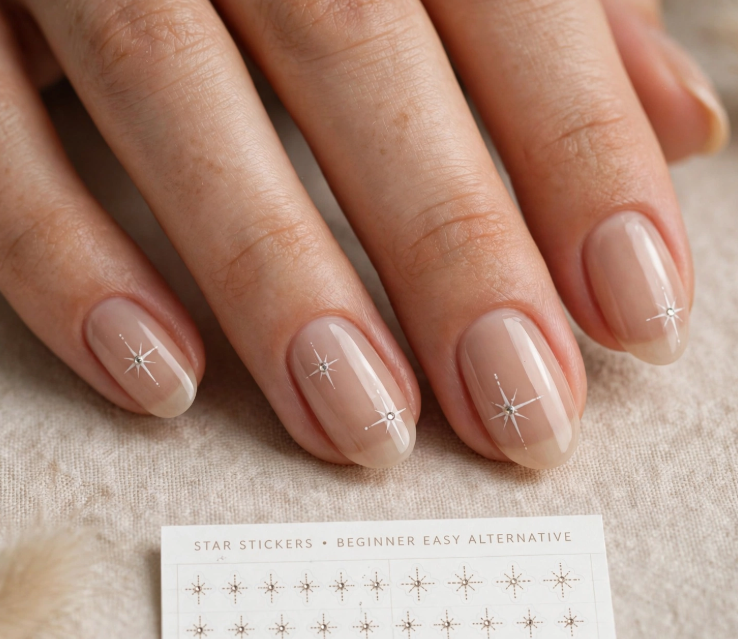
9. Minimal Star Nails
With some simple strokes, stars can be made. Draw a small dot for the centre of the star. With a small brush or toothpick, pull out short lines to the outside.
If you don’t have to paint a star, use star stickers to make things easier! A little rhinestones can add a bit of sparkle in the middle but it’s just as good without embellishment.
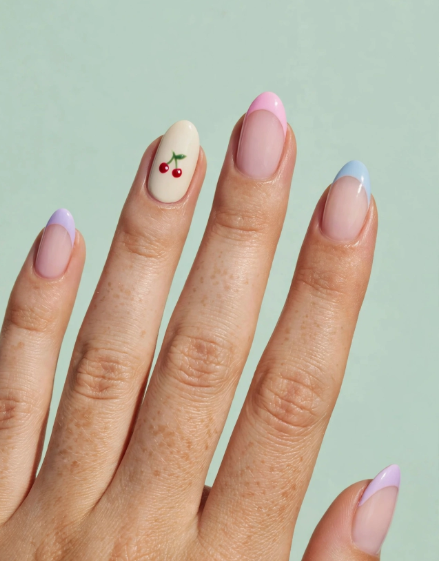
10. Cherry Accent Nails
Small cherries are a fun choice if you want cute easy nail art designs.
Create two small red dots close together. Add thin green lines above them to form the stems.
You don’t have to put cherries on every nail. A couple of accent nails against a solid-colored manicure can make the design much easier to complete.
For a summer-inspired version, pair the cherries with bright or pastel French tips.
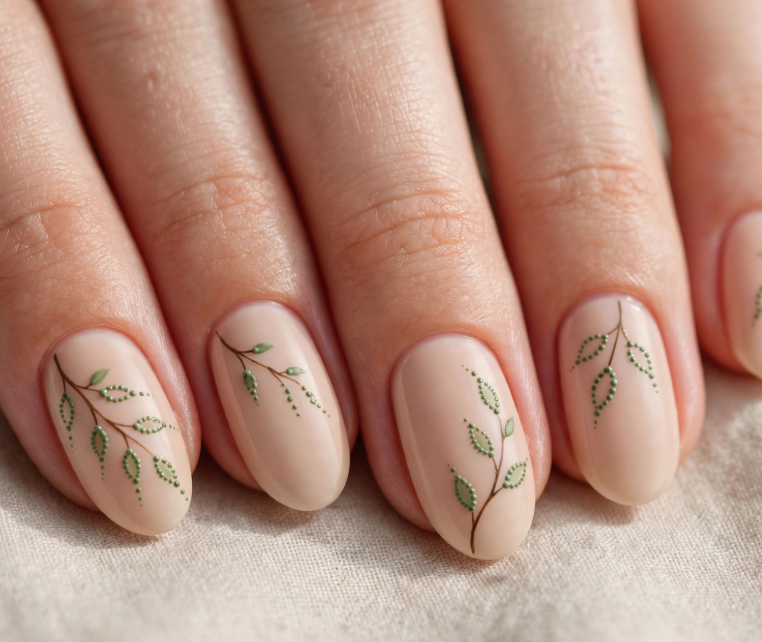
11. Leaf and Branch Design
A simple leaf design can be created using small dots and dragged lines.
Start with a solid base color. Add small dots where you want the leaves, then use a fine tool to pull the polish into leaf shapes.
Add a thin branch connecting some of the leaves.
Black, white, green, and metallic shades can all work depending on your base color.
12. Negative-Space Half-and-Half Nails
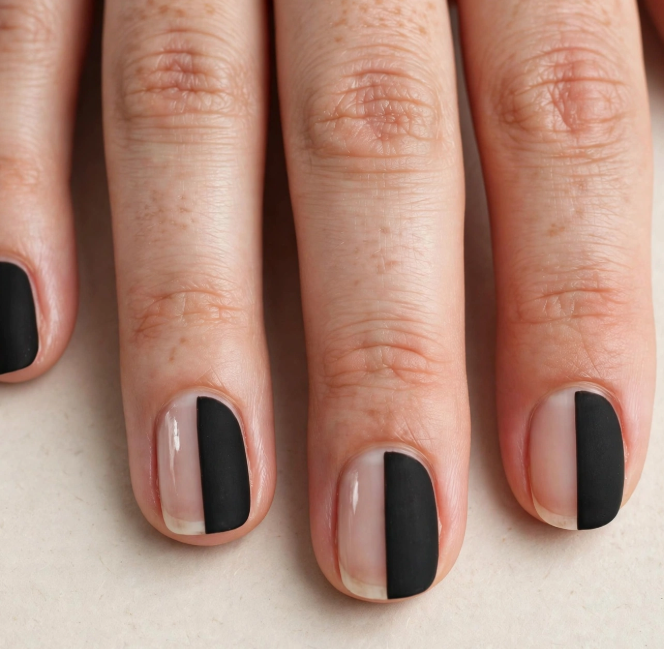
Negative space means allowing part of your natural nail to remain visible as part of the design.
For an easy version, divide the nail visually into two sections. Paint one side while leaving the other side bare.
You can use tape to help create a straighter dividing line.
Try black and natural nail, white and nude, or a bright color paired with a sheer base.
13. Reverse French Tips
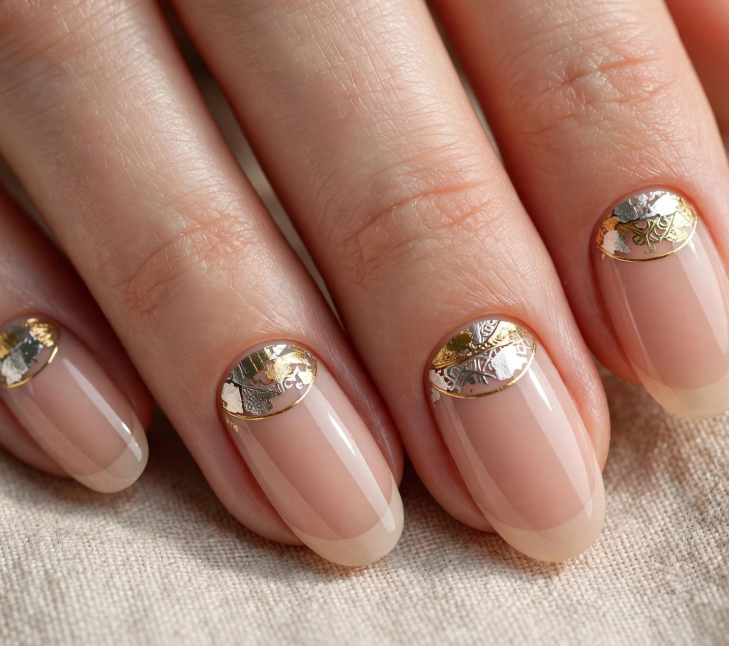
Instead of painting the free edge, move the accent to the base of your nail near the cuticle.
Apply your base color and let it dry. Then create a curved accent along the lower portion of the nail.
Metallic gold, silver, white, and contrasting colors all work well for this design.
Because the accent is small, it can be easier for beginners than painting a traditional full French tip.
14. Easy Ombre Nails
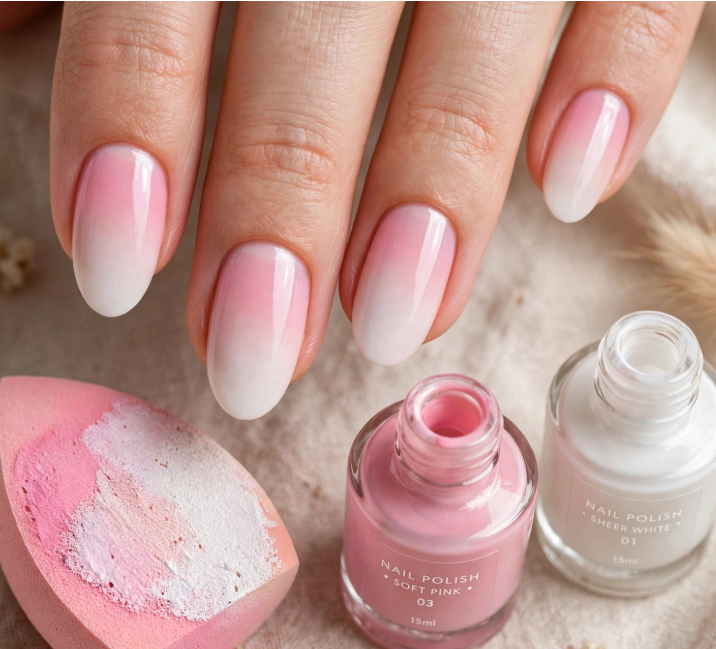
A soft gradient can create a polished manicure without detailed artwork.
Choose two or three colors that blend naturally together. Apply them onto a small makeup sponge in stripes, slightly overlapping the shades.
Press the sponge gently onto the nail to transfer the colors.
You may need more than one layer to build the gradient. Clean around the cuticle area afterward and finish with top coat.
If you want an even simpler approach, create a gradient across your hands by painting each nail a slightly different shade from the same color family.
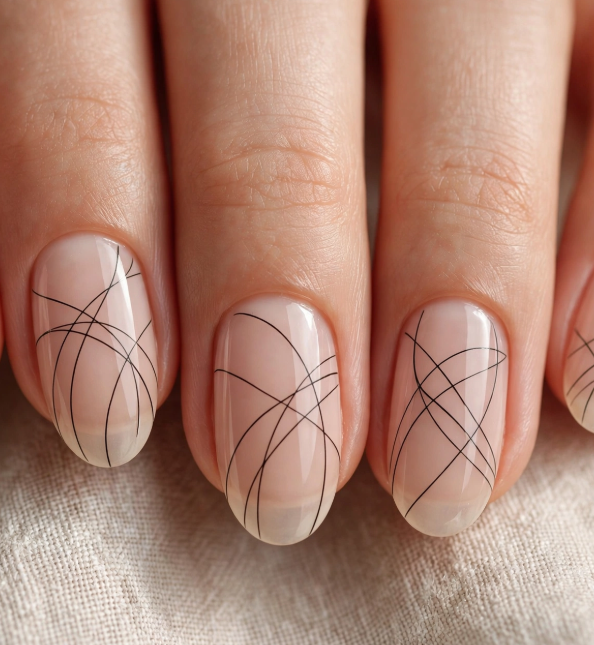
15. Abstract Line Art
You don’t need to paint recognizable objects to create interesting nail art.
Try thin black, white, brown, or colored lines that curve across a nude or sheer base.
Let the lines overlap occasionally, but don’t overcrowd the nail.
This design is forgiving because slight differences between nails can make the manicure look intentionally abstract.
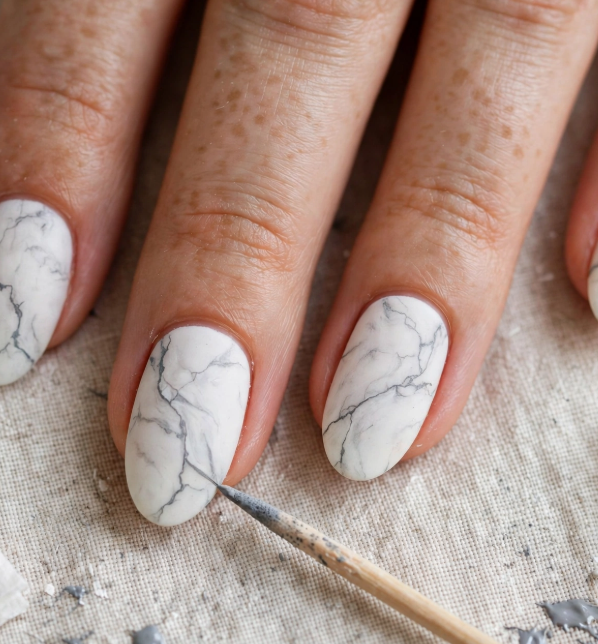
16. Easy Marble Nails
Marble is another design that can be made with simple tools.
Paint your base color and allow it to become mostly dry. Add a small amount of another polish and gently drag a toothpick through it to create irregular veins.
Don’t overwork the polish. A few imperfect lines can create a natural marble effect.
Finish with top coat once the design has dried.
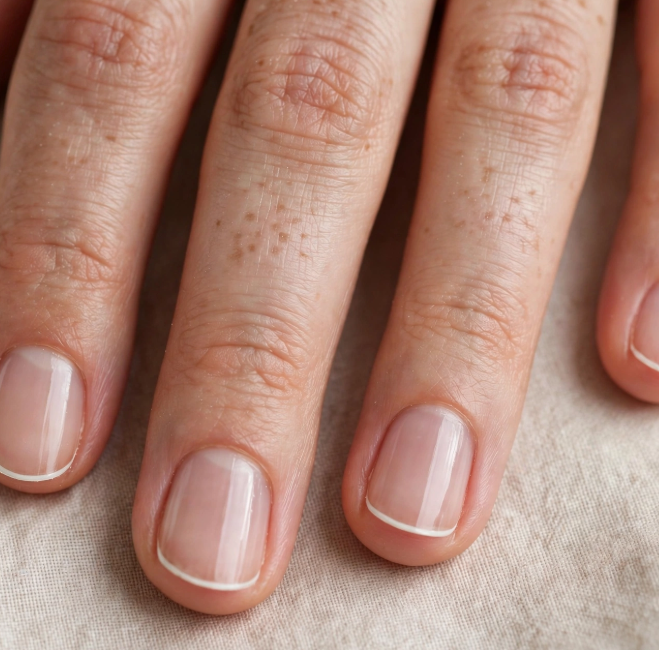
17. Micro French Tips
If you like French manicures but want something more understated, try very thin tips.
Apply a sheer or nude base. Then use a thin brush to create a narrow line across the tip of each nail.
You can use white for a classic look or experiment with several colors.
Micro French styles are also easy to customize for short nails because the design takes up very little space.
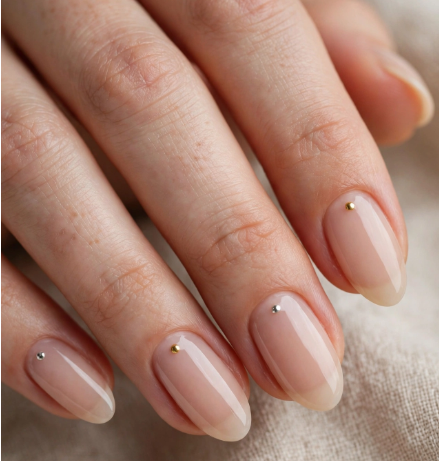
18. Chrome or Metallic Dots
You can make a simple manicure look more decorative by adding metallic dots.
Start with a nude, white, black, or pastel base. Once dry, place tiny gold, silver, or chrome-colored dots in a simple pattern.
Try one dot near the cuticle, a diagonal row, or a few scattered dots.
This gives you the visual effect of detailed nail art without requiring complicated painting.
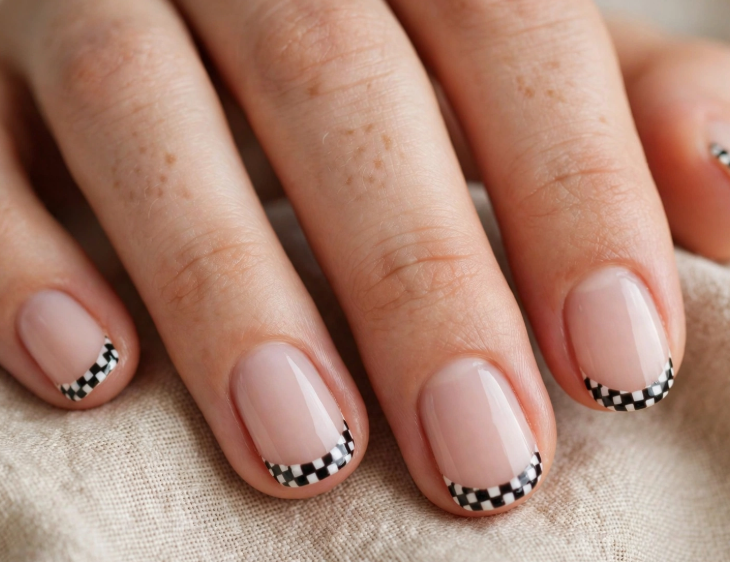
19. Easy Checkered Tips
For a playful design, create tiny black-and-white squares along the tips of your nails.
Start with a light base color. Use a thin brush or nail-art pen to create small blocks near the tip.
You don’t have to make a complete checkerboard across the entire nail. Limiting the pattern to the French-tip area makes the design more manageable.
If freehanding the squares feels difficult, nail tape can help create cleaner sections.
20. Mix-and-Match Accent Nails
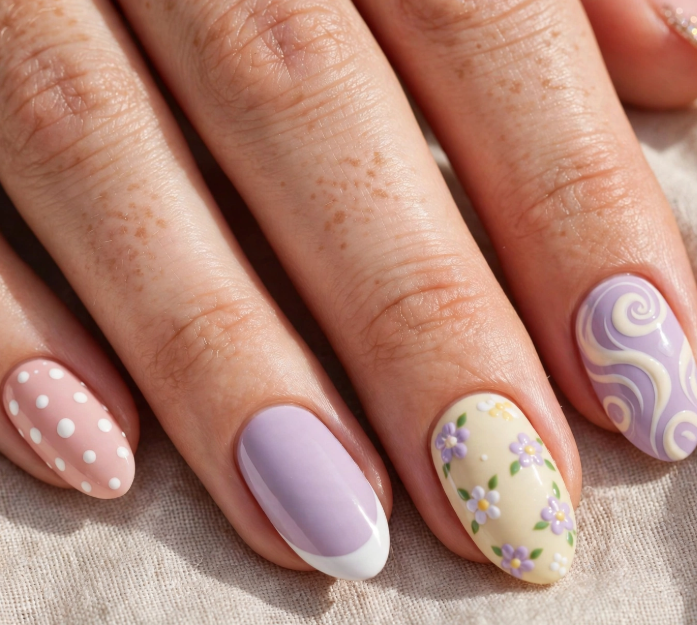
Once you’ve practiced several beginner techniques, combine your favorites.
For example, you could use:
- Polka dots on one nail
- A French tip on another
- A tiny flower on another
- A swirl on another
- Glitter tips on the final nail
The easiest way to make a mix-and-match manicure look cohesive is to use a consistent color palette.
You can also repeat one accent color throughout the designs so the manicure feels intentional rather than overly busy.
Beginner Nail Art Tips That Make a Big Difference
Practice Before Painting Your Nails
If you’re nervous about freehand designs, practice dots, lines, hearts, and curves on paper first. This helps you get familiar with how much polish your tool picks up.
Use Less Polish for Tiny Details
Too much polish can make small designs look bulky. For dots, leaves, flowers, and thin lines, start with a small amount and add more only when needed.
Let Each Layer Dry
Rushing between layers can cause smudging. Give your base and design enough time to set before applying the top coat.
Keep a Cleanup Tool Nearby
A small brush or cotton swab dipped in nail-polish remover can help clean polish that gets onto the surrounding skin.
Don’t Try to Make Every Nail Identical
Hand-painted nail art naturally varies slightly from nail to nail. A consistent color palette and similar overall placement can make small differences look intentional.
Finish With Top Coat
Once your artwork is dry, apply a suitable top coat according to the polish system you’re using. It can add shine and help protect the finished design.
What Is the Easiest Nail Art for Beginners?
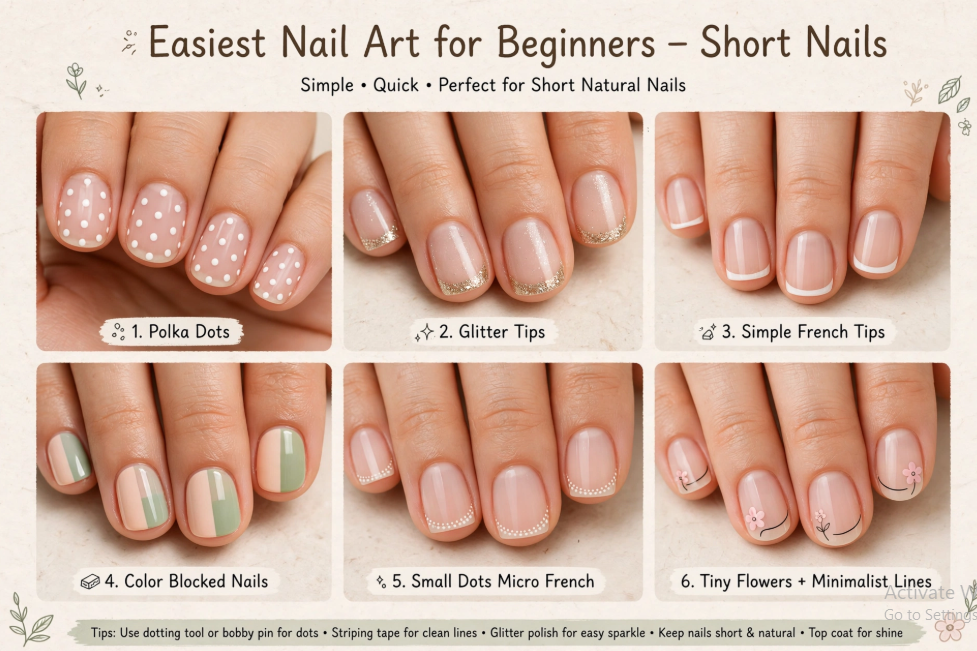
If this is your first time trying nail art, start with polka dots, glitter tips, simple French tips, or color-blocked nails.
These designs require fewer precise movements than detailed illustrations. Once you’re comfortable with dots and straight lines, move on to flowers, hearts, swirls, and other small patterns.
Beginner nail-art resources commonly recommend these foundational techniques because they can be adapted without advanced equipment.
Can You Do Nail Art on Short Nails?
Yes. Short nails can work well with simple nail art.
Small dots, micro French tips, tiny flowers, glitter accents, and minimalist lines don’t require a large canvas. The key is to avoid putting too many details into a small area.
For short nails, try keeping patterns small and using negative space to prevent the manicure from looking crowded.
What Tools Do You Need for Nail Art at Home?
You can begin with a surprisingly small collection of tools.
A base coat, a few polish colors, a top coat, and something for creating dots or fine lines can cover many beginner designs. A bobby pin or dotting tool can handle dots, while a thin brush can help with lines and small details.
For gradients, a makeup sponge is useful, and tape can help create cleaner geometric designs.
You can add specialized nail-art tools later as your skills develop.
Final Thoughts
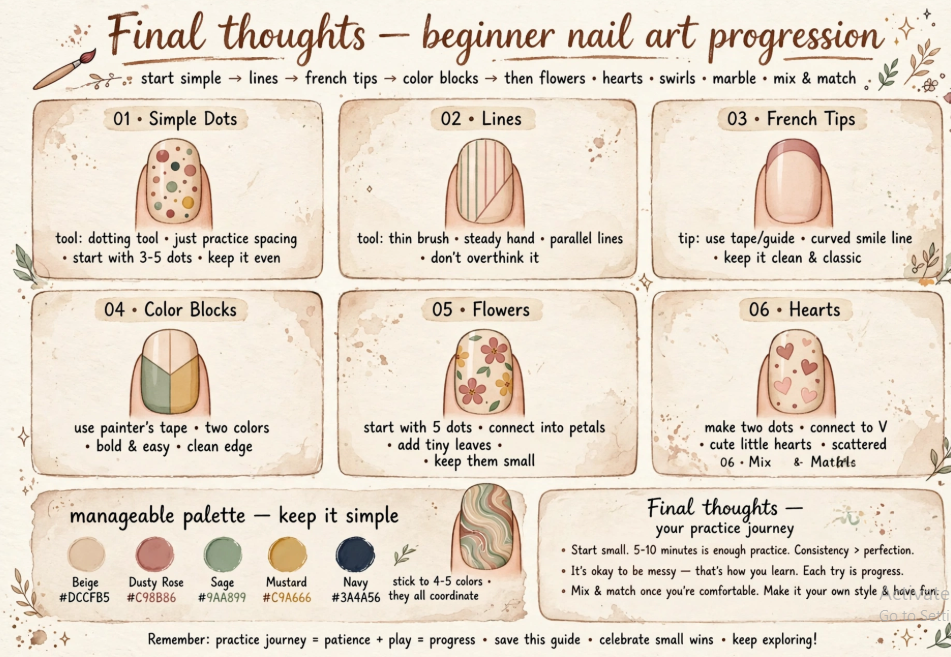
Learning nail art for beginners doesn’t have to mean starting with complicated designs. Begin with the techniques you can control—dots, lines, simple French tips, color blocks, and small accents.
Once those feel comfortable, experiment with flowers, hearts, fruit, swirls, marble effects, and mix-and-match designs.
Most importantly, give yourself permission to practice. Your first manicure doesn’t have to look professionally painted. Start simple, keep your palette manageable, and build your skills one design at a time.
For more inspiration and step-by-step ideas, check out these beginner nail designs from Sally Beauty before trying your favorite look at home.
FAQs About Nail Art for Beginners
What is the easiest nail art for beginners?
Polka dots, glitter tips, simple French tips, and color-blocked nails are some of the easiest designs to start with. They require basic tools and don’t depend on highly precise freehand painting.
What do I need to start doing nail art at home?
You can start with a base coat, a few nail polish colors, a top coat, and a simple tool such as a bobby pin or toothpick. A thin nail-art brush, makeup sponge, and nail tape can be added for more designs.
Can beginners do nail art on short nails?
Yes. Short nails work well with simple designs such as tiny dots, micro French tips, small flowers, glitter accents, and minimalist lines. Keeping the details small helps prevent the design from looking crowded.
How do you make simple nail art designs at home?
Start with clean, dry nails and apply a base coat. Paint your chosen base color, let it dry, and then add your design using a dotting tool, toothpick, thin brush, sponge, or tape. Allow the design to dry before finishing with a top coat.
How can I practice nail art as a beginner?
Practice basic shapes such as dots, straight lines, curves, hearts, and flowers on paper before painting your nails. This helps you become comfortable with the amount of polish and pressure needed for different designs.
What nail art designs are easiest to do with a toothpick?
A toothpick can be useful for tiny flowers, hearts, leaves, stars, marble effects, and simple swirls. It works especially well when you only need a small amount of polish for fine details.
How do you make DIY nail art last longer?
Start with clean, dry nails, apply a base coat, use thin layers of polish, and allow each layer to dry properly. Finish with a suitable top coat to help protect the design and add shine.
Can I do nail art without special tools?
Yes. Many beginner designs can be created with everyday items. A bobby pin can create dots, a toothpick can make small details, tape can help with geometric designs, and a makeup sponge can create gradients.
What are some easy nail art ideas for beginners?
Easy options include polka dots, daisy flowers, French tips, glitter tips, pastel mismatched nails, color blocking, simple swirls, tiny hearts, cherry accents, negative-space designs, and minimalist line art.
How long should I wait before applying top coat to nail art?
Wait until the artwork has had enough time to set so that the brush does not drag or smear the design. Applying top coat too quickly can disturb small details such as dots, lines, flowers, and swirls.