

The best Halloween decorations and crafts are not necessarily the most complex ones. In fact, a few sheets of cardstock can turn into a dramatic bat wall, while an old jar can become a glowing ghost. Similarly, leftover cardboard can be transformed into a miniature haunted house.
Best of all, DIY Halloween decorating gives you the added bonus of customizing the color scheme, scale, and aesthetic to fit your home and personality. As a result, you can create seasonal decor that feels much more personal than a collection of store-bought decorations.
Whether you prefer a traditional orange-and-black color palette, a vintage Halloween look, a dramatic gothic room, or cute and family-friendly Halloween decor, these 25 ideas will inspire you to create your own Halloween decorations.
If you’re looking for more simple seasonal projects for little ones, explore our guide to 24 Preschool Seasonal Crafts for Spring, Summer, Fall & Winter for easy ideas to enjoy throughout the year.
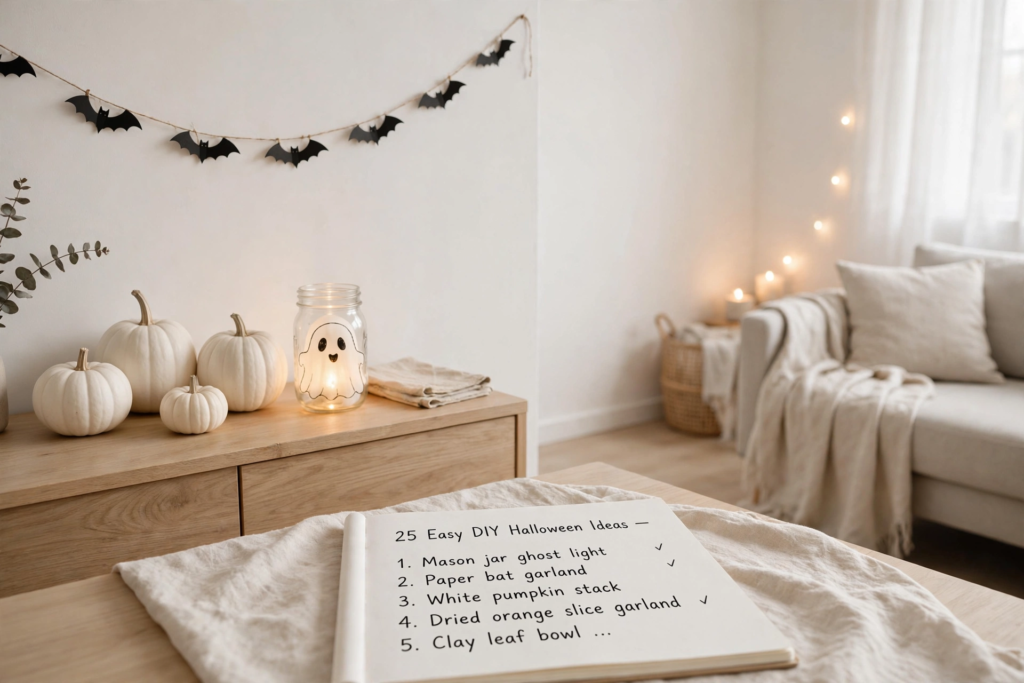
Quick Guide to the Best Halloween Decorations and Crafts
| DIY idea | Best place | Style |
|---|---|---|
| Paper bat wall | Wall or mantel | Spooky |
| Ghost garland | Mantel or doorway | Cute |
| Painted pumpkins | Table or entryway | Any style |
| Cheesecloth ghosts | Porch | Classic spooky |
| Halloween wreath | Front door | Traditional |
| Cardboard tombstones | Yard | Haunted |
| Vintage paper art | Shelf or wall | Retro |
| Window silhouettes | Windows | Spooky |
| Ghost jars | Shelves or table | Cute |
| Halloween book stack | Coffee table | Gothic |
| Paper lanterns | Party area | Festive |
| Branch arrangement | Entryway | Natural/gothic |
| Haunted house | Shelf | Whimsical |
| Tin-can ghosts | Porch | Upcycled |
| Egg-carton spiders | Kids’ display | Playful |
Easy Halloween Crafts That Become Decorations
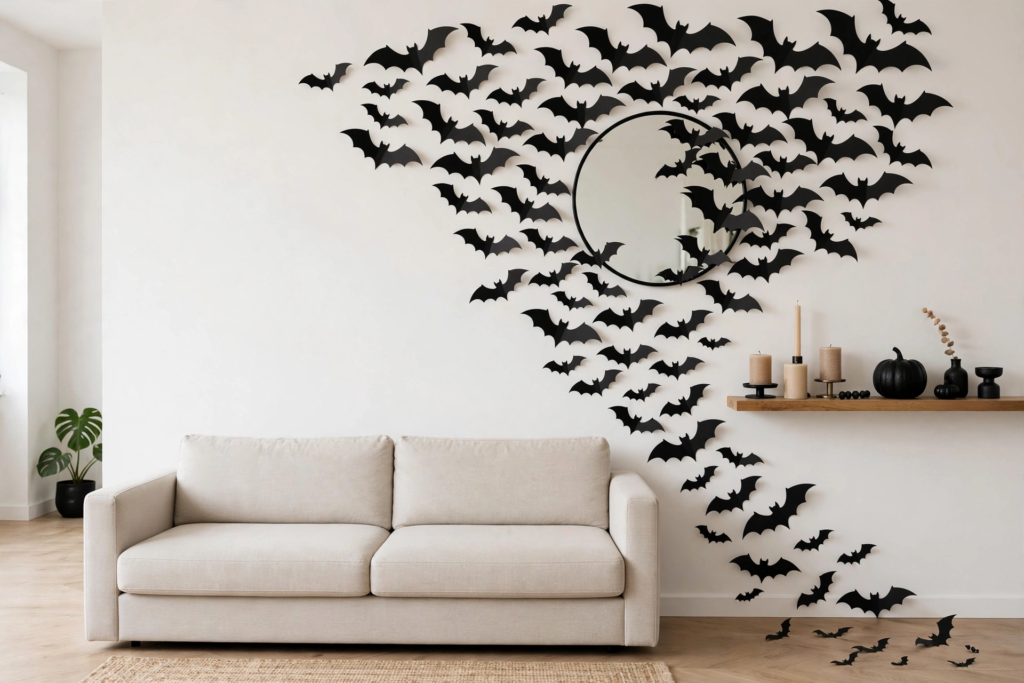
1. Create a Paper Bat Wall for Halloween Decorations and Crafts
Paper bats are one of the easiest ways to make a big Halloween statement with little investment.
To begin, cut bats of varying sizes from black cardstock and cluster them on a wall near a door, mirror, favorite picture, or mantel. Then, allow them to trail away and down the wall as if they’re swarming the house.
Most importantly, vary the sizes throughout the arrangement. If you use bats that are all the same size and space them evenly, you may end up with a nice design; however, it won’t create the natural swarming effect you’re after.
In addition, paper bats are great for renters, apartments, hallways, mantels, or any other place where you might not want something permanent.
Finally, if you plan to leave them up for only a short time, be sure to use removable Command strips or another wall-safe hanging method appropriate for your surface.
For more nostalgic and creative DIY inspiration, check out our guide to 20 Retro Crafts to Try for a Creative Weekend, featuring fun projects with a vintage-inspired feel.
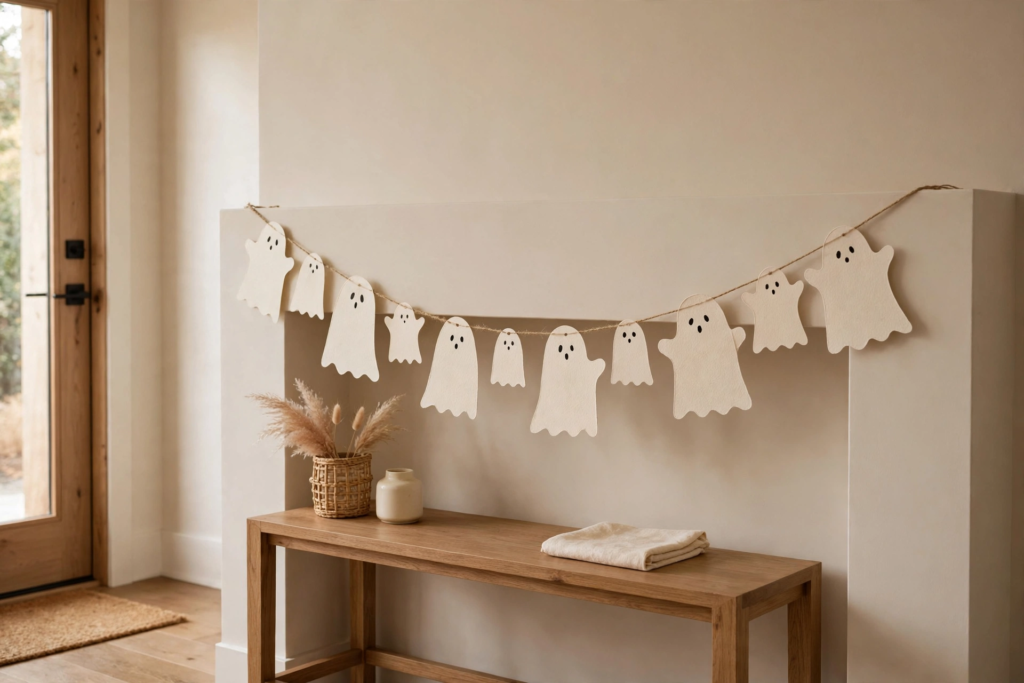
2.Make a Ghost Garland for Halloween Decorations and Crafts
Cut simple ghost shapes from white or cream cardstock and string them together with twine.
For a more polished look, vary the ghost sizes and leave a little space between them. Add tiny black eyes rather than complicated faces.
Hang the garland:
- across a mantel
- around an entryway
- above a console
- along a shelf
- across a party table
A cream-colored version works particularly well if your home has warm neutrals instead of bright white accents.
If you love vintage-inspired DIY projects, explore 20 Nostalgic Crafts Making a Comeback in 2026 for more creative ideas with a nostalgic twist.
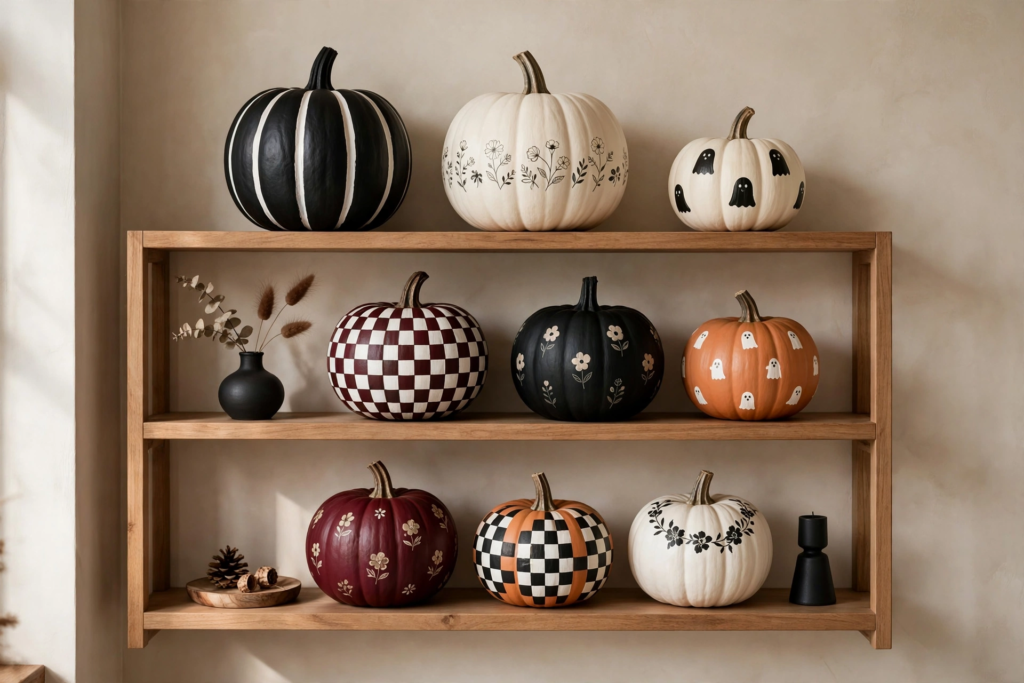
3. Paint Your Pumpkins for Halloween Decorations and Crafts
Painting pumpkins is an easy way to create Halloween decor that matches the rest of your home.
Try:
- matte black
- creamy white
- deep burgundy
- muted orange
- black-and-white stripes
- checkerboard
- simple floral patterns
- tiny painted ghosts
Instead of decorating every pumpkin differently, repeat one or two colors throughout the display.
That creates visual cohesion without requiring a matching pumpkin collection.
For more fun projects that encourage creativity, check out 25 Craft Ideas for Teens That Are Actually Cool, with easy ideas teens can make and enjoy.
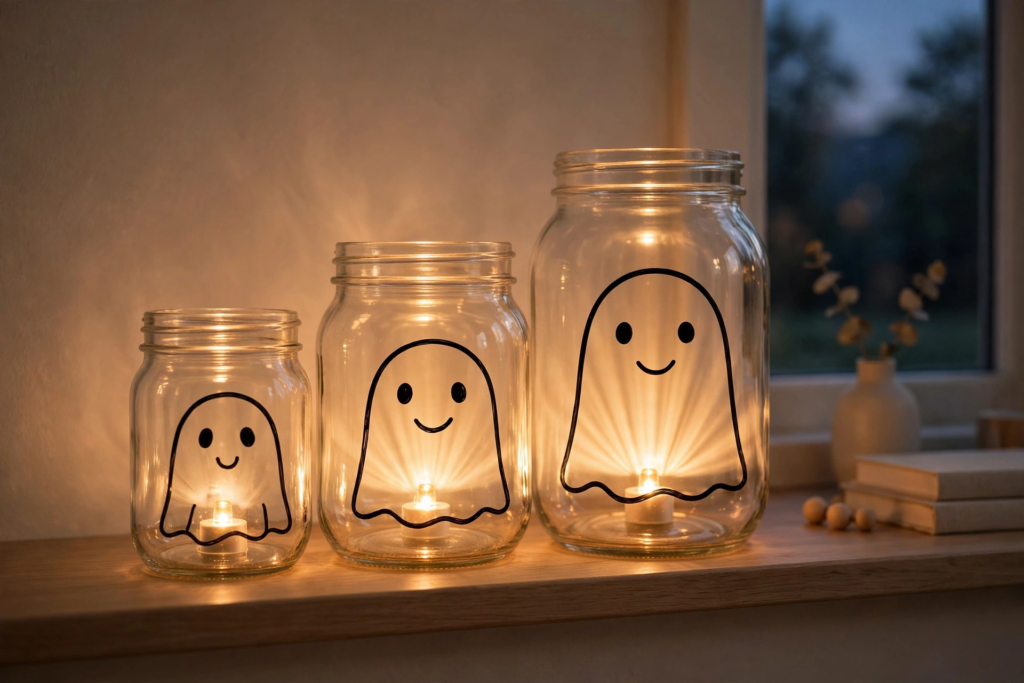
4. Turn Jars Into Ghost Lanterns for Halloween Decorations and Crafts
Clean glass jars can easily be turned into cute little ghosts for Halloween decoration.
To start, simply draw a ghost face on the side and place a small battery-powered LED light inside. Then, arrange the jars on a shelf, tabletop, mantel, or entryway surface for a soft seasonal glow.
For a little more variety, you can create jars featuring bats, pumpkins, black cats, or other spooky Halloween shapes. Alternatively, keep all the designs as simple ghost faces for a more cohesive display.
For the best visual impact, group three jars in different sizes together rather than placing lots of individual jars in separate spots. This way, the display feels more intentional and creates a small Halloween focal point without making the space look cluttered.
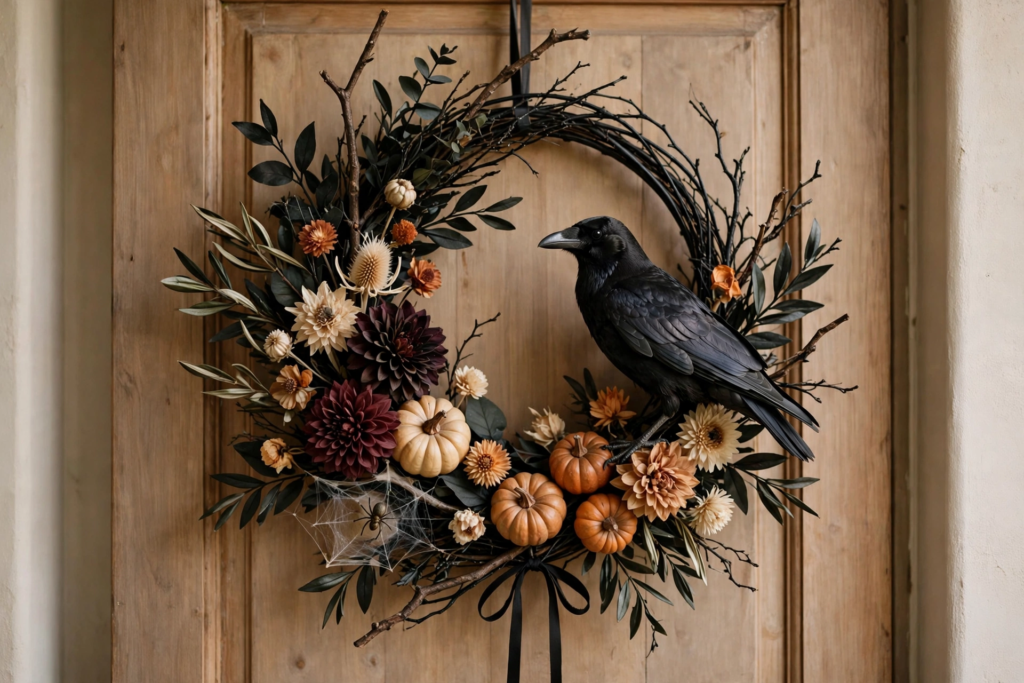
5. Make a Halloween Wreath for Halloween Decorations and Crafts
A Halloween wreath does not have to be covered in plastic spiders.
a sophisticated version, start with a simple wreath base and add:
For:
- dark faux foliage
- black ribbon
- dried-looking branches
- deep-colored flowers
- small pumpkins
- a single black crow or bat
a vintage style, add muted orange and cream details.
a minimalist look, use almost entirely black with one small seasonal accent.
Halloween Decorations for the Entryway and Porch
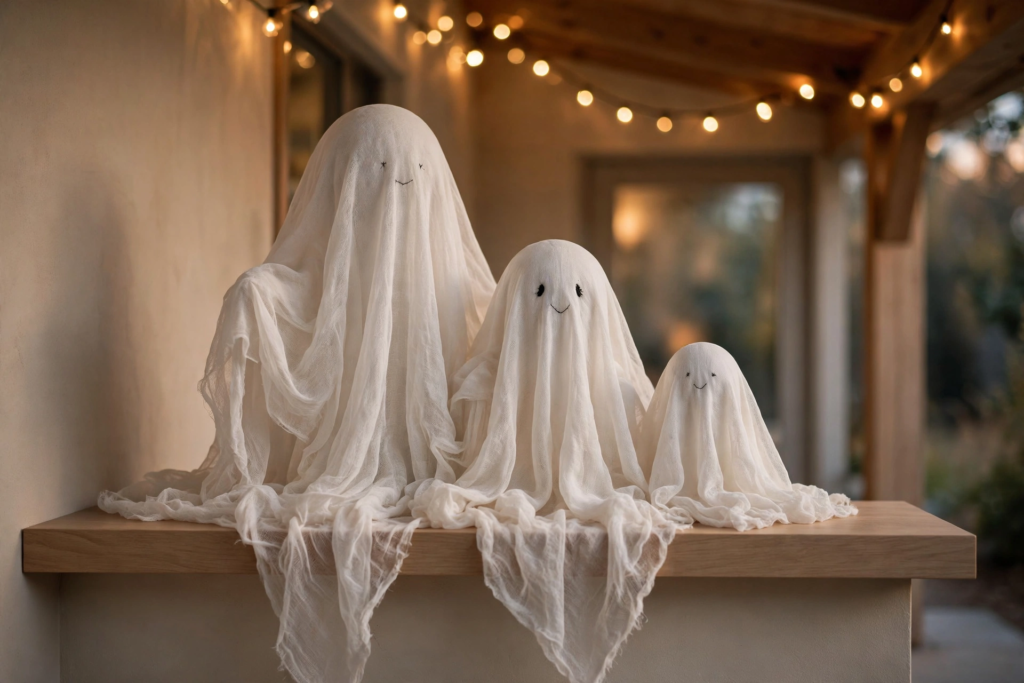
6.Make Cheesecloth Ghosts for Halloween Decorations and Crafts
Cheesecloth ghosts create an instant Halloween feel with very little effort.
To begin, simply drape the fabric over a few lightweight objects, allow it to hang naturally, and add a simple face. For more visual interest, make three ghosts in different sizes and arrange them together.
If you’re decorating a covered porch, hang the ghosts around the perimeter to create a playful entrance. Meanwhile, smaller versions can be displayed indoors on a mantel, console table, shelf, or entryway.
For an extra spooky effect, place them near warm LED lights so their loose fabric creates soft shadows after dark.
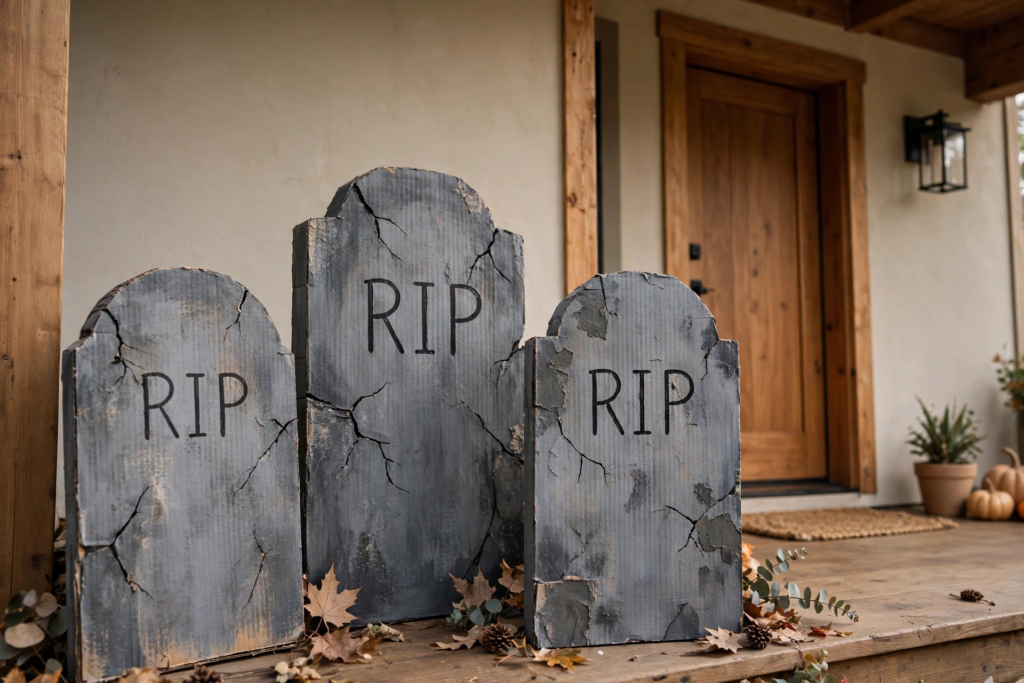
7. Build Cardboard Tombstones for Halloween Decorations and Crafts
Cardboard can easily be turned into makeshift tombstones for a spooky Halloween yard display.
To begin, cut the cardboard into simple tombstone shapes, then paint them gray, charcoal, or another stone-inspired color. Next, add simple lettering, cracks, or other details to give them an aged appearance.
However, keep in mind that cardboard is highly susceptible to moisture and changing weather conditions. Therefore, it is best to use cardboard tombstones in a sheltered area or for a short-term Halloween display rather than leaving them outdoors for an extended period.
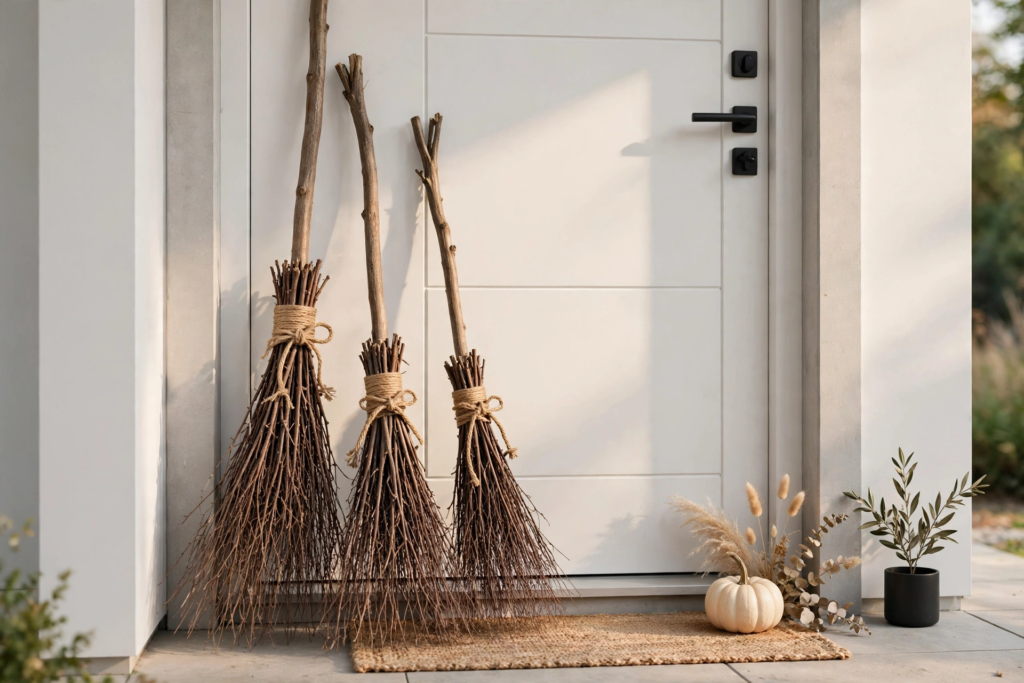
8.Display a Collection of Witch Brooms for Halloween Decorations and Crafts
A few simple twig or branch brooms can easily be turned into Halloween decorations instead of costumes.
To start, tie the twigs or branches together and lean them against the front door, prop one beside the fireplace, or arrange smaller ones in a large container.
In addition, you can group several brooms at different heights to create a more interesting display. This works especially well with a witchy, rustic, or slightly spooky Halloween theme.
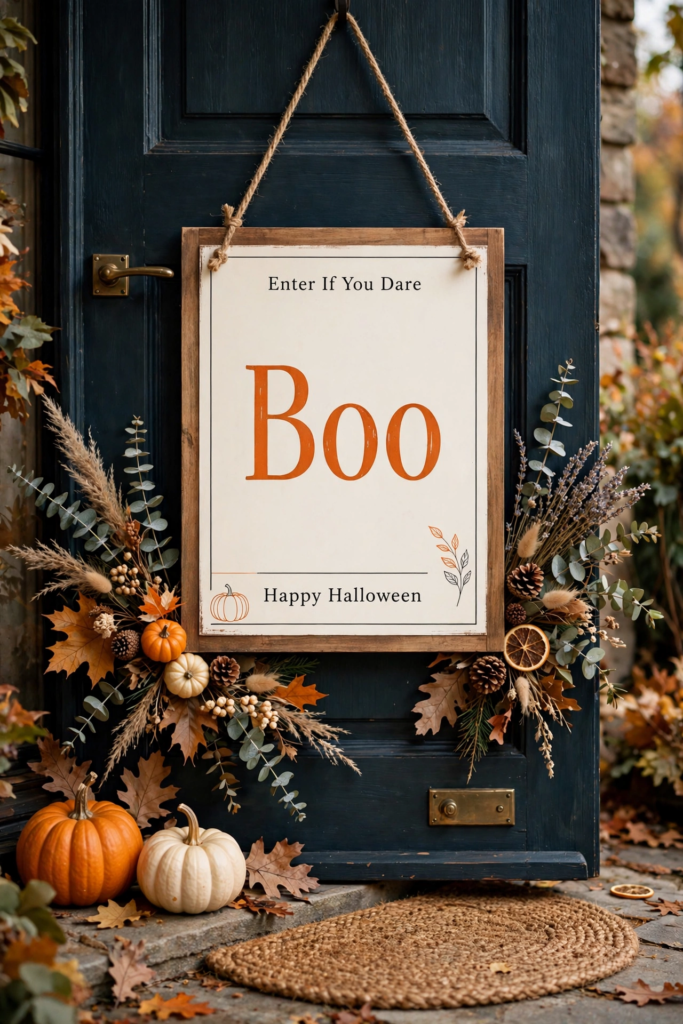
9. Create a Halloween Door Sign
Use a piece of wood, cardboard, or a canvas board to create a seasonal sign.
You could use simple wording such as:
- Boo
- Enter If You Dare
- Happy Halloween
- Beware
- Trick or Treat
For a more sophisticated home, keep the typography simple and use black, cream, and one accent color.
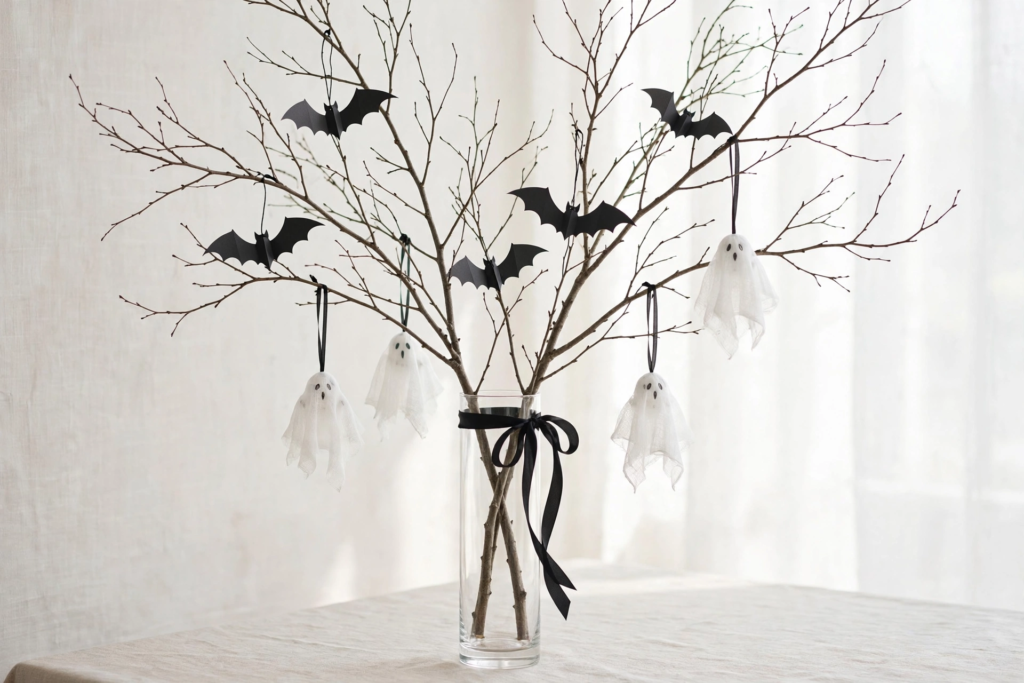
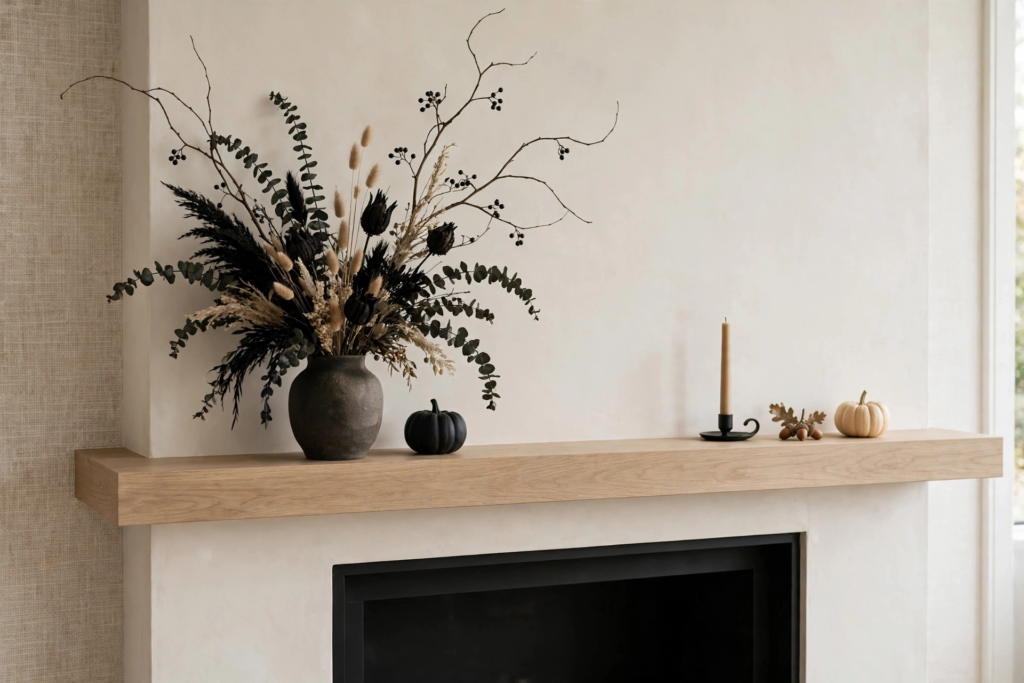
10. Make a Spooky Branch Arrangement
Use fallen branches gathered from suitable places as a natural base for your Halloween display.
To begin, place the branches in a tall vase and decorate them with lightweight paper bats, small ghosts, faux cobwebs, or black ribbon. Then, arrange the decorations loosely so the branches still remain visible.
As a result, this simple display works especially well if you’re going for a gothic, rustic, or nature-inspired Halloween theme.
Moreover, recent 2026 decorating coverage highlights branches, dramatic flowers, natural elements, and sculptural pumpkins as part of a more sophisticated approach to Halloween decorating.
Halloween Crafts for Walls, Windows and Mantels
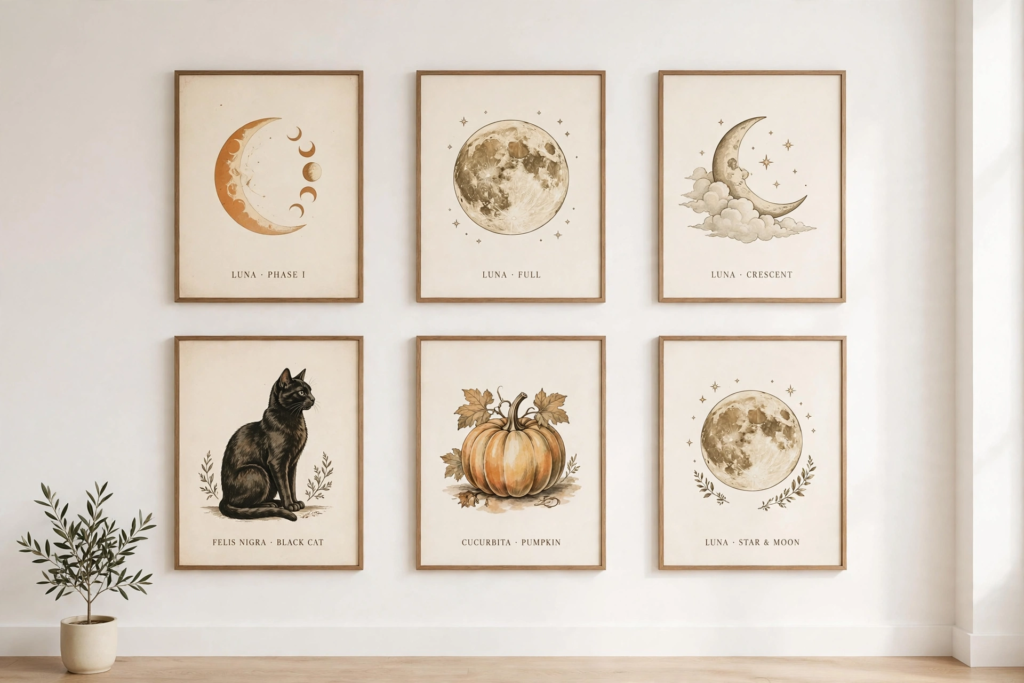
11. Create Vintage-Inspired Halloween Art
Vintage Halloween images can instantly set the mood and give a room a nostalgic seasonal feel.
To begin, look for Halloween-themed drawings, vintage-style fonts, moons, black cats, pumpkins, or botanical prints and place them in simple frames.
For the color scheme, choose muted oranges, creams, browns, blacks, and other desaturated tones rather than modern, overly bright colors. This way, the artwork feels more timeless and blends naturally with your existing decor.
In addition, the restrained colors and simple frames can help the Halloween pieces blend seamlessly into a gallery wall instead of making the display feel overly themed.
12. Make Window Silhouettes
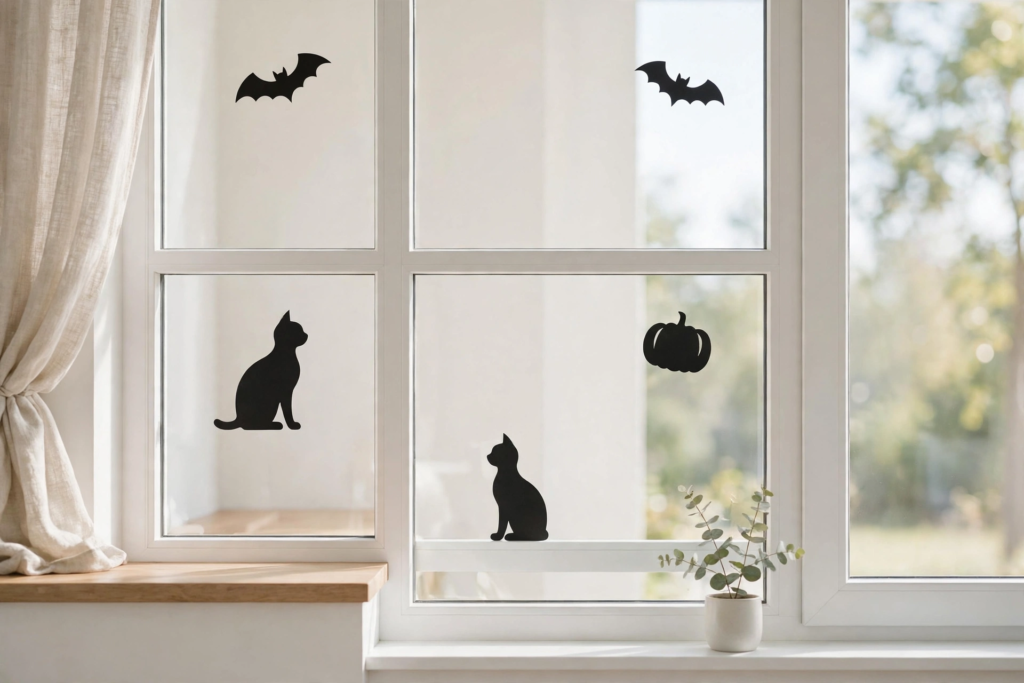
Black paper silhouettes are ideal for windows because they look especially dramatic when viewed from outside after dark.
Try silhouettes of:
- bats
- cats
- witches
- crooked trees
- ravens
- pumpkins
- haunted houses
Keep the shapes relatively simple so they remain recognizable from a distance.
13. Hang Mini Ghosts
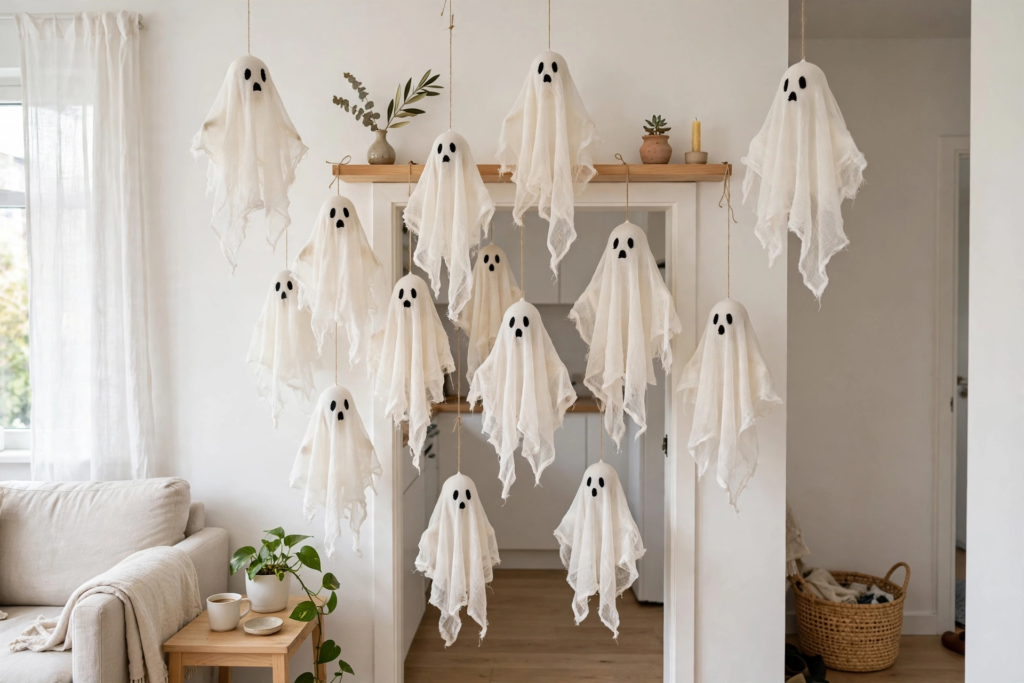
Make lightweight ghosts from fabric or paper and suspend them at different heights.
To begin, cluster several small ghosts around a staircase, doorway, mantel, or dining area. Then, vary their heights and spacing to create a playful floating effect without making the display feel too uniform.
For small apartments, this approach works especially well because it adds plenty of Halloween impact without taking up valuable floor space. As a result, you can create a festive display while keeping the room open and functional.
14. Make a Halloween Banner
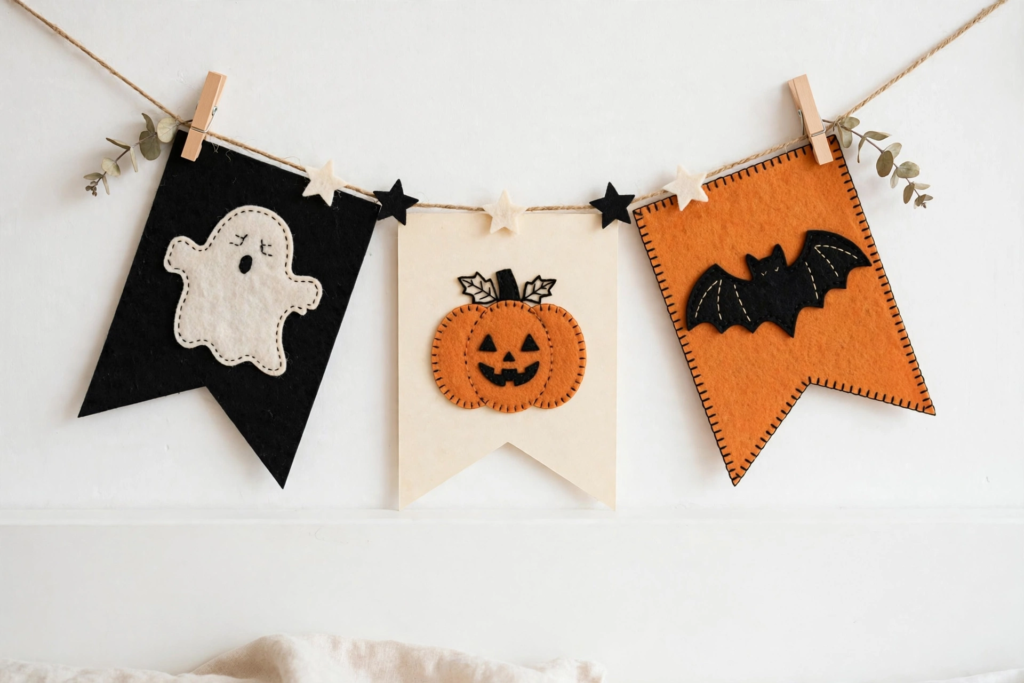
Create a simple banner from cardstock, fabric scraps, or felt.
Instead of covering it with multiple characters, choose one visual theme.
For example:
Black + cream + vintage orange
or
Black + burgundy + antique gold
or
White + black + soft purple
Repeating the same palette across several decorations makes a homemade display feel much more intentional.
15. Make Paper Halloween Lanterns
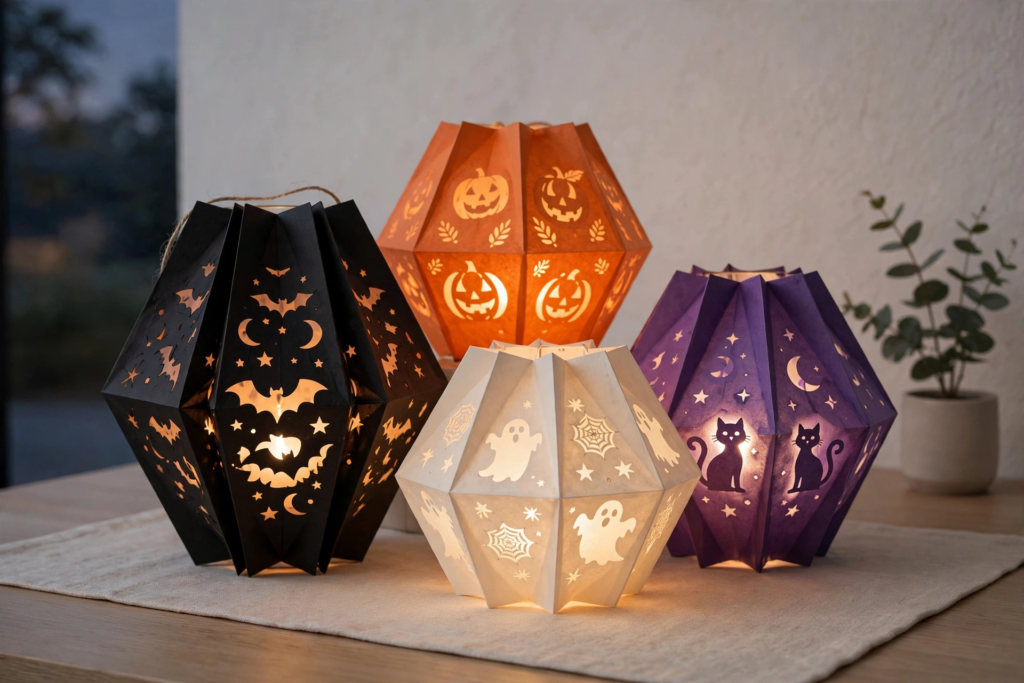
Fold black, orange, cream, or purple paper into lantern shapes, then cut small Halloween motifs into the surface to create decorative patterns.
Next, place battery-operated lights inside suitable lanterns for a soft evening display. For safety, avoid combining paper with candles or open flames. Instead, if lighting is part of the project, choose battery-powered LED illumination as the practical option.
Halloween Table and Shelf Decorations
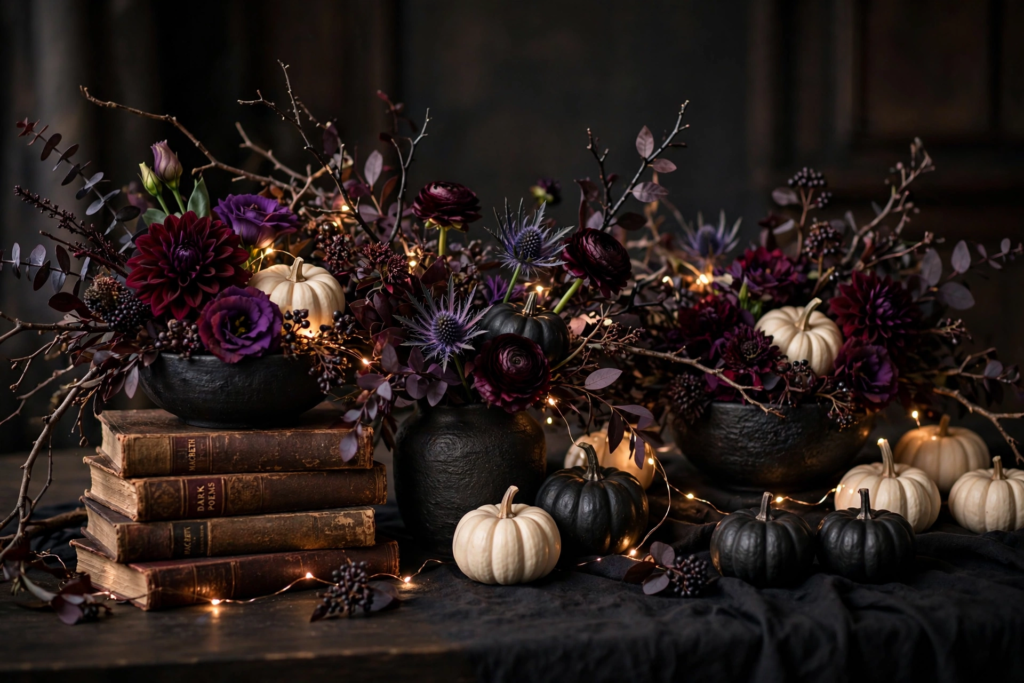
16. Create a Moody Halloween Centerpiece
A Halloween centerpiece can be dramatic without being frightening.
Try combining:
- dark flowers
- branches
- small pumpkins
- black vessels
- vintage-style books
- warm LED lights
Keep the arrangement low enough that it does not block sightlines across the table.
For a more sophisticated, 2026-inspired look, combine deep purple, burgundy, black, and cream instead of relying entirely on bright orange. In addition, rich purple and dramatic tablescapes have been highlighted in current design coverage as notable Halloween decorating directions this year.
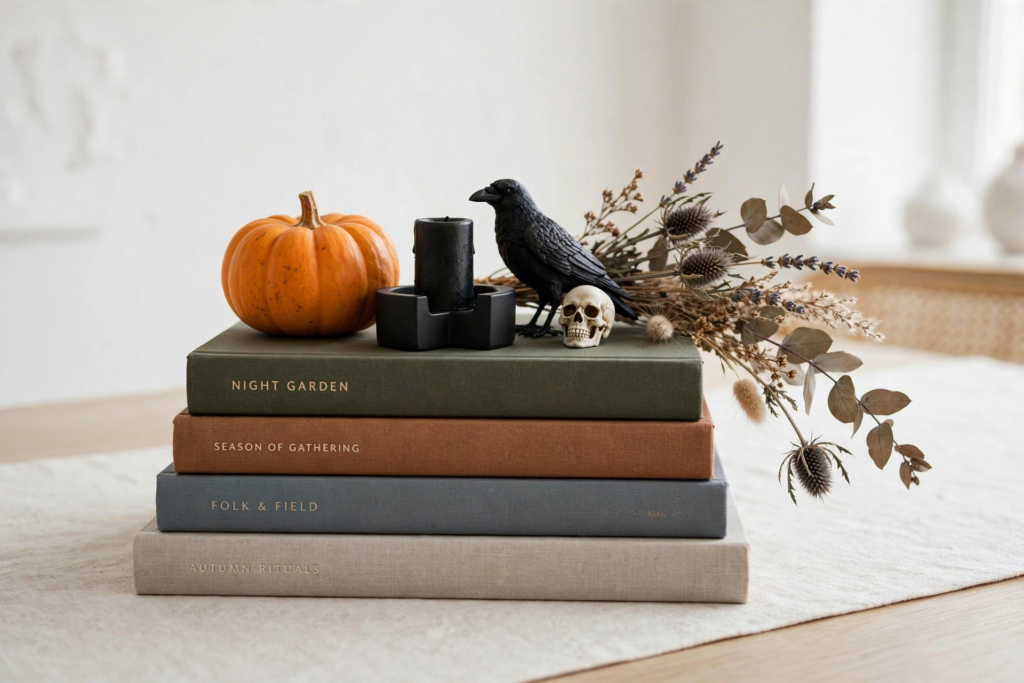
17. Style a Halloween Book Stack
Stack a few books horizontally and place one seasonal object on top.
Good choices include:
- a small pumpkin
- black candleholder
- faux crow
- miniature skull
- dried-looking floral stem
The books provide height while the single seasonal object gives the arrangement its Halloween identity.
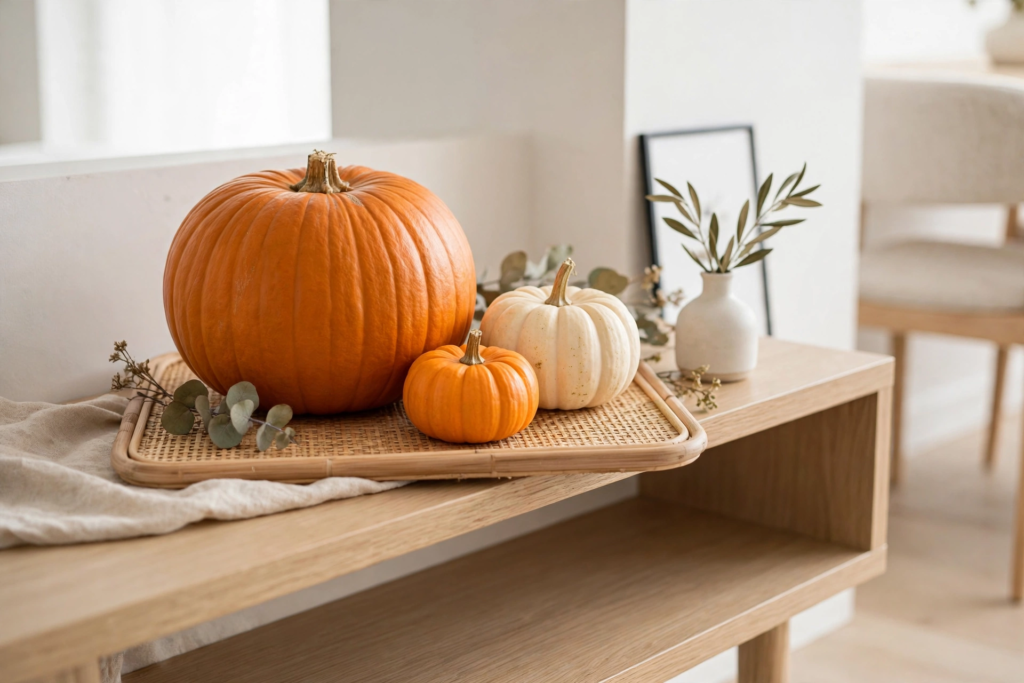
18. Make a Mini Pumpkin Display
Try using pumpkins in different sizes to create a small, balanced vignette.
For example, use one large pumpkin, two smaller ones, and a simple accent piece to complete the arrangement. Then, place the grouping on a tray, console, dining table, or shelf.
This approach works especially well if you want to bring seasonal touches into your home without having Halloween decorations scattered throughout every room. As a result, you can create a festive look while keeping the overall space neat and intentional.
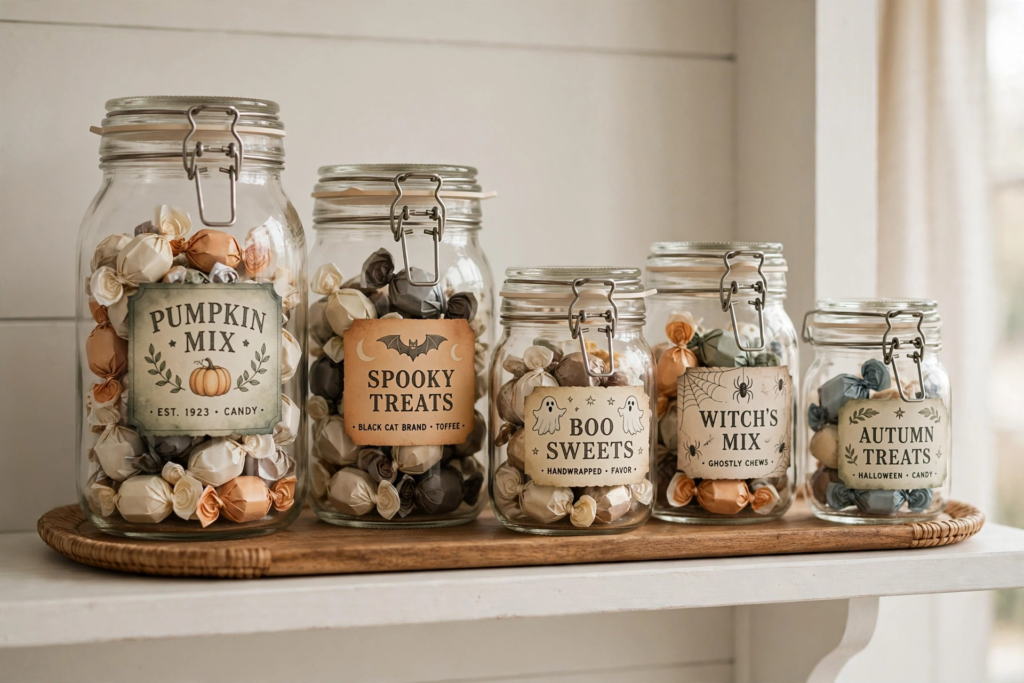
19. Create Halloween Candy Jars
Decorate clear jars with removable Halloween labels or paint simple seasonal motifs on them.
Next, use the jars to hold wrapped candy, party favors, or even non-edible decorations. For a vintage-inspired look, choose old-fashioned typefaces and muted colors to give the display a nostalgic feel.
Alternatively, group several jars in different sizes on a tray or shelf to create a cohesive Halloween arrangement without adding too much visual clutter.
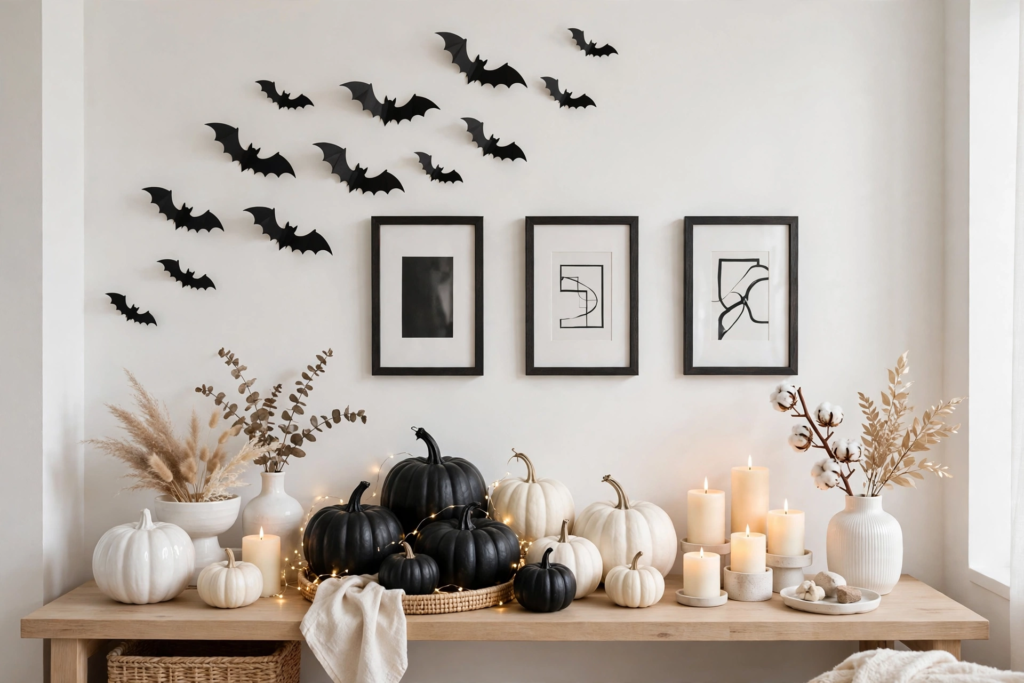
20. Build a Black-and-White Halloween Display
If orange does not fit your interior, you do not have to abandon Halloween decorating.
Combine:
- black pumpkins
- white pumpkins
- black bats
- cream candles or LED lights
- dark frames
- white ceramic pieces
The result can feel seasonal while still working with a neutral home.
Recycled and Upcycled Halloween Crafts
One of the strongest opportunities in DIY Halloween decorating is using materials you already have at home.
In particular, current community discussions highlight cardboard, trash bags, old clothes, branches, recycled materials, and leftover craft supplies as practical options for creating Halloween decorations without buying an entirely new collection. As a result, repurposing what you already own can make seasonal decorating more affordable while also giving ordinary household items a creative second use.
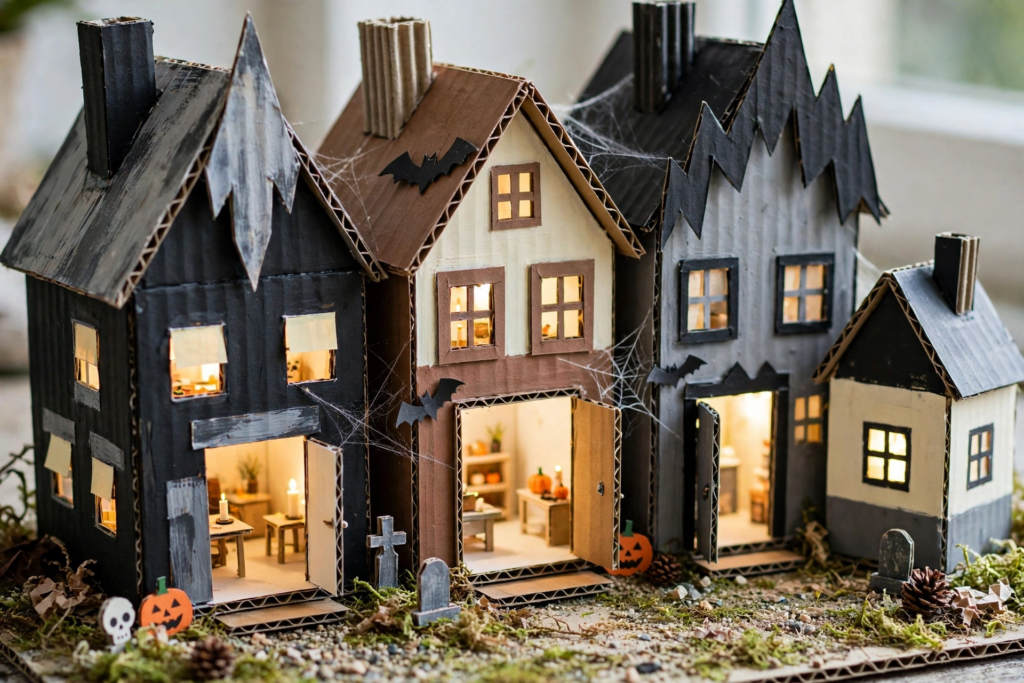
21. Make a Cardboard Haunted House
Save small shipping boxes and turn them into miniature haunted houses.
Cut out:
- windows
- doors
- roof shapes
Paint the exterior black, gray, brown, or cream.
Add tiny paper windows and place several houses together to create a miniature Halloween village.
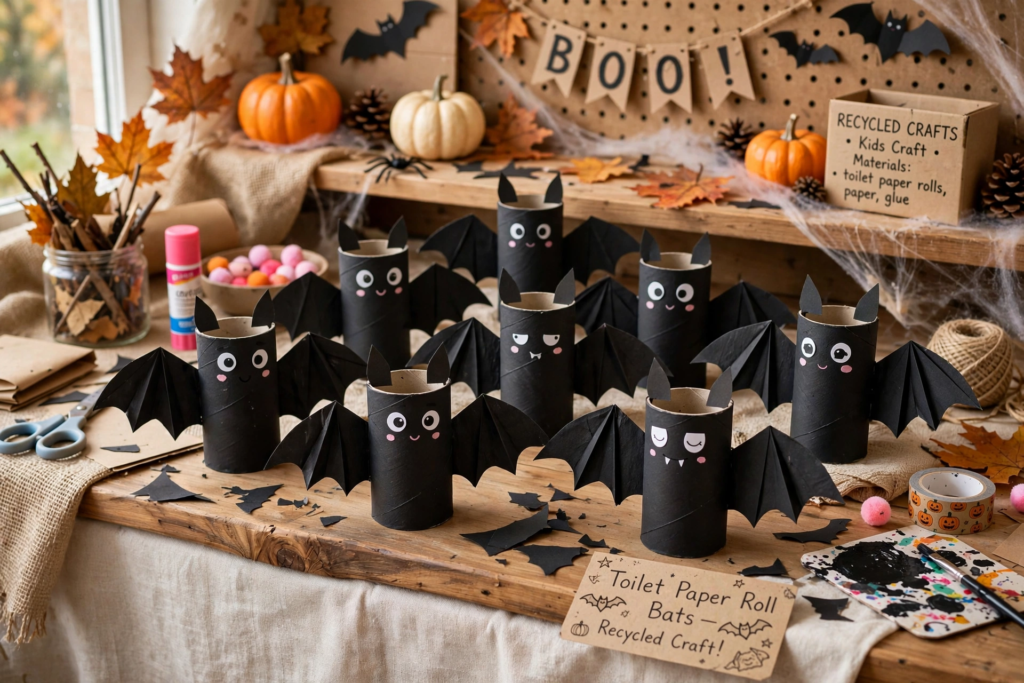
22. Turn Toilet-Paper Rolls Into Bats
Save cardboard tubes and transform them into small Halloween characters.
To begin, paint the tubes black, then attach simple paper wings and add small eyes to create cute bat characters. Next, let the pieces dry completely before displaying them on a shelf, table, or Halloween craft area.
In particular, this project is well suited to children because it uses inexpensive recycled materials and results in decorations they can proudly display afterward.
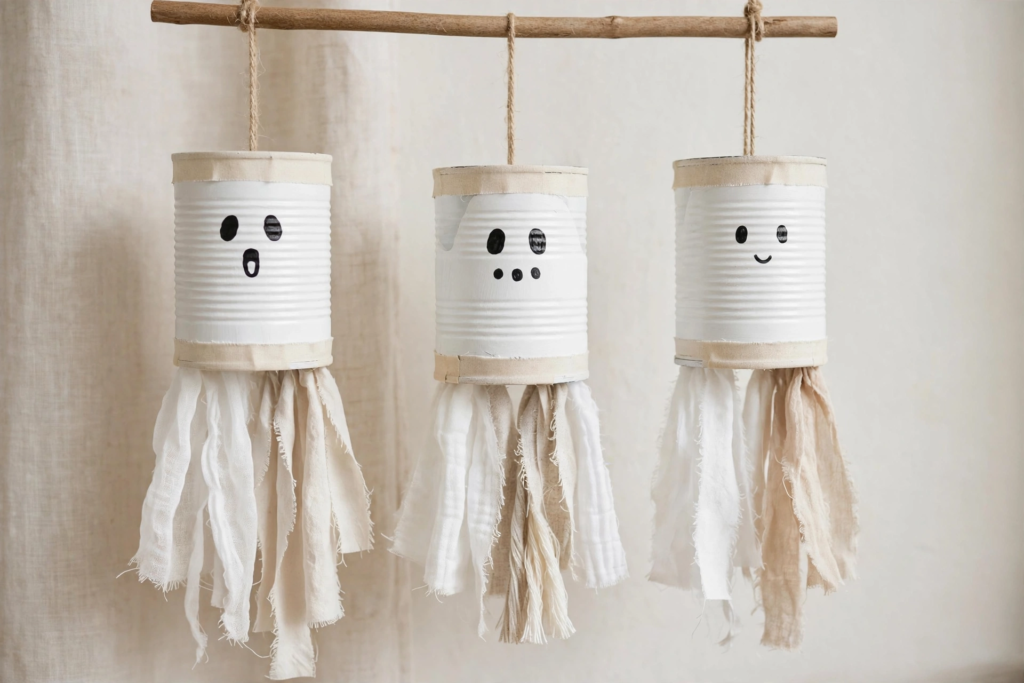
23. Make Tin-Can Ghosts
Clean, empty cans can easily be transformed into hanging Halloween decorations.
To begin, paint the outside of each can white, add a simple ghost face, and attach fabric strips or ribbons underneath. Then, allow the paint to dry completely before hanging the finished decorations.
For safety, make sure any cut metal edges are securely covered or otherwise safely handled so the finished craft does not leave a sharp edge. As a result, you can create a fun recycled Halloween decoration while keeping the project safer to handle.
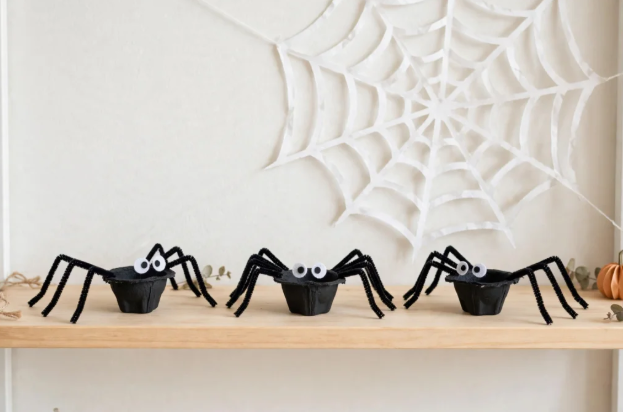
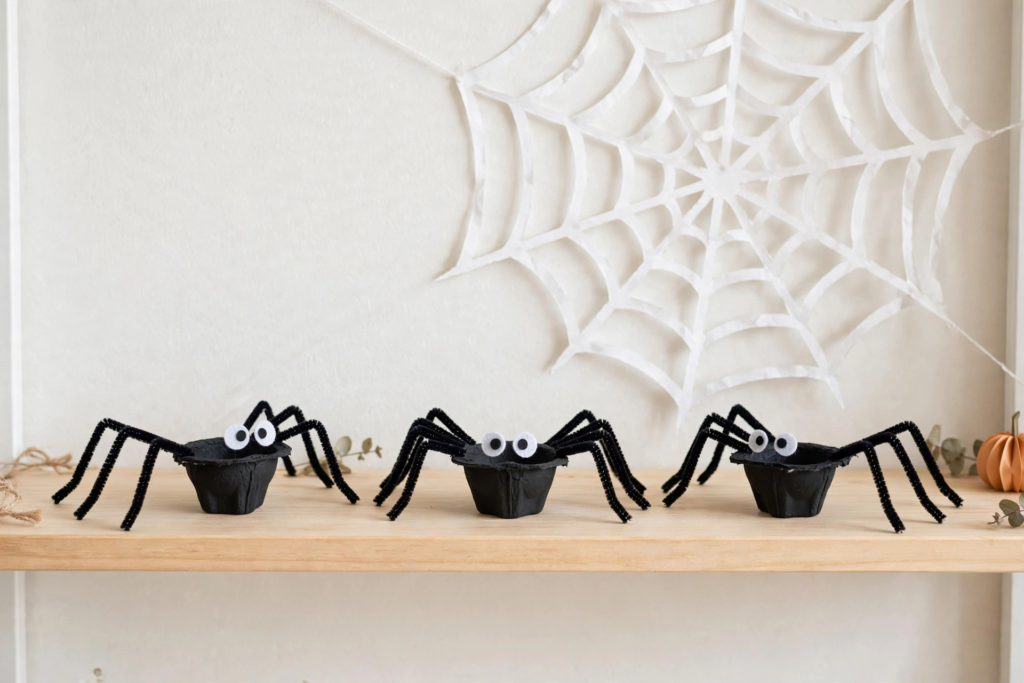
24. Make Egg-Carton Spiders
Cut individual cups from a clean egg carton and paint them black.
Next, add legs using suitable craft materials and attach simple eyes to give each spider a playful look. Once they’re finished, arrange several spiders along a shelf, inside a Halloween display, or around a paper web.
For added visual interest, vary their positions and sizes where possible so the display feels more natural and less repetitive.
25. Create a Recycled Halloween Garland
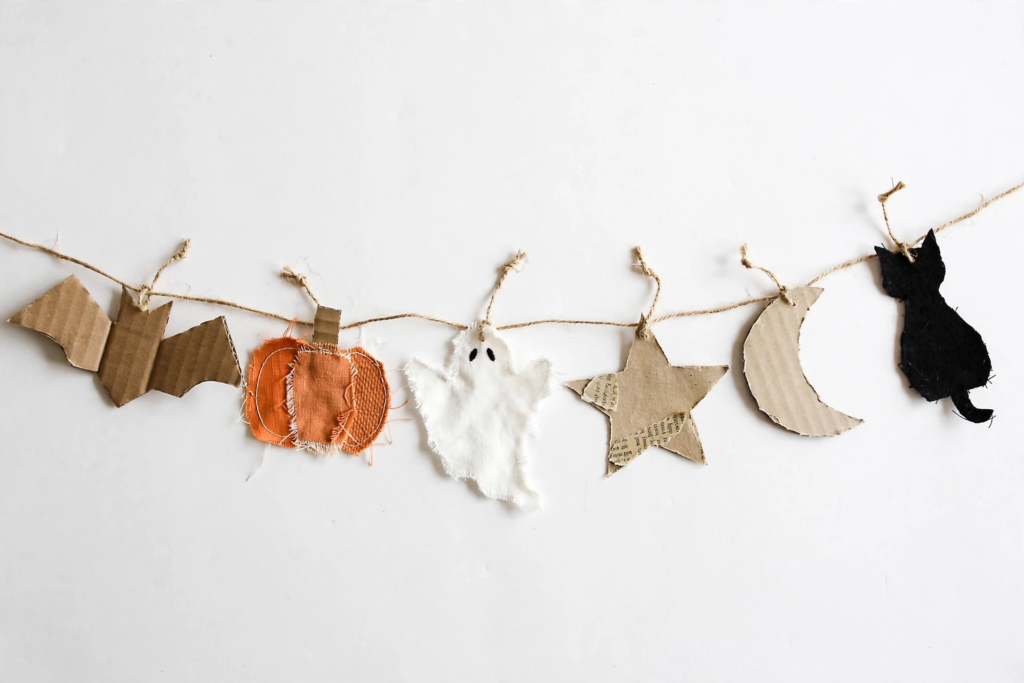
Combine leftover paper, cardboard, fabric scraps, ribbon, and twine into one mixed-material garland.
Cut different shapes such as:
- bats
- pumpkins
- ghosts
- stars
- moons
- black cats
The mismatched materials can actually make the finished garland more charming because it looks collected rather than mass-produced.
Make Your DIY Halloween Decor Match Your Style
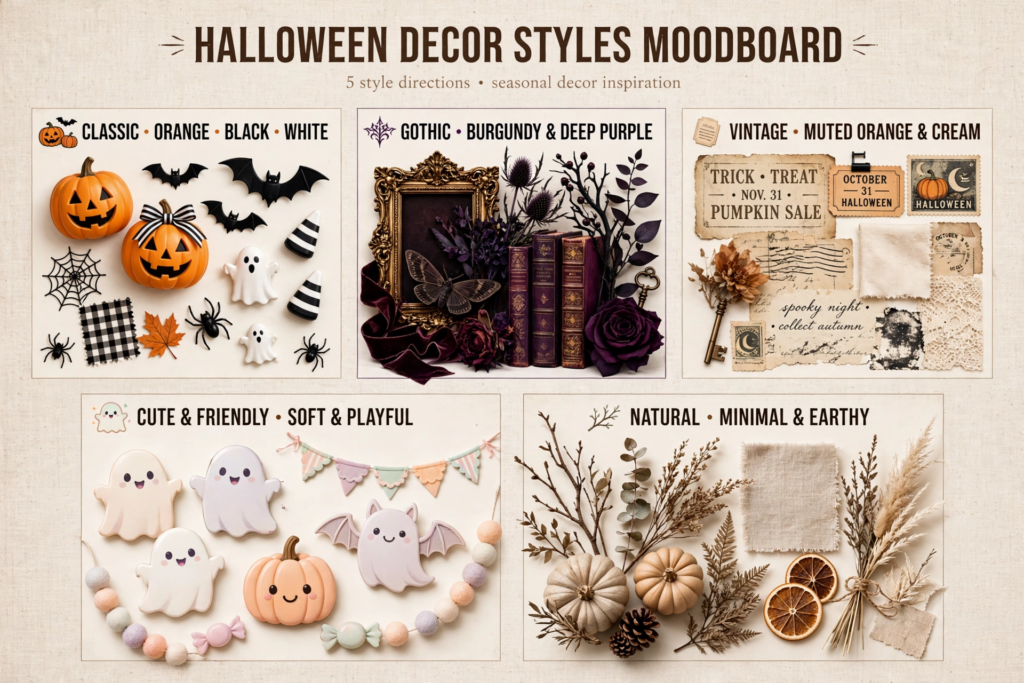
The easiest way to make homemade Halloween decor look intentional is to choose a style before you start crafting.
Classic Halloween
Use:
- orange
- black
- white
- pumpkins
- bats
- ghosts
- spiders
This is the easiest palette for a traditional Halloween atmosphere.
Gothic Halloween
Try:
- black
- burgundy
- deep purple
- antique-looking frames
- branches
- dark florals
- vintage books
Current 2026 trend reporting identifies gothic/Victorian Halloween as a prominent direction.
Vintage Halloween
Use:
- muted orange
- cream
- faded black
- old-fashioned typography
- paper ephemera
- thrifted frames
- nostalgic characters
This is where the vintage craft approach from the competitor article is especially useful.
Cute Halloween
Choose:
- friendly ghosts
- small pumpkins
- smiling bats
- soft colors
- playful garlands
Keep the shapes rounded and the expressions simple.
Natural Halloween
Try:
- branches
- pumpkins
- dried-looking foliage
- pinecones
- natural fibers
- muted colors
This can transition easily into general fall decorating.
For safe decorating, especially when using lights or materials around children, review the seasonal safety guidance from the U.S. Consumer Product Safety Commission before starting your Halloween projects.
How to Keep Halloween Decor From Looking Cluttered
More decorations do not automatically create a better display.
Instead, choose one focal point in each area.
For example:
Mantel: one large arrangement + several small accents
Entryway: wreath + small table vignette
Dining table: centerpiece + restrained place-setting details
Wall: one bat swarm or framed art arrangement
Porch: door focal point + two or three supporting decorations
Repeat colors and materials throughout the room so the pieces feel connected.
A useful rule is to let some surfaces remain visually quiet. Empty space gives the decorations around it more impact.
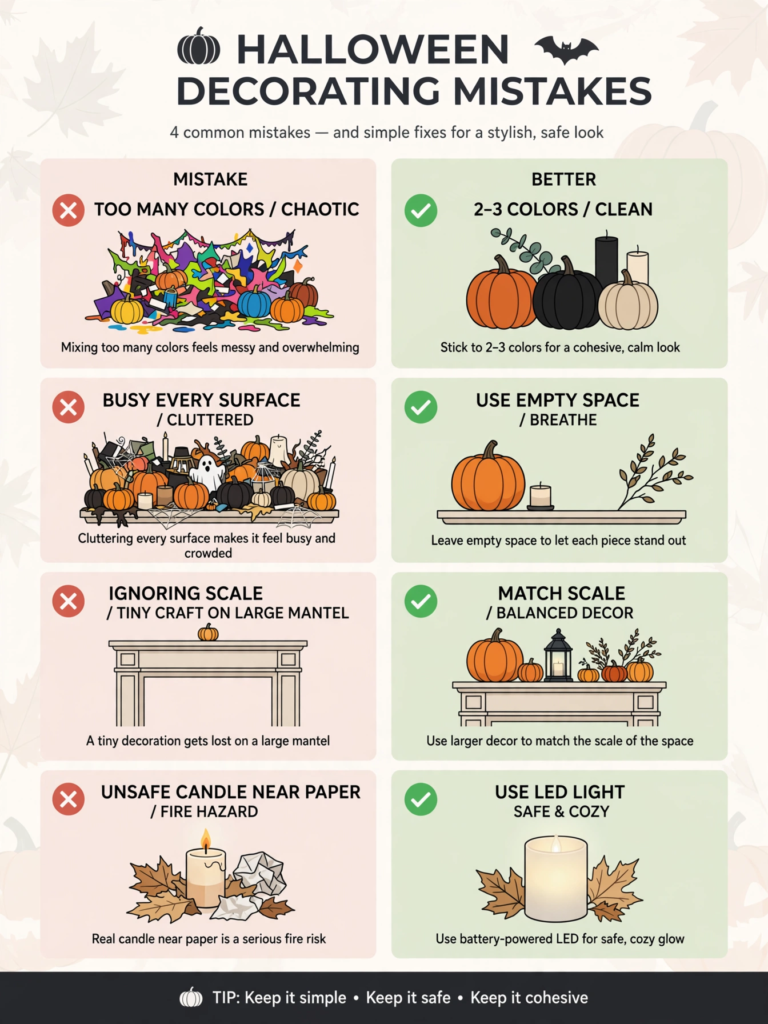
Halloween Decorating Mistakes to Avoid
Using too many unrelated colors
Orange, purple, green, red, black, white, and metallics can quickly become visually chaotic.
Choose two or three main colors instead.
Making every surface equally busy
Give the eye somewhere to rest.
Ignoring scale
A tiny craft can disappear on a large mantel, while an oversized decoration can overwhelm a small apartment.
Forgetting where the decoration will live
A delicate paper craft belongs indoors or in a protected location. Outdoor decorations need materials and attachment methods appropriate to their environment.
Relying only on purchased props
A few handmade elements can make store-bought decorations feel more personal.
Using unsafe lighting
Keep paper, fabric, and other flammable craft materials away from open flames. Battery-operated LED lighting is a practical alternative for many DIY displays.
How to Make Halloween Decor Look More Expensive
You do not need expensive materials to create a polished display.
Focus on composition rather than quantity.
Use:
- A limited color palette
- Different heights
- Repeated materials
- One strong focal point
- A mixture of large and small objects
- A little negative space
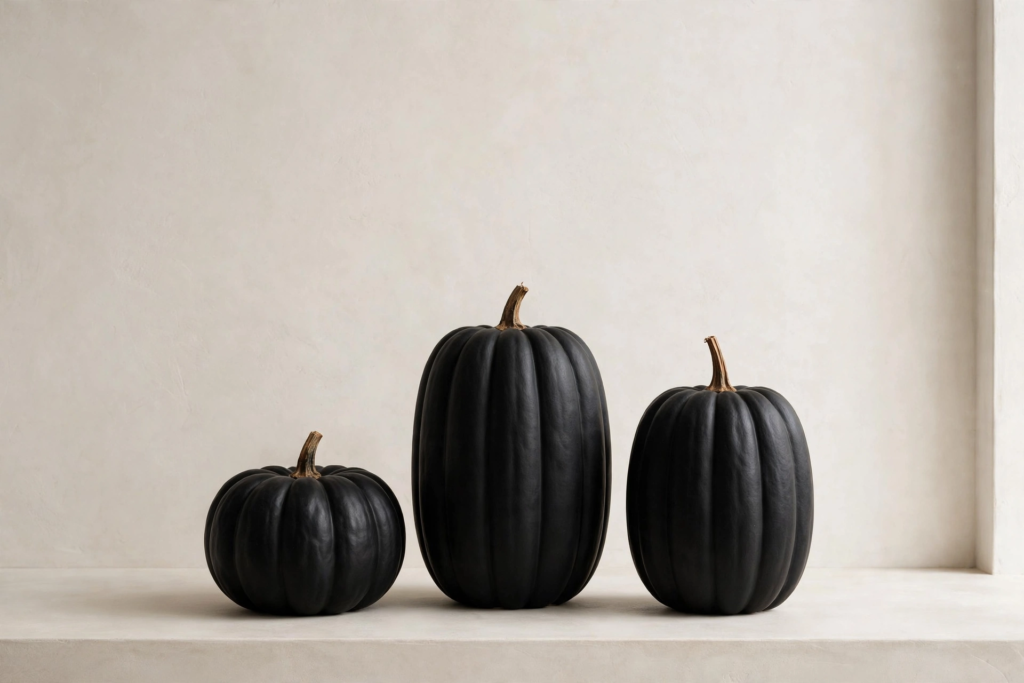
For example, three black pumpkins arranged at different heights can look more intentional than ten unrelated Halloween figures scattered across a table.
Likewise, the same principle works with homemade crafts. Instead of covering a space with random decorations, try grouping related pieces together to create a clear focal point.
For instance, a carefully arranged group of paper bats can have far more visual impact than a wall covered randomly with decorations. As a result, using fewer pieces with thoughtful placement can make your Halloween display feel more polished and cohesive.
What Are Some Creative Halloween Decoration Ideas?
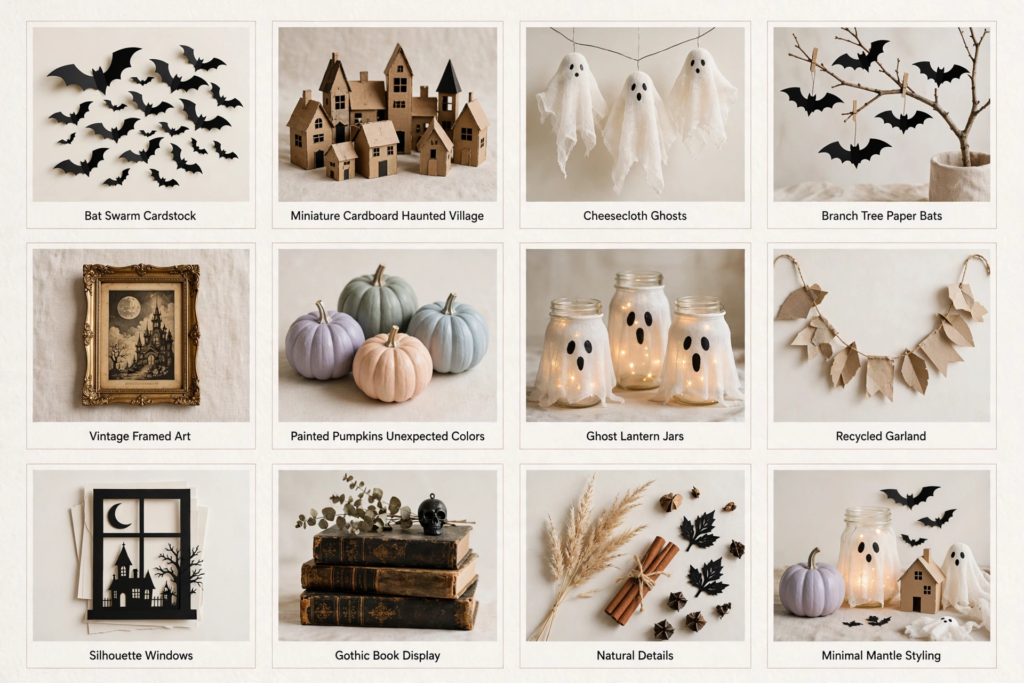
Some of the most creative ideas combine ordinary household materials with recognizable Halloween shapes.
Try:
- a bat swarm made from cardstock
- a miniature cardboard haunted village
- cheesecloth ghosts
- a branch tree decorated with paper bats
- vintage-inspired framed Halloween art
- painted pumpkins in unexpected colors
- ghost lantern jars
- recycled-material garlands
- silhouette-covered windows
- a gothic Halloween book display
The goal is not to make every project complicated. It is to give familiar Halloween symbols an unexpected presentation.
Final Thoughts
The best Halloween decorations and crafts are the ones that fit naturally into your home rather than making it feel like a Halloween store.
To begin, focus on one area—a front door, mantel, shelf, table, or window—and choose a small collection of crafts that share a similar color palette and decorating style.
If you’re on a budget, start with paper, cardboard, fabric scraps, jars, branches, and other materials you already have. On the other hand, if you prefer a more polished look, combine handmade pieces with a few carefully selected seasonal accents.
Most importantly, you don’t have to commit to just one Halloween style. Whether you love vintage Halloween, gothic decor, cute ghosts, or traditional orange-and-black decorating, different looks can work together. As long as you keep a cohesive color palette, even very different handmade pieces can feel like part of the same display.
FAQ SECTION
What are some Halloween crafts?
Easy Halloween crafts include paper bats, ghost garlands, painted pumpkins, Halloween wreaths, ghost jars, paper lanterns, cardboard haunted houses, window silhouettes, and recycled-material spiders. In addition, many of these projects can double as finished home decorations, making them a simple way to add a festive touch without creating separate craft projects and decor.
What are typical Halloween decorations?
Typical Halloween decorations include pumpkins, jack-o’-lanterns, ghosts, bats, spiders, skeletons, witches, black cats, tombstones, cobwebs, Halloween lights, wreaths, and seasonal garlands. For example, you can combine a few of these classic elements on a porch, mantel, shelf, or table to create a festive Halloween display without decorating every part of your home.
How do you make Halloween decor?
Start by choosing the space you want to decorate and the style you want to create. Next, gather simple materials such as cardstock, cardboard, fabric, jars, pumpkins, branches, paint, and twine. Then, make several related pieces rather than lots of unrelated decorations. This way, your finished display will feel more cohesive, intentional, and visually balanced.
What are some creative Halloween decoration ideas?
For example, try creating a paper bat wall, miniature haunted village, ghost lanterns, vintage Halloween artwork, a branch arrangement with bats, painted pumpkins, or a mixed-material recycled garland. In addition, combining a few of these ideas around one focal area can create a more creative and cohesive Halloween display.
How can I decorate for Halloween on a budget?
To keep costs down, use materials you already own before purchasing new supplies. For example, cardboard boxes, paper, fabric scraps, jars, branches, and leftover craft materials can all be transformed into Halloween decorations.
In addition, repurposing these everyday materials can reduce the need to buy an entirely new collection of seasonal decor. Notably, recent DIY discussions show strong interest in this budget-friendly, reuse-focused approach.